• About
  • Advertising
  • Contact
  • Meet the Team
  • Blog
    • Bloglovin
    • Facebook
    • Instagram
    • Pinterest
    • Twitter

Eighteen25

Create A Life You Love.

  • Home
  • Printables
  • DIY + Crafts
  • Holidays
  • Recipes
    • All Recipes
    • appetizers
    • salads/side dishes
    • main dishes
    • Desserts
  • Misc.

Photography with Jeanna Hayes

Nov72012 posted by Jodie and Jen

Hey there everyone! Are you in full swing of Thanksgiving prep yet? Or are you like me and campaign for the pickle platter assignment at the big family feast?
Ok, down to business! In my last post I talked about exposure and how aperture + shudder speed + ISO work together to create it. Out of the three, aperture is the most complicated – but don’t let that scare you! Remember how I like to keep things simple? Well, here goes!
When your aperture has a small number (think 2.8 for example), the “hole” is more open than an aperture of 8. The example below isn’t perfectly to scale, but you get the idea – right?

Yes the whole number concept seems backwards with the wider opening having a smaller number, but you’ll get used to it! Not only does this affect how much light gets in, but it also controls the depth of field. Think about the pupils of your eye and how they dilate to let in more light in a dark room, or retract when you step out into the sun. Well, aperture acts much like that except that it’s not near as sophisticated as the human eye (dang!), and to work at its best, WE have to be the one deciding how much light to let in.

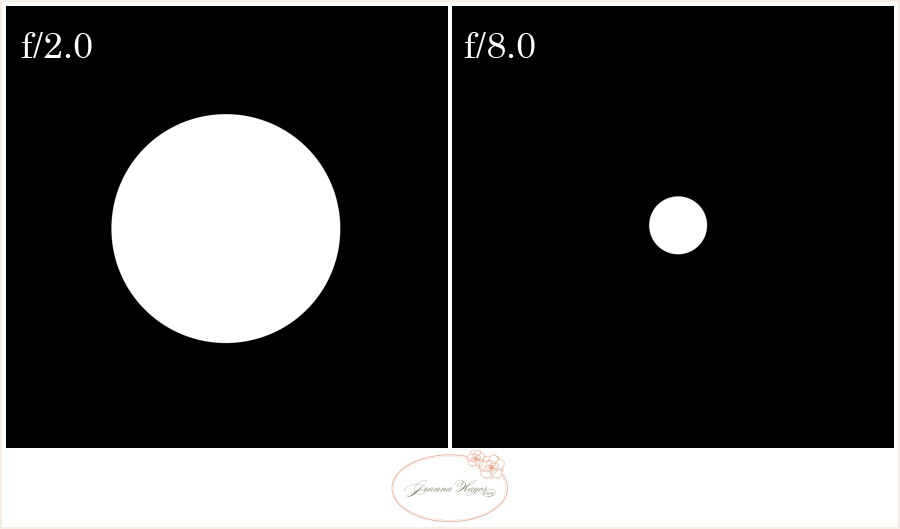
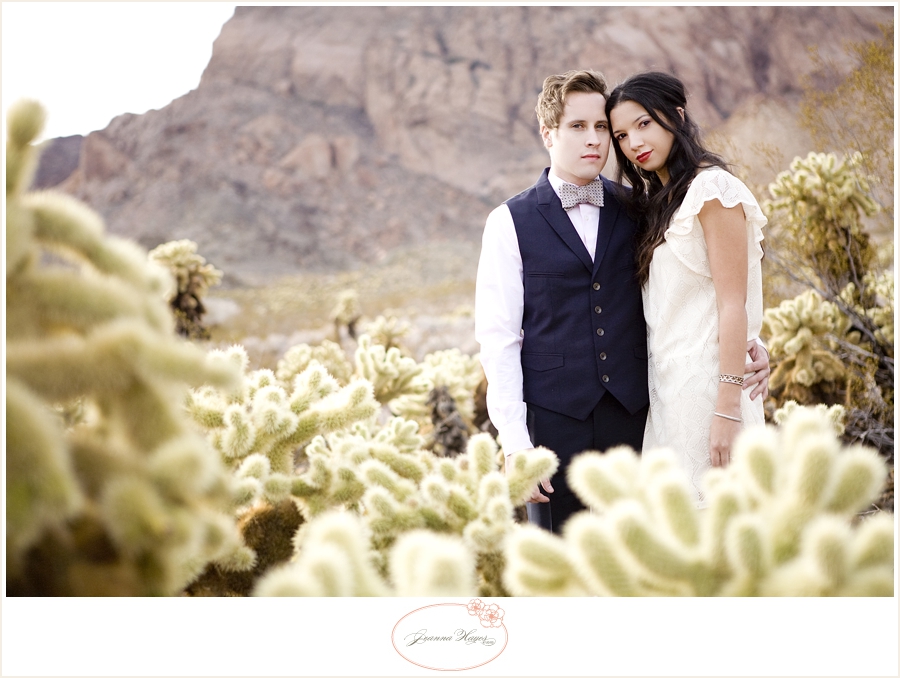
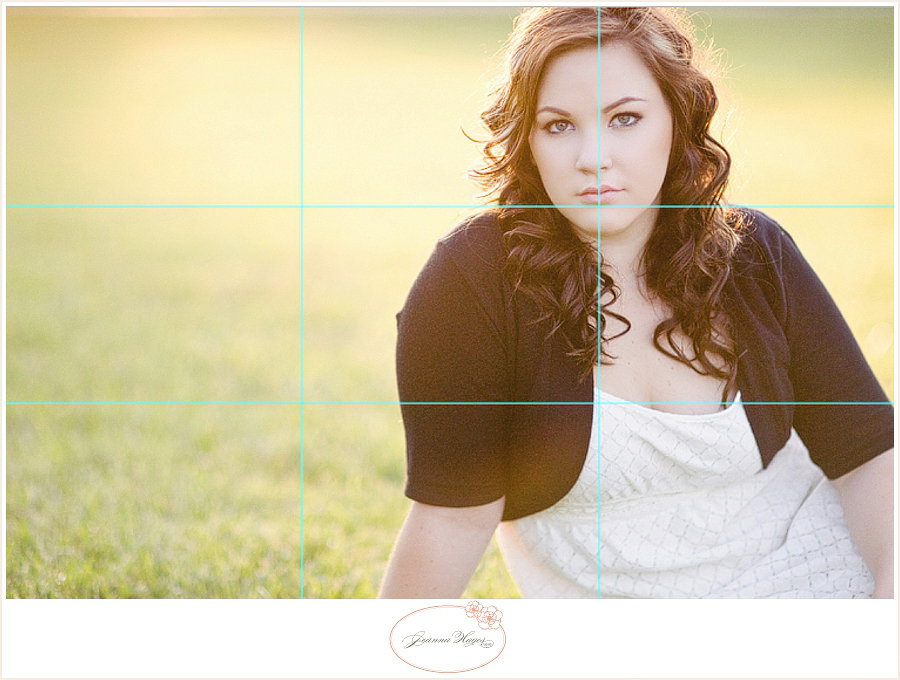
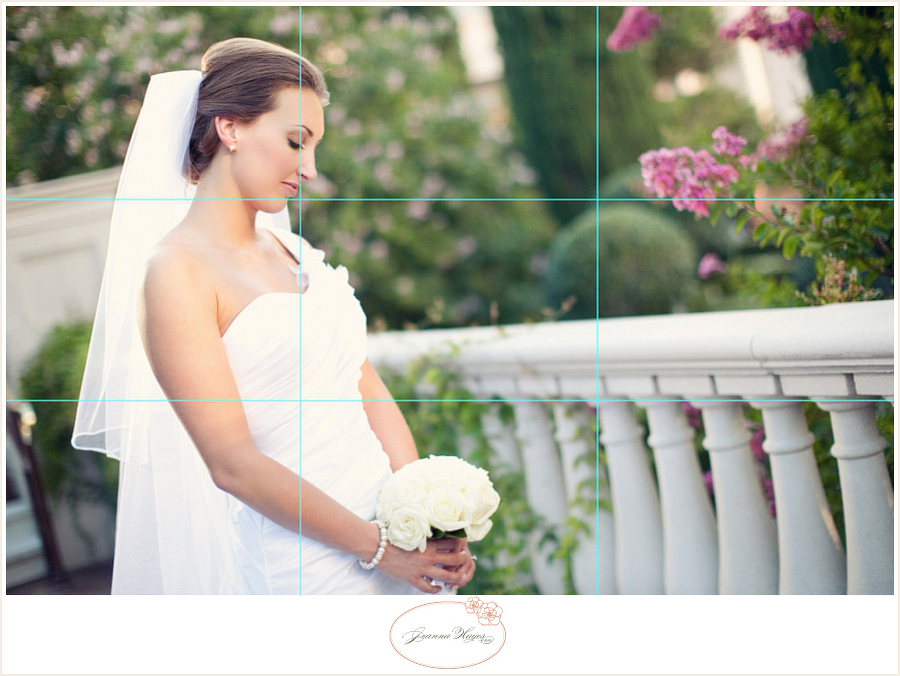
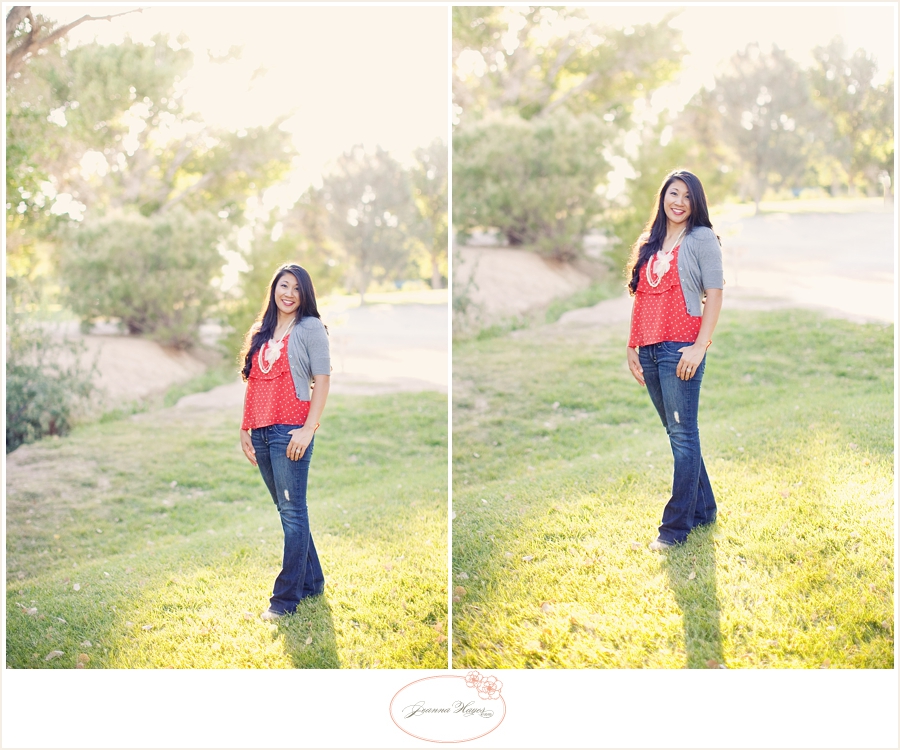
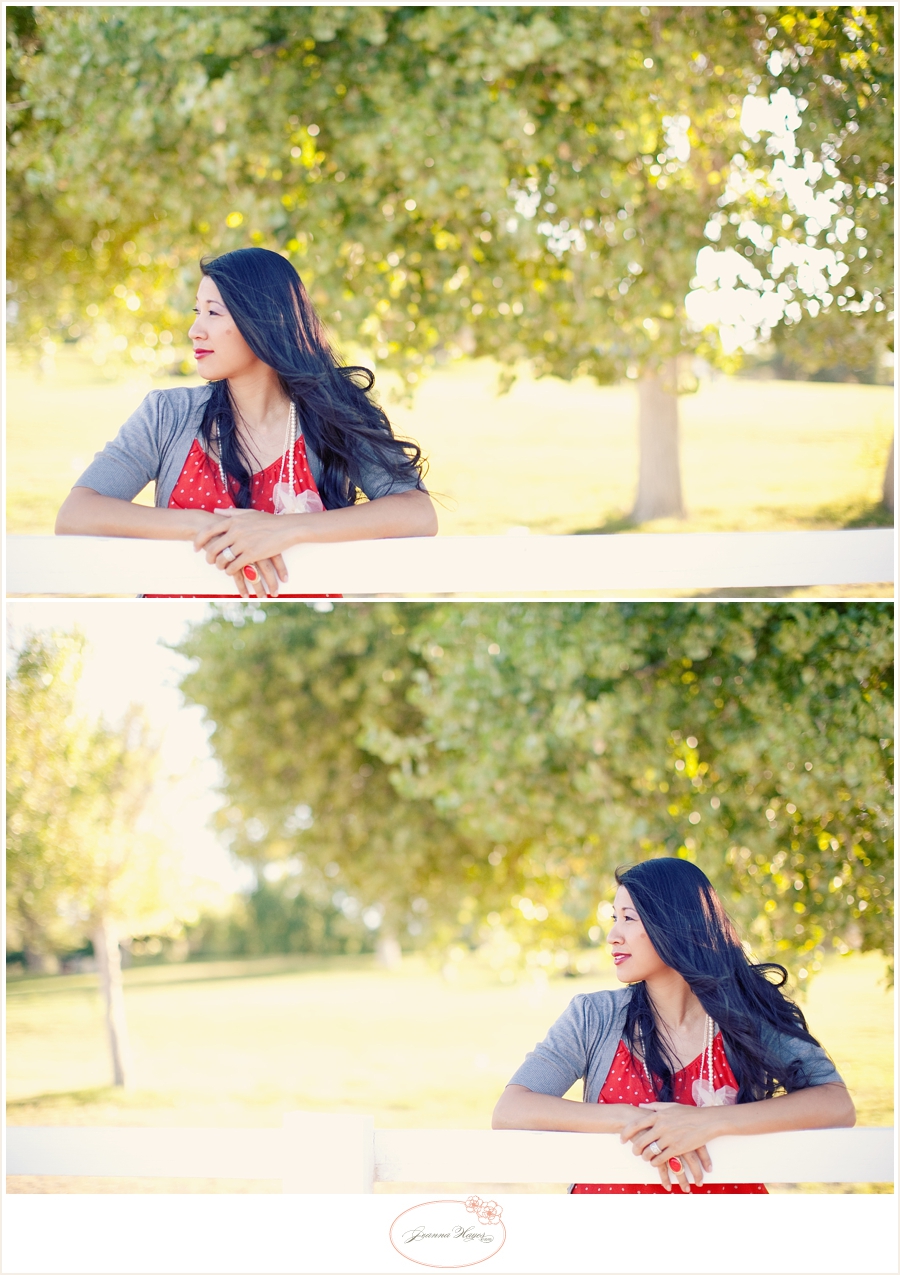
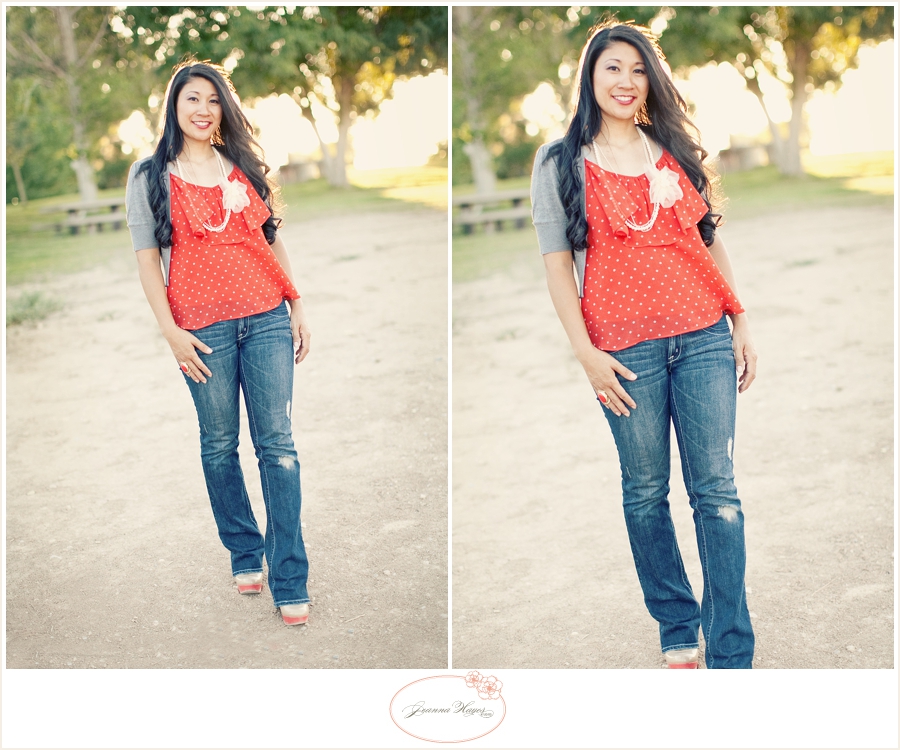
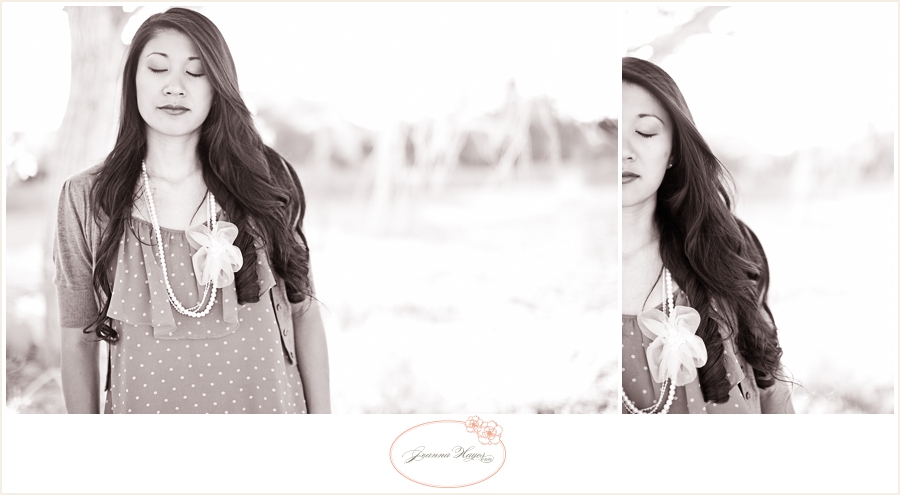
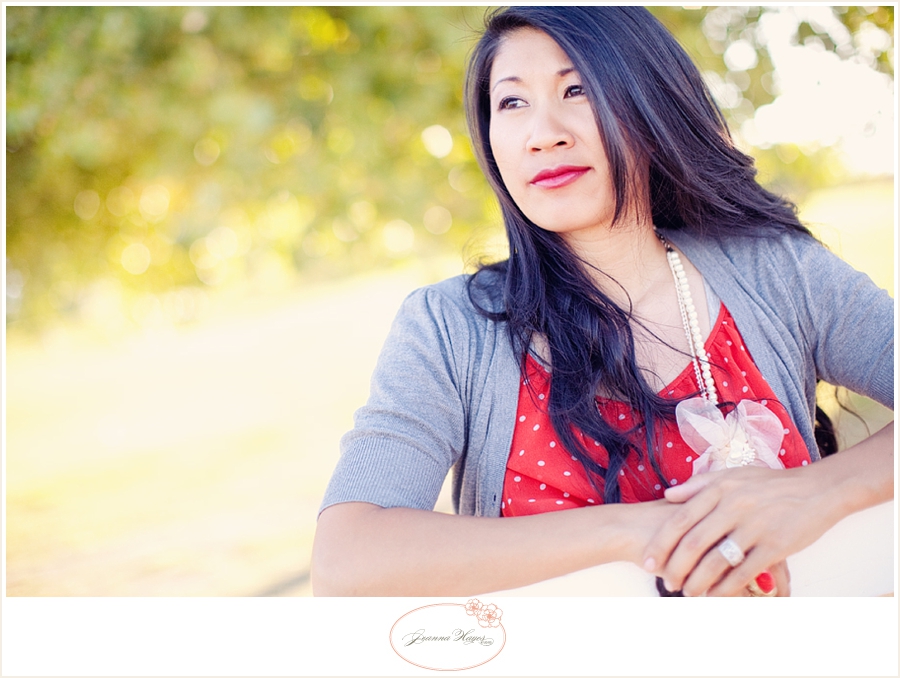
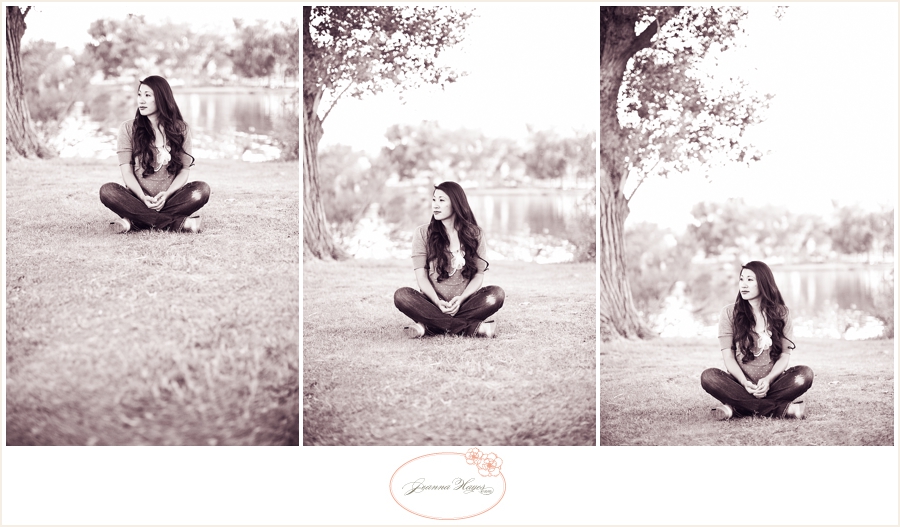
Depth of field is one of the neatest ways we can exercise creativity in our photos. How much your subject is in focus will have a great affect on the general mood of your photo. Have you seen the photo of a cityscape at night with the headlights blurred to show the movement of traffic? Or the shot of a field of flowers with one single bloom in focus? There is a reason photographers choose certain depths of field to their images, and that is usually to evoke a certain mood or feeling from the viewer. Traditionally, portraits of people tend to have a wide aperture (along the lines of 2.8, for example). The reason behind this is so the background is beautifully out of focus and we can see our lovely subject a little more clearly. The opposite is often the case with landscape photographers. They often use smaller apertures in order for their photos of a landscape to be crisp – all the way from the flowers in the foreground to the mountains in the distance. And of course there is every setting in between! Here is an example of two different settings:

I personally love to shoot at very wide apertures. Of course, there is a risk to this (I guess I live on the wild side!). The wider your aperture, the harder it is to get your subject in focus. When I shoot at 1.2 and I focus on the subject’s eye (the eye closest to you is what you want to aim for), I could shoot 20 pictures in the exact same way, and maybe get 5 back in focus the way they should be. The target of focus is that narrow! If I were shooting at a 2.8, it would be much easier because more can be in focus at the same time. When I first began to learn about all of this and I finally got the general concept behind aperture, there was still one thing that baffled me. Why when my aperture was wide open, was I sometimes still not getting that beautiful blur in all of my photos? Was I doing something wrong? Well, I finally realized that… drumroll… not only does that little number on your aperture affect blur, but a few things in “real life,” too. Where your subject is, is called a plane (there goes a geometry reference – eek!). Everything in front of, or behind it, will be out of focus if your aperture is wide open. For example, if your aperture is set at 2.8 and your subject is standing less than a yard in front of a big wall, are you going to get that beautiful blur? Ummm, nope! And I’ll tell you why – the wall is too close to them! Once again, anything that is closer to your subject will be in focus, and everything else – in front of and behind – will be blurred. That’s not always a bad thing, and I do love me some wall photos! But at least if you get a basic understanding of how to get that blur when you want it, and to rid yourself of it if you don’t, you’ll be golden.
Here are a few examples:
This photo was taken with a 2.8 aperture. So…wouldn’t you think there would be a lovely blur? Well, not if you read the last paragraph! Because that door is closely behind the cutest-kids-in-the-world (if I do say so myself), it’s not going to be very blurry. It is too close to them. So whether my aperture is at a 2.8 or a 5, it’s going to look almost the same! Funny how one little door can do that…
This next one was taken at a 1.4. Do you see how the leaves closest to the couple are in more focus than the ones further away? As the trees fade in the distance, they turn into a yellow haze. Sigh… I love that! This is one of those choices you have in in the general “feeling” of your photo.
Similarly, you can tell in this photo that the grass closest to this little guy is in sharp focus, and gradually fades the further it gets in the background. (1.4 aperture) Note: the reason the grass by his feet is in focus, is because that is where his plane is.
I chose this next photo because it demonstrates how things can be out of focus not only behind your subject, but also in front. The cacti in the foreground is blurred, as well as the background. As it get closer to the plane of the couple, it gets more in focus. Perfect demonstration of what a plane does to focus and blur!

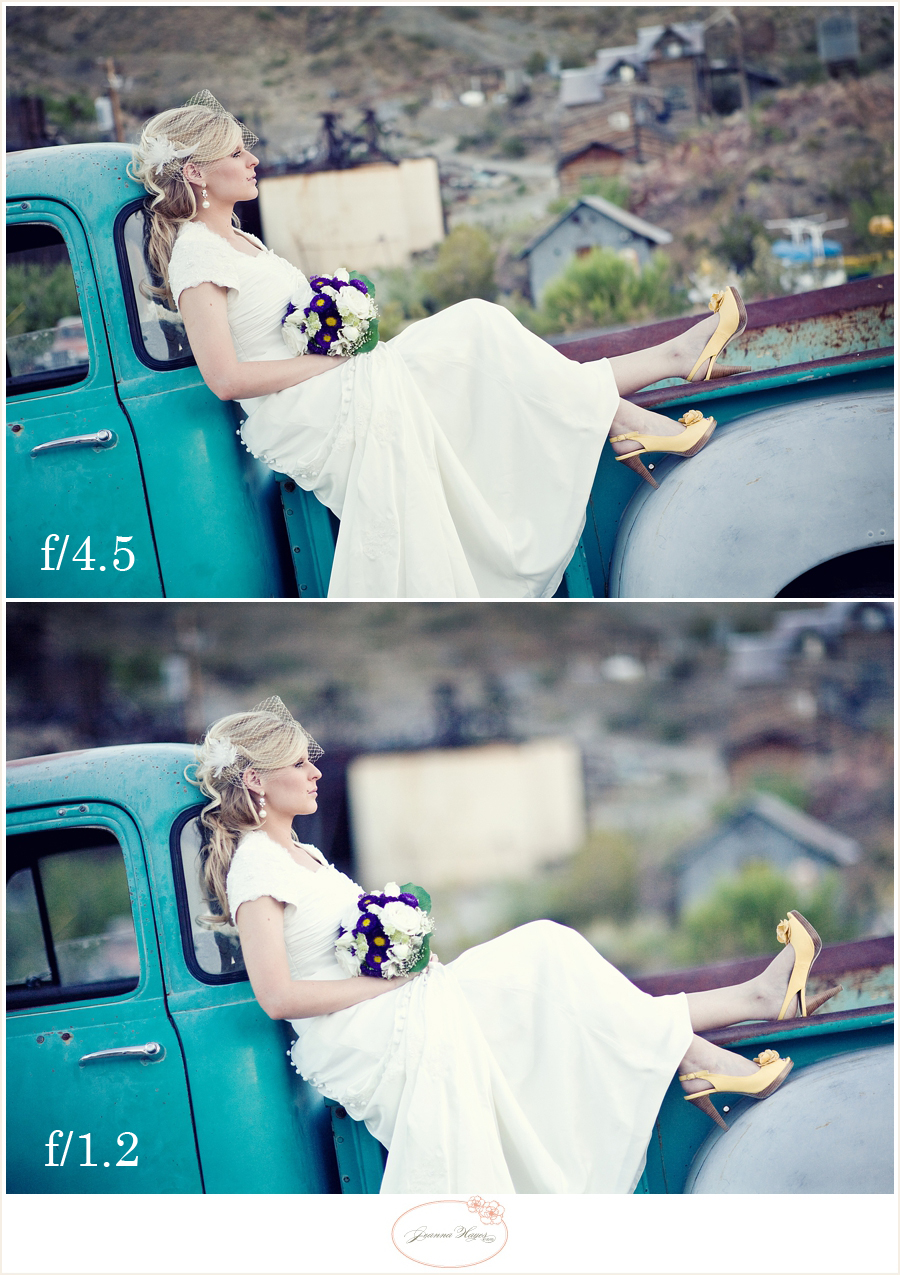
Do you see how not only that little number on your setting can affect focus, but the actual real-life setting in front of you? I for one, think it’s pretty neat. After all – if you aren’t getting enough blur for your liking, put your subject far from their background for an extra “push.” You are in control! Just remember that :). Have a great holiday season, everybody! Now let’s see if you can get a beautiful shot of that Thanksgiving turkey before everyone digs in, eh?
-Jeanna

 We are so excited to have Jeanna here sharing photography tips and lessons with us on eighteen25! For more information about Jeanna or to see more of her beautiful work be sure to stop by Jeanna Hayes Studios.
  • Bio
  • Twitter
  • Facebook
  • Pinterest
  • Latest Posts
Jodie and Jen

Jodie and Jen

I'm Jen Sedillo, one of the bloggers behind Eighteen25. I love creating and crafting, reading good books, visiting new places and being with family!
Jodie and Jen

@eighteen25girls

Jodie and Jen
Jodie and Jen

Jodie and Jen

Jodie and Jen

Latest posts by Jodie and Jen (see all)

  • Our Friday Five 9.30 - September 30, 2022
  • Our Friday Five 12.3 - December 3, 2021
  • Composition Book Christmas Planner - November 28, 2021


« Family Match Game
Today’s Guest: Brenda from Pebbles In My Pocket »

Comments

  1. Marrakech tours says

    November 7, 2012 at 3:48 pm

    nice blog

  2. Mandy says

    November 7, 2012 at 8:31 pm

    This was helpful. Thanks!

  3. Crystal says

    November 7, 2012 at 9:09 pm

    Great tips and the pictures really helped to show what you were meaning. Awesome pictures!!

  4. Tammy_Skipper says

    November 8, 2012 at 1:27 pm

    I love explanations like this, it makes complete sense to a novice like myself, thank you! I have a question about the photo with the cactus…how do you determine what 'plane' is focused? What did you do to make sure the couple was in focus vs. the cactus? Thanks!

  5. Capturing Joy with Kristen Duke Photography says

    November 8, 2012 at 2:57 pm

    I always love to read other photographers tips–great explanations!

  6. Shelley says

    November 8, 2012 at 4:31 pm

    Thank you so much for teaching me!!

  7. Mica says

    November 11, 2012 at 3:49 am

    I just love every topic you all post on here – another great one, explained SO well 🙂
    Do you think you could link to her previous photography posts? I guess I missed them… will start looking to see if I find them easily though.
    Thanks!!

Photography with Jeanna Hayes

Aug12012 posted by Jodie and Jen

Hello again! Is everybody ready to dig in to some technical stuff today? Yes? Sweet! Let’s roll up our sleeves and get going…

Today I’m going to go over the basics of exposure. What is exposure, exactly? Well, the quick way to explain it, is the amount of light that is hitting your camera’s sensor. You want to let the right amount of light in so that your picture isn’t too dark or light. Have you ever tried to take a picture and it turned out completely white or black? If you take a photo and it’s white, there was too much light getting in to your camera and it was overexposed. Naturally, the opposite is true – if you take a picture that turns out black, there wasn’t enough light getting in and it was underexposed. Your goal is to get in the middle so you can actually SEE what you’re trying to get a picture of. Obviously there are steps in between where your photo can be slightly too light or dark, but today I’m going to tell you the steps to take to make sure your image is right on target. Woohoo!
When I bought my first DSLR camera, I shot in auto. I figured that the camera was a lot smarter than I was and it would know which settings I needed in any given situation. I mean, c’mon – people much smarter than me figured out how to make such an amazing camera, so who was I to mess with different settings… right? Ummmm, WRONG! After being unhappy with my images and realizing that “fixing” them in Photoshop later doesn’t work at all, I knew something had to change. One day I just sucked it up and forced myself to do a shoot in manual mode. I took it slow, took my time with each shot, and braced myself when I got home to download the images to my computer. I couldn’t believe it. They turned out amazing! The difference was huge and I never turned back. So as scary as that little “M” (for manual mode) on your camera’s dial can seem, it has the potential to be your best friend!
Just to simplify things, I like to think of my camera as a “light box” and that it’s up to me to let the right amount of light inside. To get proper exposure, you need to know about three things:
APERTURE
SHUTTER SPEED
ISO
These three work together so closely that if you change one, it automatically affects the other two. In the next few months I’ll be getting into these a little more in depth in the following months, but here’s the overview:
APERTURE – This affects the amount of light that comes in to your camera. When I’m being ridiculously simple, I call it “the hole.” If the hole is bigger, it lets more light in. If it’s smaller, it lets in less light. Are you shocked by this stunning revelation? Ha! Really though, the only tricky thing to remember is that the smaller the number of your aperture, the bigger the “hole.” Yes, the fact that a big aperture has a small number and vice-versa is confusing and doesn’t seem to make sense, but you’ll get it. Especially as you play around with different settings. It really clicked with me as I started buying different lenses because the lower the number, the price tag seems to go way, way up! An aperture of 1.2 will let in a TON of light. An aperture of 10 will let in quite a bit less. By the way, those numbers often have “f” in front of them – like f5.6. But to keep things simple, I hardly pay attention to that little letter. I was never good at Algebra, so when I see letters and numbers together I get all flustered. Maybe you’re the same? So let’s just ignore that little letter for now.
Another thing that aperture affects, is depth of field. You know those gorgeous photos where the background is blurry and the subject is in focus? That is depth of field. Lower numbers, like an aperture of 2.8 for example, will make your background blurry (assuming the background is far enough from your subject). An aperture of 16 will make things pretty equal in focus.
SHUTTER SPEED – How long your shutter is open. Easy enough? It can remain open for a few seconds, to thousandths of seconds. Obviously you’d have to decide what you need by evaluating your aperture. How much light is getting in from that? How long do you need your shutter open so that you let just the right amount of light in? You’ll want to get the sharpest image you can by setting the shutter speed to open and shut as quickly as possible. If it’s too quick, you won’t let enough light in. If it’s open too long, you’ll let in too much light AND there will be blur. The good news is that there’s only two ways to go, so it’s usually pretty easy to figure out!
ISO – This is your camera sensor’s sensitivity to light. The higher the number, the more sensitive it is, and vice-versa. The lowest number is 100, and it goes up from there. Depending on your camera, it could be anywhere from 600 to 6400! When you have lots of light, you can put your ISO number low (like in the 100-300 range). In low-lighting, you’ll need to crank that number up so that the camera will be sensitive to the light that is there (perhaps in the 1000+ range).
So how do these three work together? Each are components to getting the right amount of light into your “light box” so you can get a perfectly exposed photo. If you crank your aperture wide open at noon in direct sun, do you think you’ll need to have a slow or fast shutter speed? You’d need a super quick one so that your sensor wouldn’t flood with too much light and make a stark white image. Speaking of, do you think you’d need a low or high ISO in that situation? A low one because you don’t need your sensor to be too sensitive to light if there’s plenty to be had. There are many different lighting situations where if you just take your time, you can figure out what you need to do to get that perfectly exposed image. If your photos aren’t turning out when you are shooting on manual, don’t get discouraged. Just stop. Think about your options and make a choice. Usually if you think it through, you’ll get it and it will start to make sense. I often compare shooting to piano lessons – the more you practice, the quicker you’ll get. Before you know it your brain and fingers will be working so quickly together that you hardly have to even think about it! So as your mother would say: practice, practice, practice!
Have fun and I’ll see you next month when I delve a little deeper into aperture!
– Jeanna

We are so excited to have
Jeanna
here sharing
photography tips
and
lessons with us on eighteen25!
For more information about
Jeanna
or to see more
of her beautiful work
be sure to stop by Jeanna
Hayes Studios
.
. . .
this post is sponsored by:
  • Bio
  • Twitter
  • Facebook
  • Pinterest
  • Latest Posts
Jodie and Jen

Jodie and Jen

I'm Jen Sedillo, one of the bloggers behind Eighteen25. I love creating and crafting, reading good books, visiting new places and being with family!
Jodie and Jen

@eighteen25girls

Jodie and Jen
Jodie and Jen

Jodie and Jen

Jodie and Jen

Latest posts by Jodie and Jen (see all)

  • Our Friday Five 9.30 - September 30, 2022
  • Our Friday Five 12.3 - December 3, 2021
  • Composition Book Christmas Planner - November 28, 2021


« [giveaway] lisa leonard
Creamy Cucumber Dressing »

Comments

  1. Suzanne says

    August 1, 2012 at 11:47 am

    This was an excellent article for me. I have struggled with understanding aperture, ISO and shutter speed. I appreciate the clear and simple explanation. My favorite part was the series of questions at the end with the answers following. It was a positive way to "test" myself on what I had read.

  2. Erin says

    August 1, 2012 at 3:29 pm

    This post is amazing. Thank you so much for the simple explanation for a rookie like me. I will be sharing this with my friends.

  3. Kathy L. says

    August 2, 2012 at 5:24 pm

    This was a great post and now has me excited to actually try to get out of manual mode! Thank you!

  4. Ashley Shell says

    August 2, 2012 at 6:10 pm

    That was a very very helpful article! Thank you! I will be referring back to this as I work to better understand Aperture and ISO usage. I have the shutter speed down pretty well, but have struggled mostly with Aperture. Thank you. I am looking forward to finding some things to test this out on.

Photography with Jeanna Hayes

Jul42012 posted by Jodie and Jen

I have an admission… I am a complete art nerd. I’ve always loved anything to do with design, painting, art history, etc. When I was growing up, heaven to me was a blank piece of paper and a box of colored pencils. So naturally one of my very favorite classes in college was my drawing class. The instructor once told us, “The first line you draw is actually the fifth.” He was referring to the fact that the first four “lines” are the edges of the paper, so as a result we needed to be careful where we place our drawing. This bit of knowledge actually translates really well over to the camera, having to do with cropping and composition.

The moment you put your eye up to the viewfinder, you have a choice of where you put your subject(s). In that little rectangle it doesn’t seem like there are many options, but what you choose has a big impact. Are you looking to be traditional? Artsy? Bold?
You may have heard of “the rule of thirds.” Basically, it is an element of design which suggests that an image is most pleasing when divided into thirds and the subject is placed where the lines intersect. See the examples below and how the subjects’ faces are in, or close to where the grids meet?
 
 
The cool thing about this “rule,” is that is a simplified version of the golden ratio. Have you ever seen the following?…


As we’ve all heard, beauty is in the eye of the beholder. However, this neat ratio of “beauty” stems directly from mathematics, and is seen everywhere in nature. That’s right – it blends art, math, and science. Pretty neat stuff, right? This mathematical swirl is exactly why we tend to visually favor odd numbers, as well as our subjects placed toward the side of the frame in a photo. Below is one more example. The photo on the left tends to be a bit more pleasing to the eye (not to mention has more visual interest) because of subject placement being placed on the lower right third.

If you are loving the principle of thirds, there is even more to it. A little more food for thought, and that is… where is your subject looking? Is his/her body language helping or hindering your overall image? In the next two photos, I want you to notice something. She is looking the same direction in each picture, yet the two are very different. The way the first photo is cropped, she is placed on the third – but where she is looking actually draws your eye OUT of the photo. It’s not the worst thing in the world, but look at the contrast. In the second picture, she is looking toward the negative space, which is in the photograph. Because your eye naturally goes in the direction where your subject is looking, make sure that place is in the frame of your picture. Make sense?


While implementing the rule of thirds really does produce a cool-looking image, that doesn’t mean a picture is unattractive when the subject is placed in the middle. It’s nice and traditional, and I still love cropping that way! My opinion is that while you’re snapping, it’s a good idea to take shots in all kinds of ways and not discount a good, old-fashioned “middle crop.” When placing your subject in the middle, be sure to place equal space on all sides. The first picture in the next example has nice and even spacing around her. The second picture has her cut off at the ankle and her placement just seems… weird. “Just say no” to awkward cropping!


So… what’s left in the world of composition? Well, the experimental part! I love cropping and having fun with it. Do crazy things with the subject in your viewfinder… maybe you’ll like it! In this example, I had my model (my beautiful and amazing sister-in-law), close her eyes. The second is obviously my experimental edit. It’s fun, and just a little crazy… but I like it! This is where you just have FUN with it.


Feel free to break the rules. I ALWAYS get fairly close to the subject and am not afraid to crop off the tops of their heads! I not only love how it looks, but I actually consider this a signature “look” of my brand. So don’t be afraid to take some risks!
 
 
My last photo examples, are a review of some different subject placements. You decide which are your favorites…
 
(when cropping on the third in a vertical shot, I tend to favor the subject on the very bottom section – they look more “anchored” in the shot)
 
 
Well, that’s it for cropping and composition! So far I’ve taught you about things to think about and plan before you even press that shutter button. Next month, it’s time for more technical stuff! See you soon!
– Jeanna
 
. . . .
 

We are so excited to have
Jeanna
here sharing
photography tips
and
lessons with us on eighteen25!
For more information about
Jeanna
or to see more
of her beautiful work
be sure to stop by Jeanna
Hayes Studios
.


. . .


this post is sponsored by:
  • Bio
  • Twitter
  • Facebook
  • Pinterest
  • Latest Posts
Jodie and Jen

Jodie and Jen

I'm Jen Sedillo, one of the bloggers behind Eighteen25. I love creating and crafting, reading good books, visiting new places and being with family!
Jodie and Jen

@eighteen25girls

Jodie and Jen
Jodie and Jen

Jodie and Jen

Jodie and Jen

Latest posts by Jodie and Jen (see all)

  • Our Friday Five 9.30 - September 30, 2022
  • Our Friday Five 12.3 - December 3, 2021
  • Composition Book Christmas Planner - November 28, 2021


« Previous Post
chalkboard chore charts »

Comments

  1. Kelly Jean says

    July 4, 2012 at 2:32 pm

    Thank you so much for the tips. Here photographs are beautiful!

  2. Jenn Helle says

    July 4, 2012 at 8:36 pm

    Those pictures are great. 🙂

  3. Suzanne says

    July 5, 2012 at 12:20 pm

    I learned a lot from this post! Thank you for the suggestions and for articulating why I favor some shots and not others.

  4. Linh C. says

    July 5, 2012 at 3:14 pm

    Love your examples to show the rules!

  5. Amy says

    July 5, 2012 at 5:22 pm

    Thanks Jenna!
    I love the way you explained it.
    Beautiful photos too!

  6. Christene Houston {Author - A Heart So Broken} says

    July 6, 2012 at 12:35 am

    Girl, I love how you think. Even better, how simple and easily you explain these techniques so we can understand. Thanks for these great tips!

Photography with Jeanna Hayes

Jun62012 posted by Jodie and Jen

Hello again!
Are you ready to learn all about raw? Gosh I love shooting in this format. It’s flexible and gives you a range of control that shooting in JPEG does not.
Ok, your first step is to delve into your camera’s menu – before you begin taking photos, you have a couple of choices. One of which is the kind of format (“image quality” in most cameras), that you are going to use. Different cameras have different menus, but most should have the choices of shooting in jpeg or raw (or both!). Consult your camera’s instruction manual if you don’t know how to get to these settings – my manual was my best friend when I first got my camera!
Let’s talk about the basics…
A jpeg is a processed image. What you see is the “final” image. This doesn’t mean you can’t edit the photo, but what’s done is done and the edits won’t look as good. Most point and shoot cameras only offer this format, and most DSLR’s offer both this and raw.
A raw image is unprocessed. It is not the “final” image. The technicalities are actually pretty neat to learn about, but all you have to know right now is that you can make choices in processing after you take the photo. Pretty cool, huh?
I like to use this comparison when it comes to raw vs. jpeg… Let’s say you are baking cookies. You’re done and you have the already-baked cookie in your hand. You decide it needs to be sweeter, so you sprinkle sugar over the top. Do you think that would really do the trick? That would obviously be the jpeg comparison. The raw version would be putting more sugar in the dough before it’s baked. Make sense? I’m certainly not the most talented in the kitchen, but even I know that it would turn out a lot better! If you decide that your raw image needs to be a bit brighter, that edit is going to look a LOT better than if you were making those adjustments to a jpeg.
Of course nothing makes up for getting the exposure right in camera, but the great thing about shooting in raw, is that it’s more forgivable if you don’t get your settings absolutely spot on. And let’s face it… who has their settings perfect 100% of the time? So take comfort in knowing that if you slightly under or over expose your image, you can “save” it. Hallelujah!
There are other really neat features, too, such as isolating a single color, getting the white balance perfect (trust me – if for no other reason, do it for that!), and any and all basic edits look SO much better than if you were to do the same on a jpeg.
Lets get into the process of how to do this. First of all, you need software that can open your raw file. Many people use the Adobe Camera Raw converter that is included with Photoshop and Photoshop Elements. Once your raw file is opened, you are able to make basic adjustments. There aren’t any bells and whistles in this part, but the basic edits (white balance, tint, exposure, recovery, brightness, contrast, etc.) look a LOT better than they would if you were doing those same adjustments to a jpeg. Once you complete your adjustments and you click “done” or “open image,” the program actually opens it up as a jpeg! Now you can do a ton of different things in Photoshop. You’ve fine tuned it yourself and it’s the best jpeg it can possibly be.
I have examples below of three different photos. You can see my straight out of camera shots (I underexpose slightly for my personal post-processing style). The middle two are the same exact edits done in jpeg and in raw. Notice how “muddy” the jpeg edit is? That edit is flat, slightly discolored, and the details start to disappear more (notice the groom’s jacket). The differences are even more noticeable when the photo is too light or dark, or if the white balance is off. It is VERY hard to edit a jpeg under those circumstances. The very last photo in the collage is the final image, used from the raw basic edit. It is complete with retouching and a slight color shift.
All in all, raw is an amazing format. Especially if you’re an imperfect photographer, which is certainly why I love it! Yes it does involve an extra step, but to me it is worth it in the end. I am able to practically customize the image I’m working on so it turns out to be the best photo it can possibly be.
One last thing… if you don’t feel comfortable shooting exclusively in raw just yet, your camera most likely has a raw+jpeg option. Each photo will take up a lot more room on your memory card, but that’s certainly not a deal-breaker! It’s worth it to buy a few extra memory cards and/or external hard drive. Shoot in both so that you can play with raw for a while. And have fun in the process! That’s what it’s all about :).
See you next month! We’ll talk about cropping. Believe it or not, it’s actually a pretty cool topic ;).

. . . .

We are so excited to have
Jeanna
here sharing
photography tips
and
lessons with us on eighteen25!
For more information about
Jeanna
or to see more
of her beautiful work
be sure to stop by Jeanna Hayes
Studios
.

. . . . . . .
this post is sponsored by:
  • Bio
  • Twitter
  • Facebook
  • Pinterest
  • Latest Posts
Jodie and Jen

Jodie and Jen

I'm Jen Sedillo, one of the bloggers behind Eighteen25. I love creating and crafting, reading good books, visiting new places and being with family!
Jodie and Jen

@eighteen25girls

Jodie and Jen
Jodie and Jen

Jodie and Jen

Jodie and Jen

Latest posts by Jodie and Jen (see all)

  • Our Friday Five 9.30 - September 30, 2022
  • Our Friday Five 12.3 - December 3, 2021
  • Composition Book Christmas Planner - November 28, 2021


« {giveaway} landee on etsy
Pizza Rolls »

Comments

  1. kaitlyn says

    June 6, 2012 at 9:26 pm

    Oh my goodness. This was so informative and perfect for the new photographer – me! Thank you for teaching 🙂

  2. chibiwow says

    June 7, 2012 at 6:08 am

    I love taking photos and this tips are sure helpful. Love the finish look of those photos. Got my eye on your blog now.

  3. Jessima Munro says

    June 7, 2012 at 7:45 am

    Thanks so much for posting this. You have made RAW easy to understand and why it is so good. I am now game to try and use this 🙂

  4. Anonymous says

    June 7, 2012 at 12:45 pm

    maybe you can help…if I want to shoot raw and open in light room first to do basic edits there and then do final edits in elements how do go about doing that?

  5. Kristen Duke Photography says

    June 7, 2012 at 12:50 pm

    I love shooting in RAW, this is a great explanation!

  6. Kellie says

    June 8, 2012 at 4:11 pm

    This is great info! I've been scared to make the jump to RAW. But I use Lightroom to edit. Is it still just as important to shoot in RAW when editing in Lightroom rather than Photoshop? Thanks so much for the tutorial!

  7. Jeanna Hayes says

    June 8, 2012 at 6:17 pm

    Thanks for the kind words! I always hope the way I explain things make sense to other people, as opposed to just ME! ha!

    Anonymous – You can totally edit in Lightroom first and do those edits there. I do my batch editing that way, in fact. The LR edits look great. Just import them into LR, make your edits, then export as a jpeg. From there you can pull those up in Photoshop and do whatever else you need to do. Good luck!

    Kellie – It is extra important to shoot in raw when you do Lightroom edits! 🙂 One time I was editing a wedding and somehow I had accidentally started shooting jpegs instead of raw for about 20 photos. I didn't notice until I was editing in LR, because the batch edits I had been doing suddenly looked awful! So yes, definitely still shoot in raw :).

  8. Kellie says

    June 8, 2012 at 8:31 pm

    Great! Thank you so much!

Photography with Jeanna Hayes

May22012 posted by Jodie and Jen

Hello again!
I’m excited to be back this month, sharing a little of what I know about basic photography. Throughout the next few months I’ll be getting into a lot of different elements of photography, but today I’m going to start with a few things to think about before you even press that shutter button!
FIRST THING’S FIRST
Stop. Think about your photos as art. What are you taking a photo of, and why? Is it something very important to you, or are you just playing around? Either way, it’s all good! It’s just nice to stop and think about how you will approach the photos you will be taking. Think about what you are trying to convey, what emotions you’re trying to capture, and/or the general “feeling” of the photo. Is it a photo documenting everyday life, or is it something more formal? If you are taking your photos with purpose, it will naturally make you a better photographer and artist.
Here are 5 questions to ask yourself before you take that first photo:
1. Why am I taking this picture?
2. What is the subject in my photo and where have I placed it in the frame?
3. Are there any distractions in the picture?
4. What other perspectives could I take this photo from?
5. Am I close enough to (or far enough from) my subject?
A LITTLE BIT OF HOUSEKEEPING
No matter which kind of memory card you use, it needs to be cleaned off and ready to go. Also ask yourself how many photos you think you’ll be taking – is there enough room on your card(s)? I know it seems like it’s common sense, but as much as I don’t like to admit, there have been a few times where I was on my last memory card, and ran out of room because I forgot to take off my old photos first. Eek! Of course I couldn’t delete all the images because of the new ones I had just taken, so I had to delete the old photos one by one as quickly as I could (which isn’t very quick at all)! Of course it would have been much easier had I thought ahead and deleted all the old images first. So learn from my mistakes and make sure your card is cleared of all previous images and ready for those new ones!
Speaking of wiping the slate clean, you’ll need to regularly format your card. What does that mean exactly? Well, I often explain it like this… when you simply delete the images on your card, it’s like a messy floor in your house where you just pick up the toys, clothes, sippy cups, etc. However when you format the card, it’s like picking up everything, vacuuming, mopping, and making sure your floor is spotless . Does that make sense, or is my house the only one where a metaphor like that works?! The point is, formatting your memory card is essential to keeping it well functioning and reliable in the long run. The only “catch” to formatting your card vs. deleting the images, is that formatting is FINAL. The odds of recovering the images on that card are slim to none, but obviously this will not be a problem if your photos are downloaded and safely backed up. For this, I recommend purchasing an external hard drive or two. You can store your photos directly there, or use it as a backup to the photos on your computer. I have over 15 external hard drives, so obviously I’m a fan! (and for anyone wondering, I use the Western Digital 1TB Portable Hard Drive)
AM I SUPPOSED TO SHOOT IN AUTO, MANUAL, OR SOMEWHERE IN BETWEEN?
Well, well, here we are… the big question! First of all, my goal when all is said and done is to not only get you comfortable shooting in manual, but wondering where it’s been all your life! When you shoot in auto, the camera is in complete control. When you shoot in manual, you are in the driver’s seat and I can’t WAIT to tell you all about that part! But for now, until I get to the “in’s and out’s” of manual shooting, just play around with your camera. Practice shooting in auto, practice shooting in manual, and practice shooting with the settings in between. Have fun seeing the difference between them and don’t get discouraged if you’re not happy with the results just yet. Being a great photographer takes time and you WILL get there. Keep practicing, having fun, taking pictures with purpose, and I’ll see you next month when I go over shooting in RAW!
(Just for fun – what’s a photography guest post without a picture? This is my sweet little girl, along with a favorite saying of mine that I think goes perfectly with today’s subject…)
. . . . . . .

We are so excited to have Jeanna
here sharing photography tips
and lessons with us on eighteen25!
For more information about Jeanna
or to see more of her beautiful work
be sure to stop by Jeanna Hayes Studios.

  • Bio
  • Twitter
  • Facebook
  • Pinterest
  • Latest Posts
Jodie and Jen

Jodie and Jen

I'm Jen Sedillo, one of the bloggers behind Eighteen25. I love creating and crafting, reading good books, visiting new places and being with family!
Jodie and Jen

@eighteen25girls

Jodie and Jen
Jodie and Jen

Jodie and Jen

Jodie and Jen

Latest posts by Jodie and Jen (see all)

  • Our Friday Five 9.30 - September 30, 2022
  • Our Friday Five 12.3 - December 3, 2021
  • Composition Book Christmas Planner - November 28, 2021


« teacher appreciation countdown printable
summer subway art »

Comments

  1. Kate @ Songs Kate Sang says

    May 3, 2012 at 1:09 am

    These are great tips! Thank you!

  2. Anonymous says

    May 3, 2012 at 1:16 pm

    thank you for these posts!! i'm looking forward to learning more.

  3. kristen duke photography says

    May 3, 2012 at 8:59 pm

    good reminder to format my cards;)

  4. Anonymous says

    May 5, 2012 at 9:47 pm

    Excellent tips!

  5. Crystal says

    May 6, 2012 at 6:34 pm

    I just got a new camera and I can't wait to hear more tips!!

  6. Wendhy Jeffers (Las Vegas Photographer) says

    May 8, 2012 at 6:31 pm

    Love it!! Thanks for sharing Jeanna =)

welcome!

We are Jodie & Jen, born & raised in Vegas, in a little brick house. The number hammered onto our mailbox was 1825. Visit us often & be inspired to create a life you love. Read More…

  • Bloglovin
  • Facebook
  • Instagram
  • Pinterest
  • Twitter

Subscribe by Email

Get our latest & greatest posts straight to your inbox.

featured posts

eighteen25 loves

Disney banner 350

Privacy Policy

stay updated on latest
posts on Facebook

The Girls at Eighteen25
  • Bloglovin
  • Facebook
  • Instagram
  • Pinterest
  • Twitter

Copyright © 2026 · All rights reserved · Site by Melissa Rose Design

Copyright © 2026 · EighteenTwenty Theme on Genesis Framework · WordPress · Log in