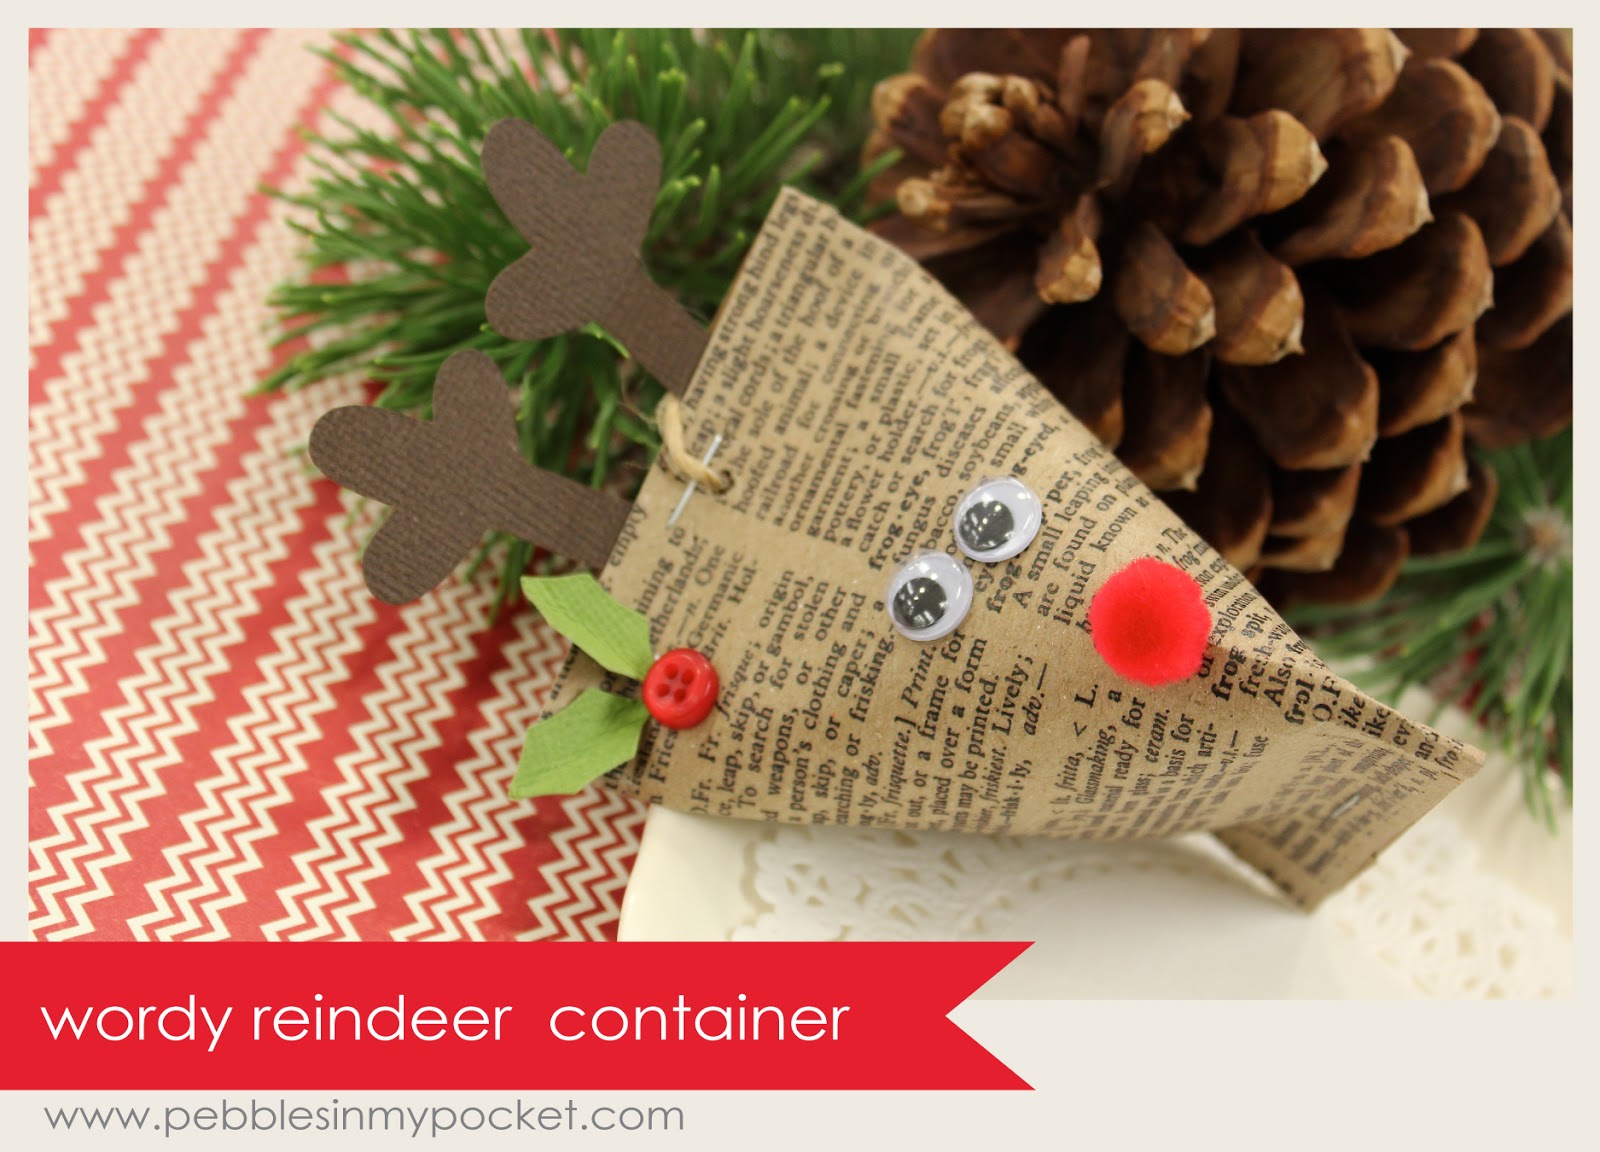
Reindeer Sour Cream Treat Container Tutorial
Our reindeer container will bring Christmas cheer to all you give him to. Easy to make within minutes! Perfect to hold a special treat… use as a gift tag, place setting or Christmas ornament.
Supplies Needed:
Dictionary or plain kraft paper (4” x 6”)
¼” Pom Poms (red)
Small googly eyes
String for hanging
Red button
Green cardstock for holly leaves
Dark brown cardstock for antlers
Red Double Stick Tape
White craft glue
Stapler,
1/8” Hole punch
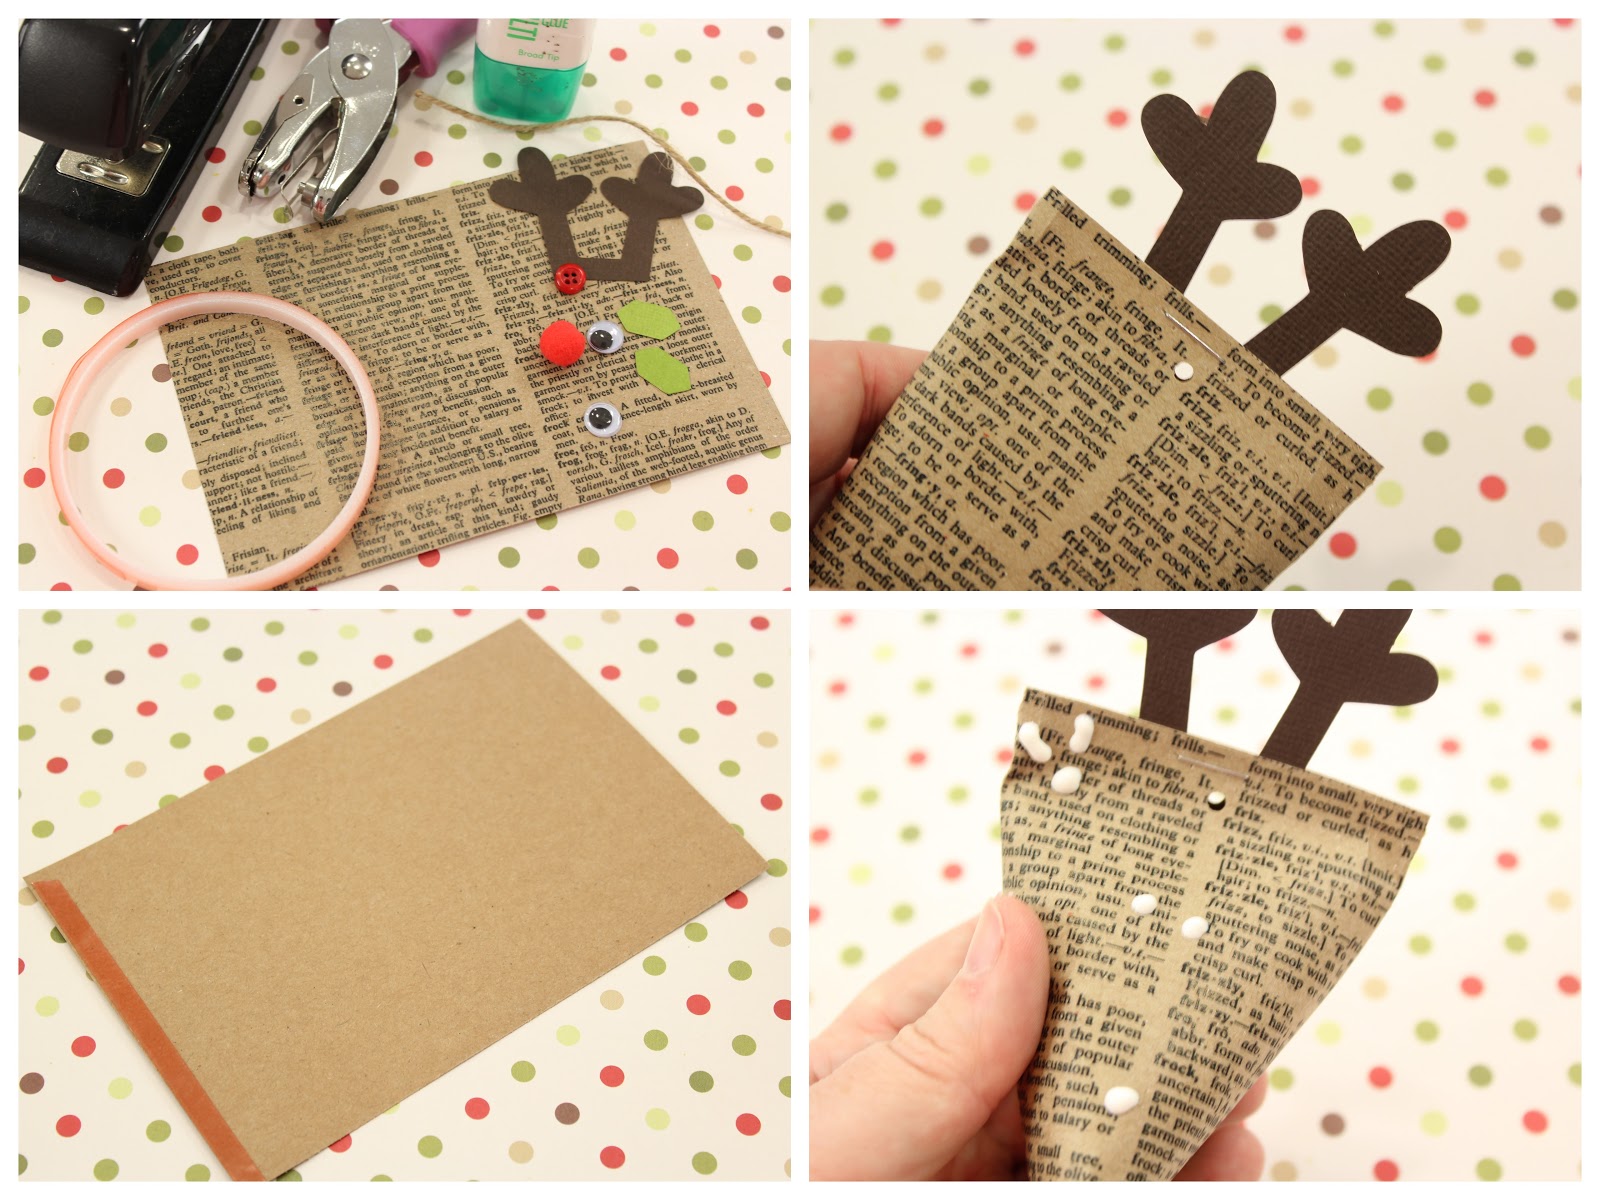
Instructions:
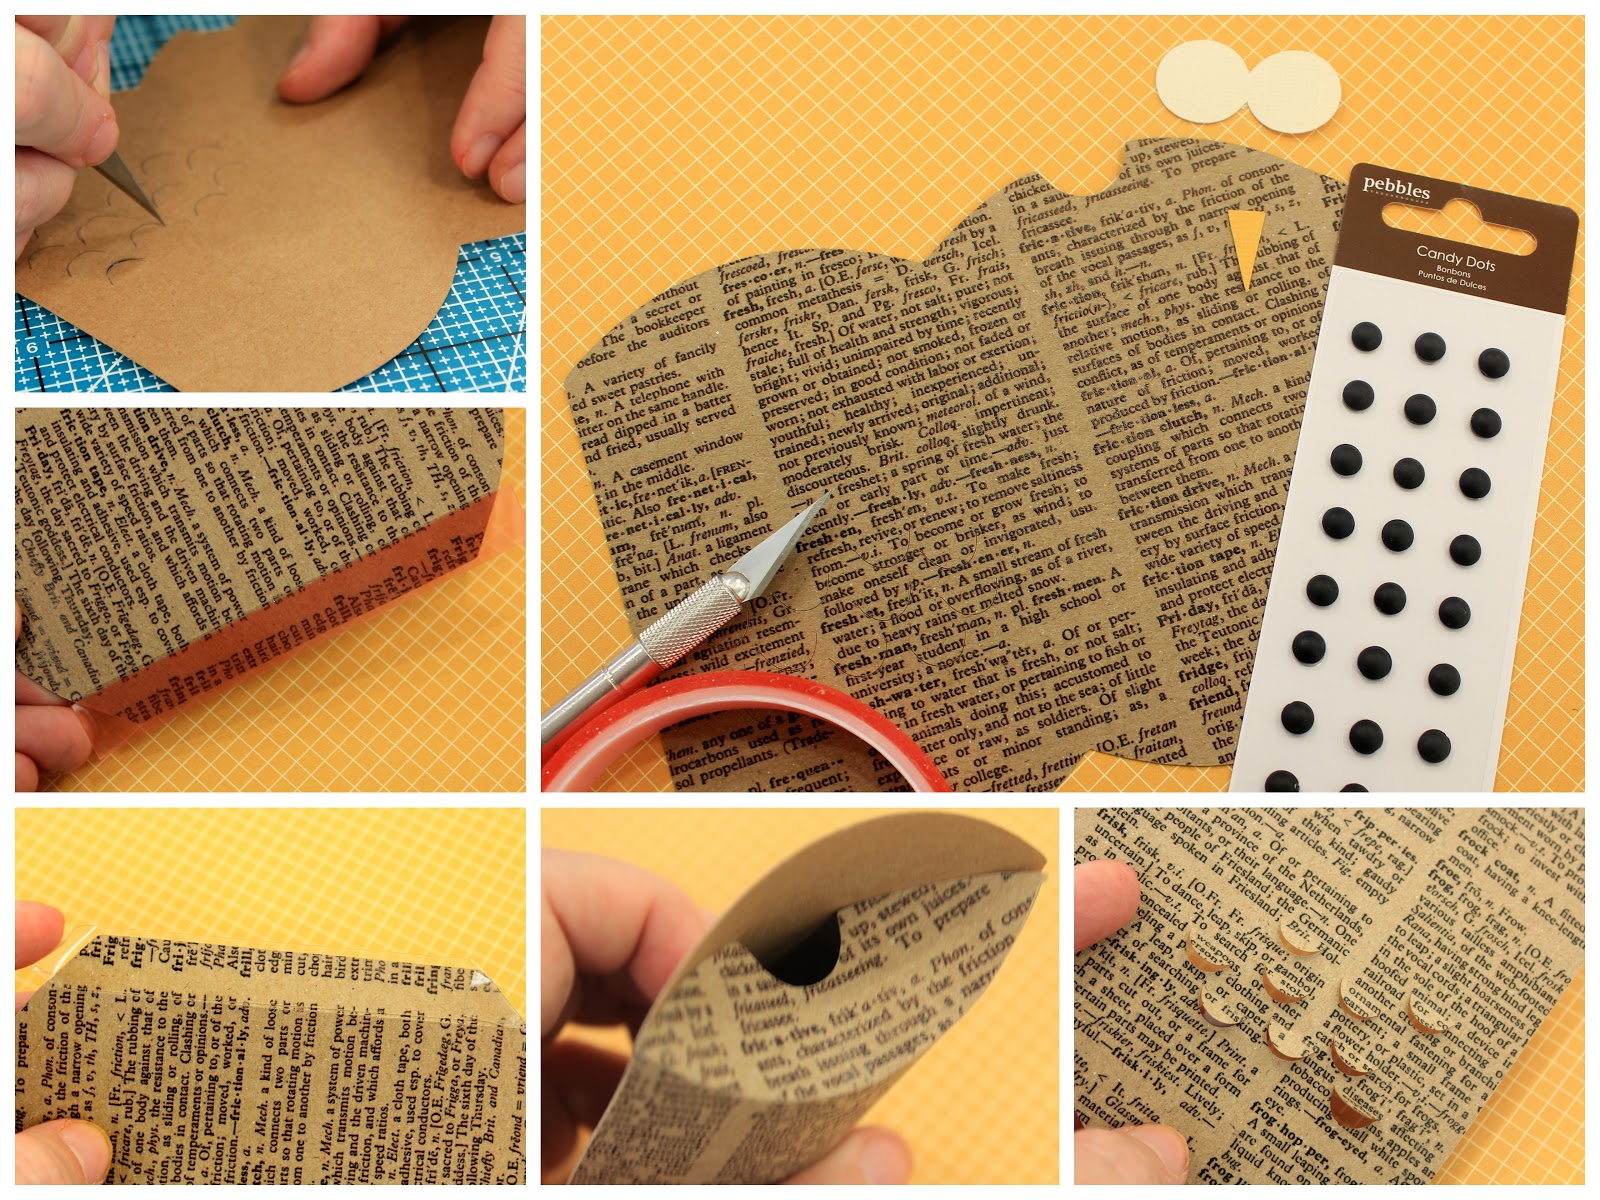
Apply a strip of Red Double Stick Tape to the short inside edge of the rectangle piece of kraft paper. With the seam in the center back, slide the antlers into the top opening and adhere on one side to hold, then staple once in the center. Hole punch the top if desired. Fill with your favorite treats or small gift and staple the bottom opening shut by twisting in the opposite direction as shown. Adhere pieces as shown with white craft glue. Let dry.
Merry Christmas!
Brenda Birrell, Pebbles in my Pocket
_________________________________________________________
this post is sponsored by:

Jamie
Latest posts by Jamie (see all)
- Bird Feeders - May 24, 2019
- [2014 WISHlists] Jamie’s List - December 12, 2014
- Avery Custom Photo Gift Tags - December 2, 2014


This is SO cute!
haha so cute!! love it!!
It's totally adorable, but I don't understand how you line up the seams to make the shape. *banghead*
Where is the sour cream in this?? *banging head too lol*
I ♥ this Wordy Reindeer 🙂
It's just called a sour cream container because there are some brands that place sour cream in it. You of course would put treats in it. The shape is done by twisting and stapling one end opposite of the other. Hope this helps 🙂