Hello fellow Spooktacular September fans! Isn’t this event amazing? I love the eighteen25 girls (in an unhealthy way, seriously) and am so happy to be participating in this Halloween goodness for my third time! Hooray for all things Halloween! Today I am sharing a little Halloween craft I call Ghosts In A Jar. Title=self explanatory. 🙂
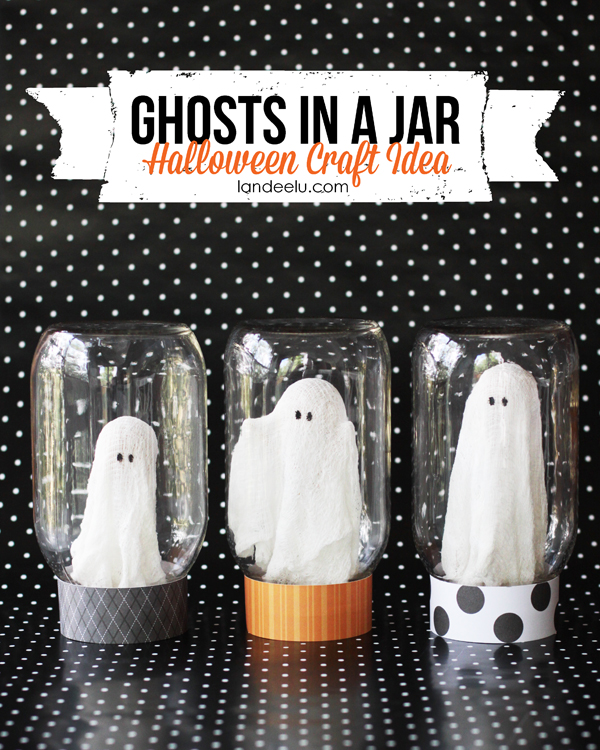
Aren’t they so cute? It’s like you caught a ghost and are keeping it in a jar like you might a bug. Nevermind that ghosts can go through walls. Apparently they can’t get through mason jars. Just go with me on this… 🙂
If you’d like to make your own little captive haunters, this is what you’ll need: (affiliate links are included)
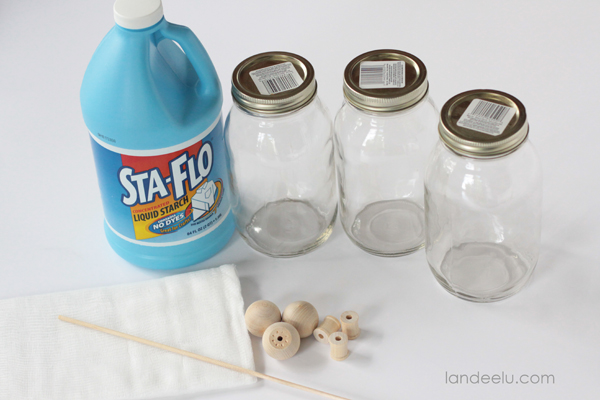
-
black craft paint or black sharpie
How to make Ghosts In A Jar
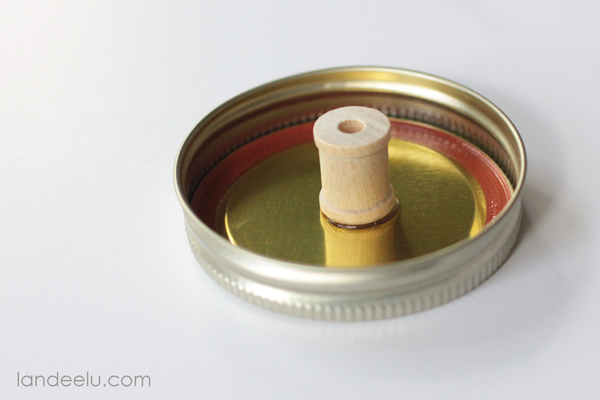
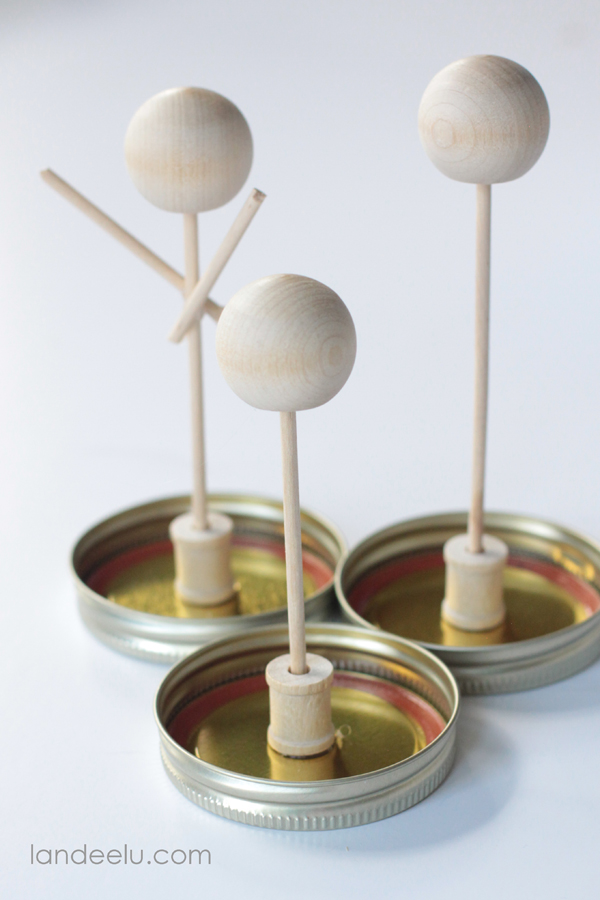
STEP ONE: Hot glue one of the spools to the underside of the mason jar lid.
STEP TWO: Cut wood dowel (easily done with some good scissors) to the height you’d like your ghost to be. Hot glue it into the spool. Hot glue a wooden knob onto the top of dowel. Add any additional wood dowel pieces to form arms, if desired. Just make sure they will fit through the mouth of the mason jar when you’re done!
SIDE NOTE: If I were doing this craft again, I would paint the knob white at this point. This will keep the wood from showing through the cheesecloth at the end. Not a SUPER big deal, but I would. 🙂
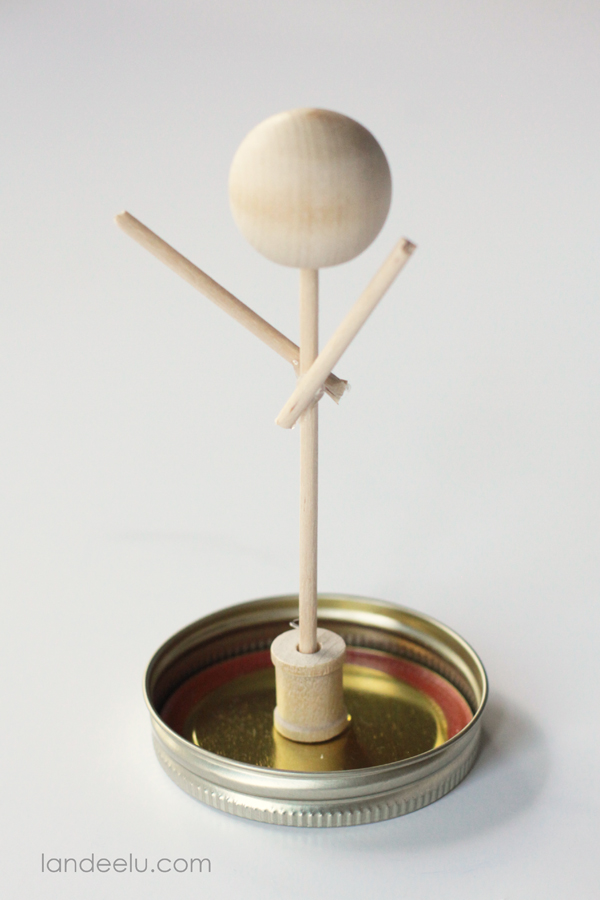
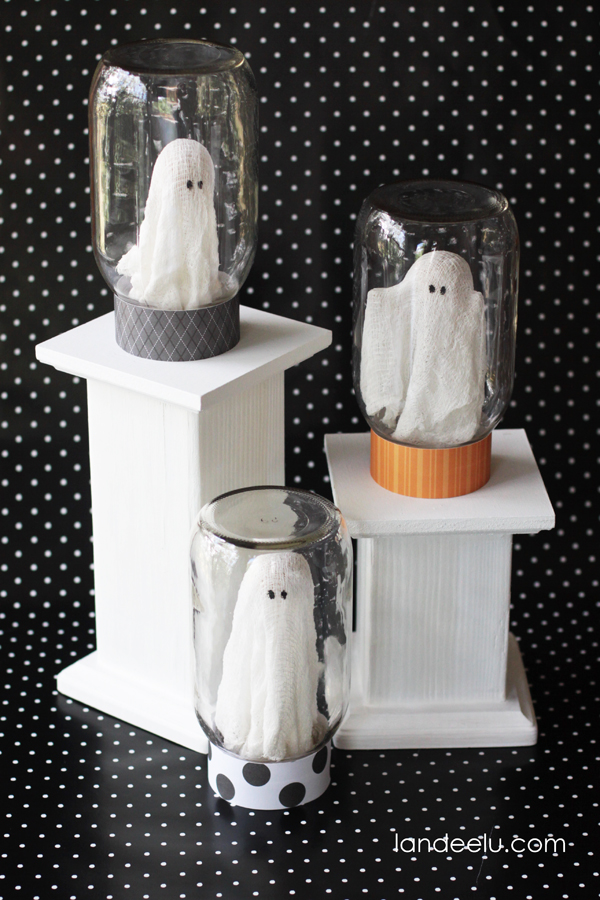
I did one with arms and two without for variety. I also made one tall and one short.
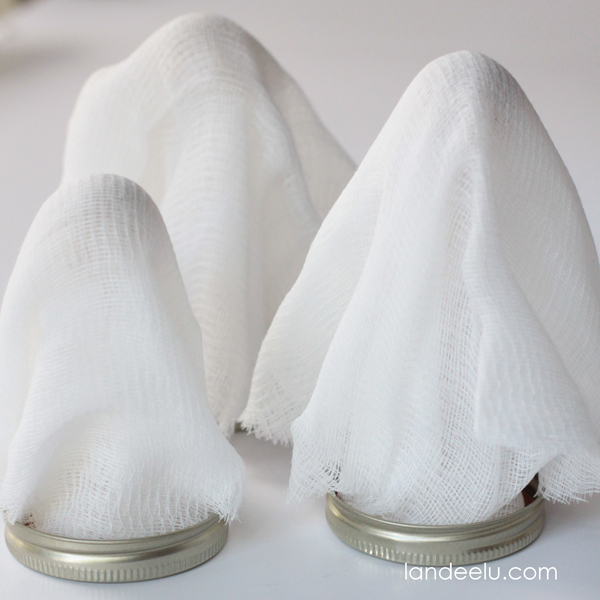
STEP THREE: Layer several pieces of cheesecloth together (I ended up doing four layers) over top of your newly created “ghost forms” and dry cut the shape/length you’d like them to be. Make them a little longer than you think you’ll need as the next step will shrink the cheese cloth a little.
STEP FOUR: Pour some liquid starch in a bowl and then, keeping the layers together, immerse the cheesecloth for one of the ghosts into the liquid starch until saturated.
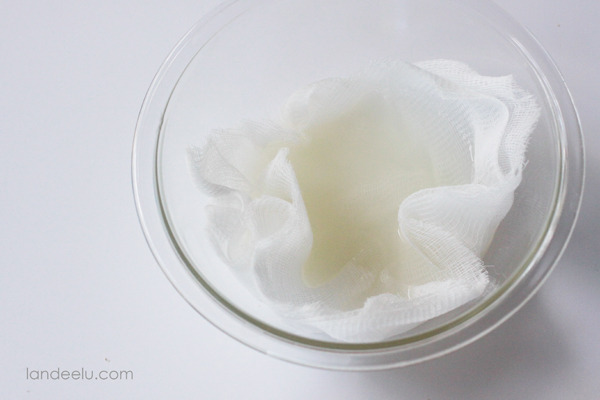
STEP FIVE: Remove cheesecloth from bowl and squeeze out any excess starch. Carefully flatten out the cheesecloth and then drape over your ghost form. Play with it a little to shape it how you’d like and then allow to dry completely.
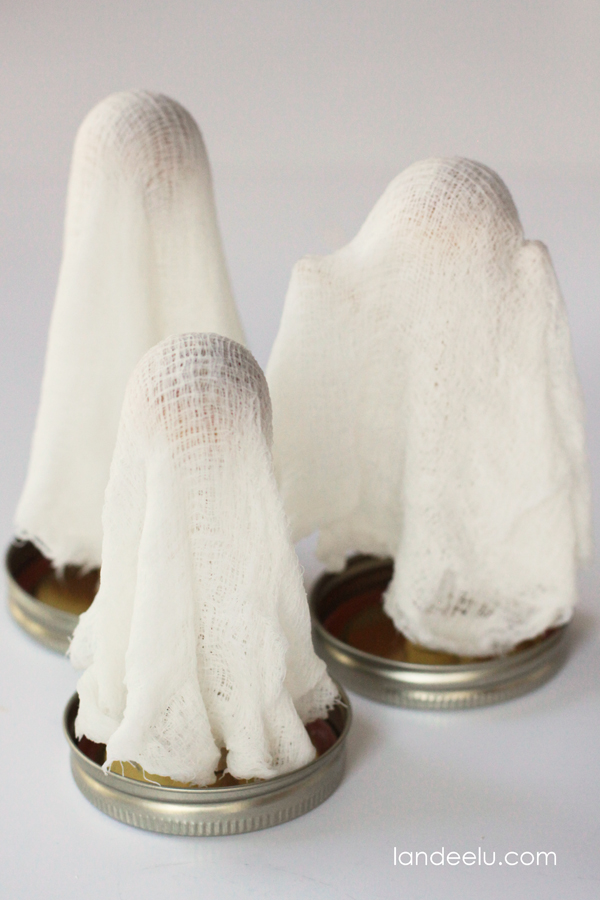
STEP SIX: Dot a couple of eyes on using black craft paint or a sharpie. Carefully put the lid back on the mason jar and trap your new little ghost inside!
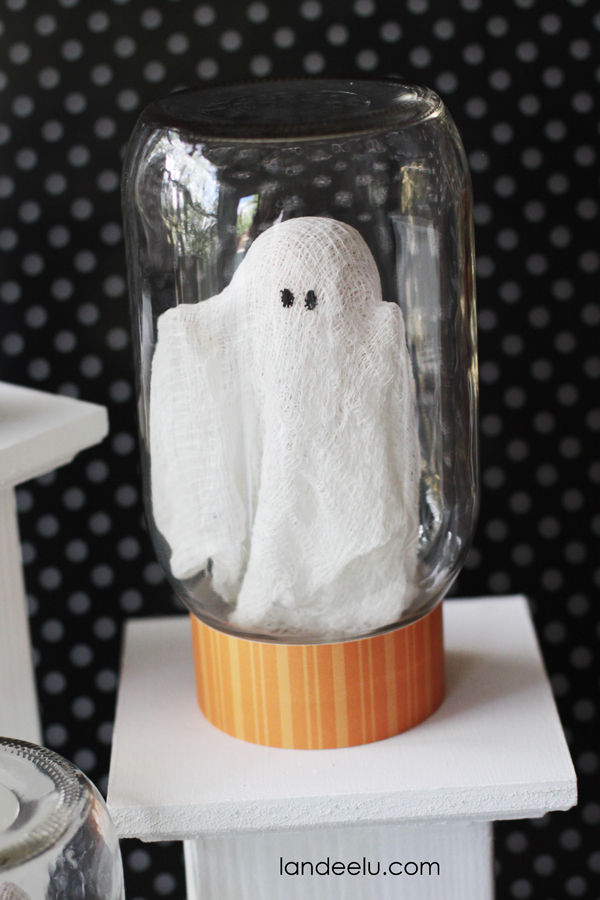
STEP SEVEN: Optional but I decided to add a little 1 1/4″ strip of scrapbook paper around the base to cute it up a bit. Just wrapped it and taped it with scotch tape. Boom.
I squeal at the cuteness! Here are a few more Halloween craft ideas you might like! Stop on by and check them out!

Here are a few more fun Halloween crafts to check out:
Hi! I'm Landee. I blog at landeelu.com (aka Landee See, Landee Do). I love squeezing inspiration out of anything and everything as I try to make my little corner of the world a little bit prettier and personal. I love a good craft, DIY project and printable almost as much as I love a good cookie! I'm also a firm believer in happy. Come on by for a visit!
Latest posts by Landee (see all)
- Ghosts In A Jar Halloween Craft - September 7, 2019
- Halloween Slime for Kids - September 2, 2017
- BOO Wall Hanging - September 1, 2016
These are adorable! They'd be cute even outside the jars, just standing on the lids! How long does the starch take to dry? I'm thinking of doing these with a bunch of kids, but if it takes super-long to dry, that wouldn't work very well.
Hi Holly! It would be great for kids but it does take several hours for the ghosts to dry completely. The outside hardens up pretty well in about 45 minutes. Probably enough to do the eyes and then let the kids take them home to dry the rest of the way?
Thank you!
Cute idea. This is getting pinned.
Such a cute idea 🙂
I also love the ribbon wreath, I may have to try that as I have so much ribbon as I don't seem to use it
Oh my goodness. Great job! Love this take on the traditional cheesecloth ghosts.
how fun!! pinned it!
Too cute! 🙂
These are completely SQUEEEEE! You know, if you use something like StiffenStuff from Beacon Adhesive instead of starch you can remove them from the form when dry and they’ll just stand up in your jar (or out of it). Actually the starch ones might as well. Then you could make little ghostly hoards with only one form. Saves some $$, too.
Maybe add a battery operated tea light underneath? Let the ghost glow
Love that idea!