Hi there Eighteen25 readers! I’m Jen from Tatertots & Jello and I am so EXCITED to be here. Halloween is my favorite time of the year. So I look forward to this party each year!!
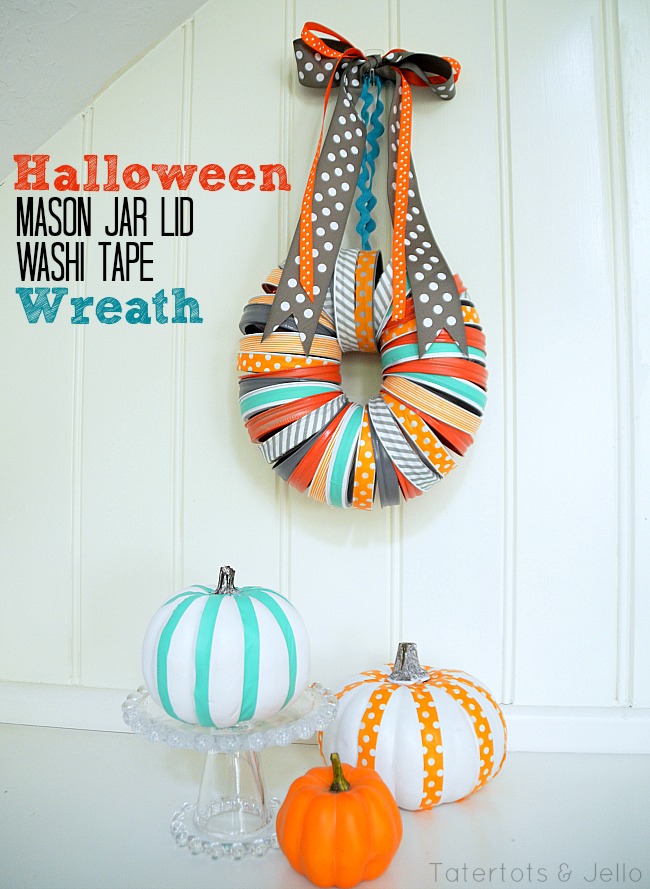
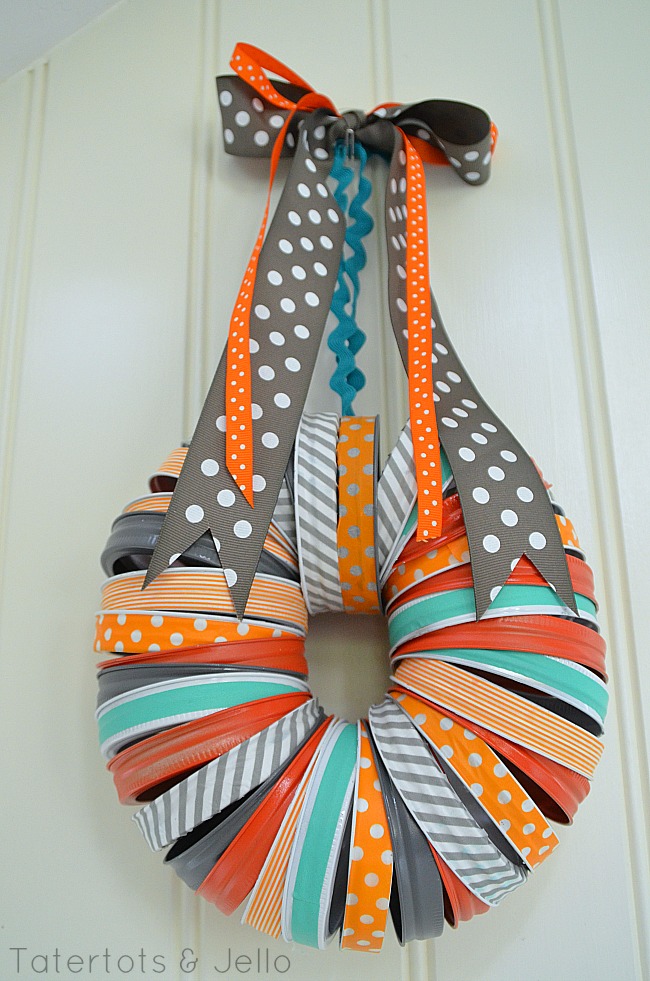
This year I’m sharing a bright and happy Halloween wreath. Have you ever seen mason jar lid wreaths? My friend Donna from Funky Junk shared a rusted one and I thought it might be fun to take the concept and create a Halloween canning jar lid wreath with paint and washi tape.

I just love the way it turned out!!
Here’s how to make this colorful and easy wreath:
Supplies:
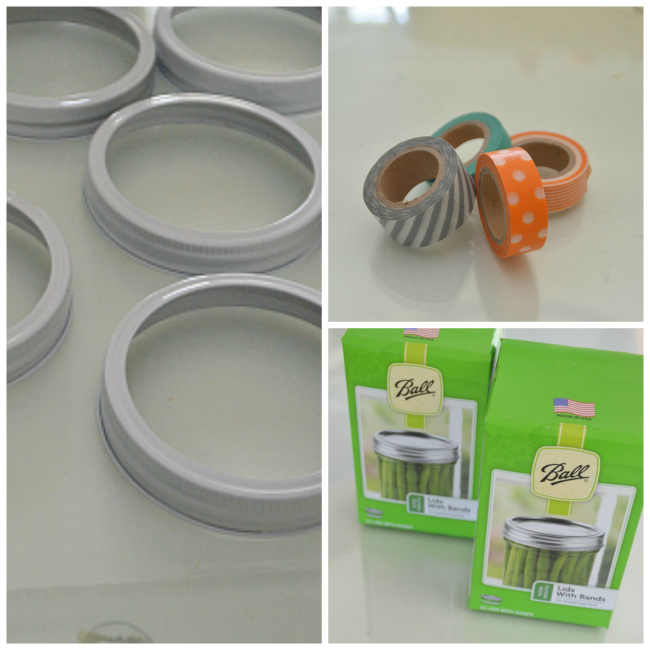
– 32 canning jar lids. You can collect the lids or you can buy the lids separately in packs from the grocery store. I found them the cheapest at Walmart. I bought mine for less than $2 for 12.
(this has been edited with additional information :))
– Paint – I used three different colors — coral, white and grey.
– Washi Tape – I used 4 different colors and patterns.
– Ribbon – to tie the lids together and also for a bow.
Directions:
- Divide up the canning jar lids into three different piles.
- Paint each pile of lids a different color.
- Wrap washi tape around some of the lids. I only added washi tape to the white lids.
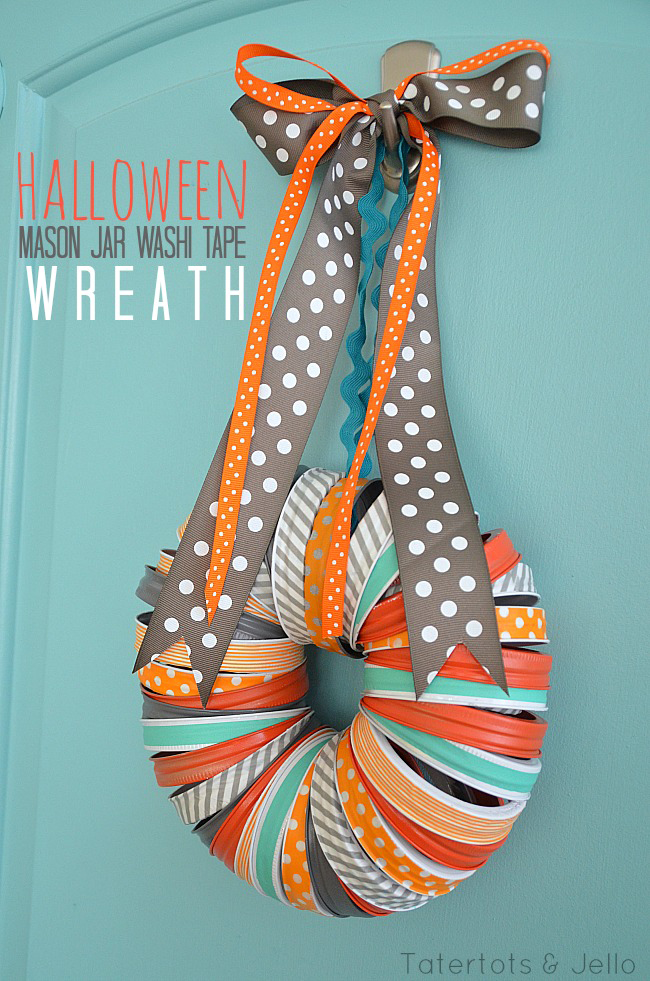
- String up the lids on a piece of ribbon.
- Once the lids are on the ribbon, cinch it tight, creating a circle of lids.
- Tie the ends of the ribbon at the top and attach a decorative ribbon to the top of the main ribbon. I used a glue gun to attach the ribbon at the top.
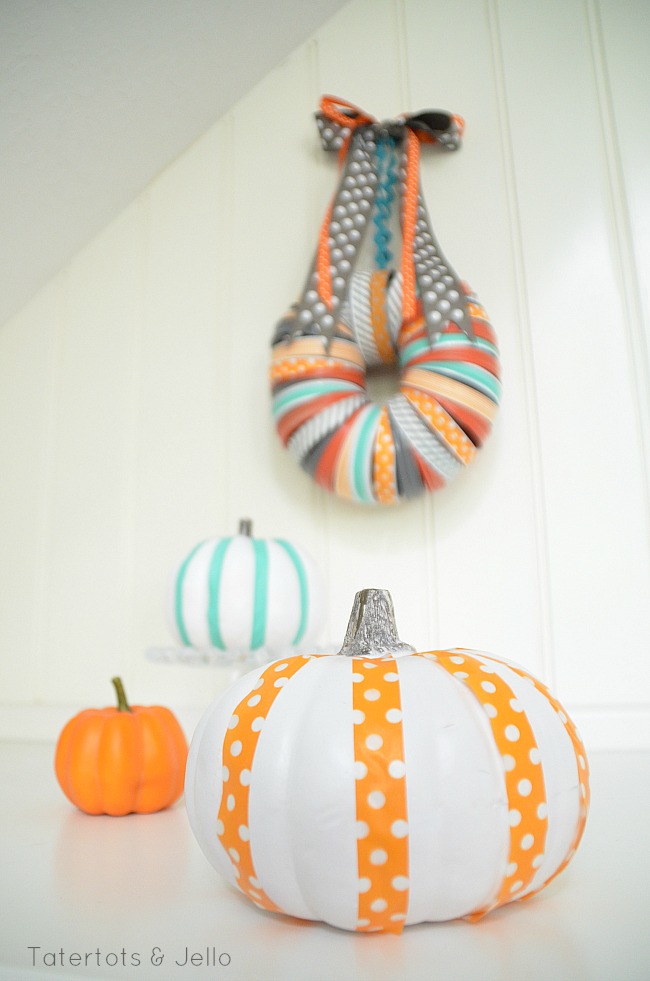
I also added some washi tape to some faux pumpkins. I just spray painted the pumpkins white and added lines of washi tape to the pumpkins. Super easy!
Thanks for letting me stop by and share this super easy and happy Halloween craft!!


Jamie
Latest posts by Jamie (see all)
- Bird Feeders - May 24, 2019
- [2014 WISHlists] Jamie’s List - December 12, 2014
- Avery Custom Photo Gift Tags - December 2, 2014
This is amazing and SO creative! I am planning a Halloween canvas fairly soon, so this is perfect 🙂
Jen, this is so dang adorable and simple, I love it! Wreaths have never really "spoken" to me, but this one does–I think it might be a first for me!
p.s. I'm so excited to see that I can buy JUST the lids, too, hooray!
This is so cute! I can see it for so many holidays and seasons!!! You are such a trendsetter! XO
Totally adorable. So many neat ideas & it's only been 3 days!
This is really cute and could make it for so much more than just Halloween. Would love to see it in black, orange, purple, and a speck of glitter.
gilburtshire.blogspot.com
This is such a fantastic idea Jen!
So cute Jen – Love it!
Oh my, I thought I have seen every Halloween wreath imaginable. This is the cutest ever, love-love the size! Fabulous pumpkins also. Thanks for sharing. You are amazing, Jen!
So fun Jen! So many fun ideas shared so far!
Super fun and cute!! I love it!! Love the pumpkins too!
Wow! Absolutely love this, Jen. You are so good with color! Pinned.
Thanks for having me!! It really is so much fun to be here. I love you girls!
xxo
These are super cute! I love this idea!!
lovin' these colors…and love that it looks so easy to make. another amazing idea! 🙂
Seriously so cute!
I love your washi tape, where did you get it? I have been looking for a good orange washi.
Super adorable, however yours pictured has 36 lids not 24–Made wreath as described above and it is TINY! You really do need more lids. Also, I wonder where you bought your lids…cheapest I found was 2.88 at Walmart. By the time you purchase washi tape and ribbon this darling project is close to $20
I count at least 35 lids there. how come the instructions say 24? I am afraid that my wreath is going to turn out way smaller than this one and not look nearly as good. Help!
I think she must have gotten the rings on clearance or bulk purchase. You definitely need thirtysix rings. Also, notice they are wide mouth rings. My walmart didn't have the wide mouth for less than $4.97. And it looks like they need to be spray painted – not craft paint like I was hoping! 🙂 Such a cute project! And so fun to do! Love all her ideas! Jen (Tatertotsandjello) is SO creative!
So cute! I was also wondering where you got that cute washi tape!
I'm already thinking about making one for Christmas. Would hold up hung outside-perfect for the Florida weather!!
Way too cute! Love it 🙂
I got the washi tape at Michaels. And the mason jar lids are from Walmart.
xoxo
The lids at my Walmart were $1.88 and I scrounged around and found a few more around my house.
xox
I am literally OBSESSED with this wreath. Swoon!!!!!
I love this so so much seriously so pretty! Great job Jen!
Confused on attaching lids, can u explain better
i believe she threaded the ribbon through the lids and then tied the ends together tight to make the circle. hope that helps. 🙂
I just made this, but used regular rings (yours looks like the wide mouth ones) & added a few more, but every time I try to hang it is doesn’t keep it’s circular shape. How did you get it to stay? Can you give more details on this?