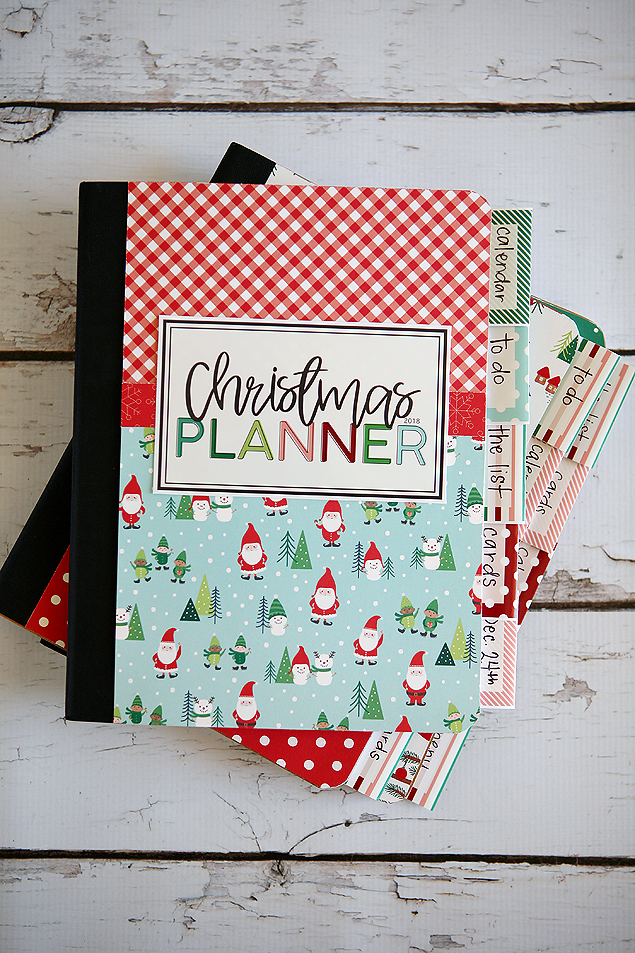
Guess what today is? Christmas Planner day…. YAY! Making these cute little DIY Christmas planners is the kick off to the holidays for us. We always try to get them out the first week in November and I think we just barely made it.
It’s always so exciting getting these Christmas Planners ready. We get more emails and requests for these than anything else on our blog and we love that! Our sister Jamie has been designing the printables for us since the very beginning (for 8 years now i think) and it’s the one time during the year that we actually go to a scrapbook store and pick out new papers!
Here’s the supply list from this year: (affiliate links are included)
- Composition Notebook
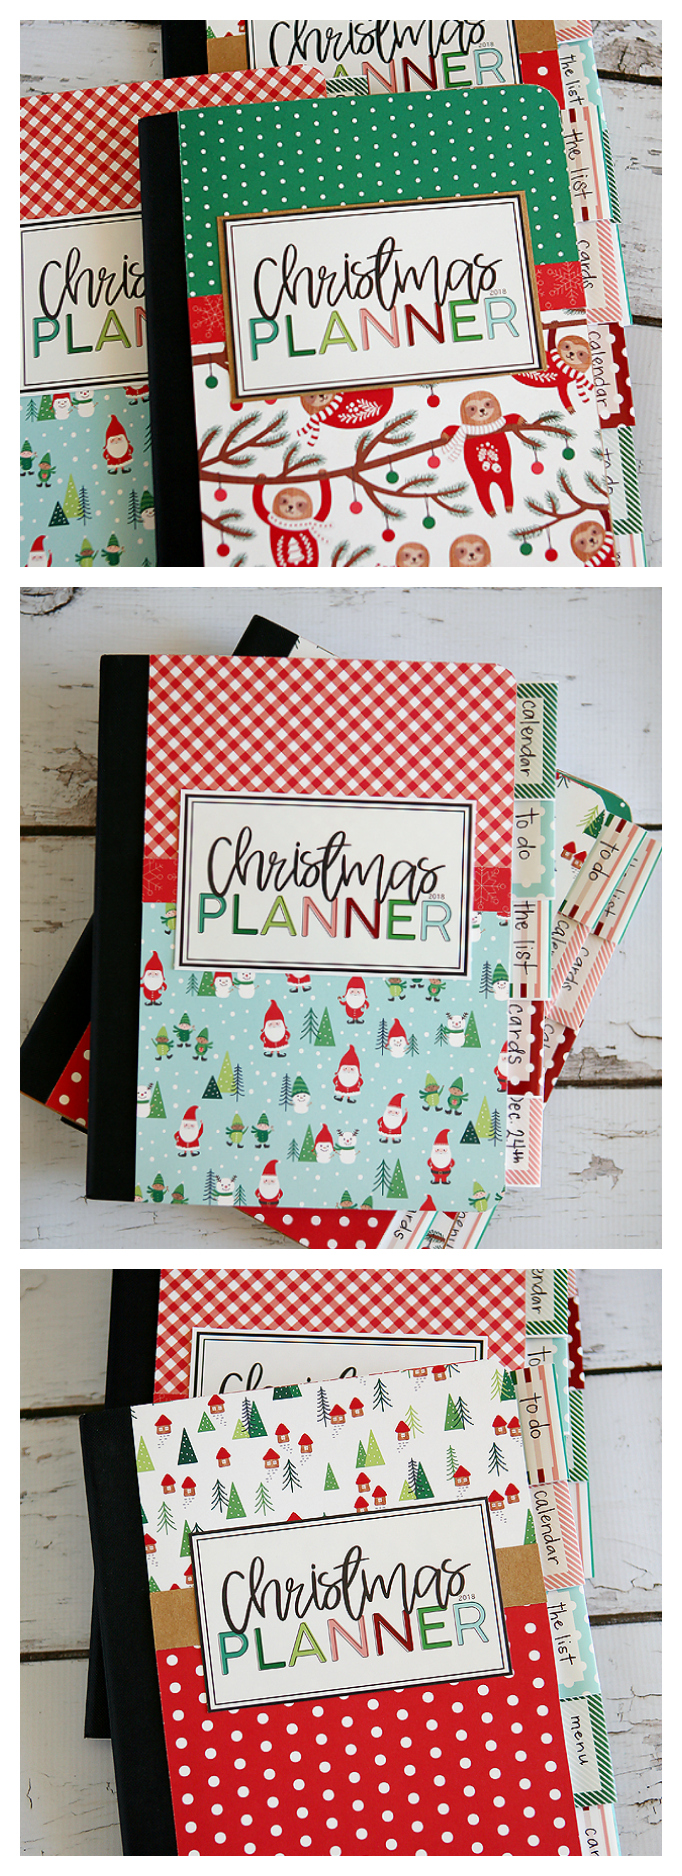
- 12×12 in Christmas Scrapbook Paper – this year we used the adorable Cozy & Bright collection from Pebbles (not sure if this link is for the 12×12 papers or the 6×6, but you’ll need the 12×12 to make your planner)
- Cardstock
- 6×9 White Envelopes
- Ultra Fine Black Sharpie
- Glue Dots
- Paper Trimmer and Scissors
- Pencil
- Stapler and Staples
- Christmas Planner Printables
How to make a Christmas Planner:
We’ve made our planners all different ways over the years and when we get together to make them we even do them all a little different from each other. There’s no right or wrong way, that’s what makes them so fun! Here are some simple instructions you can check out HERE and HERE.
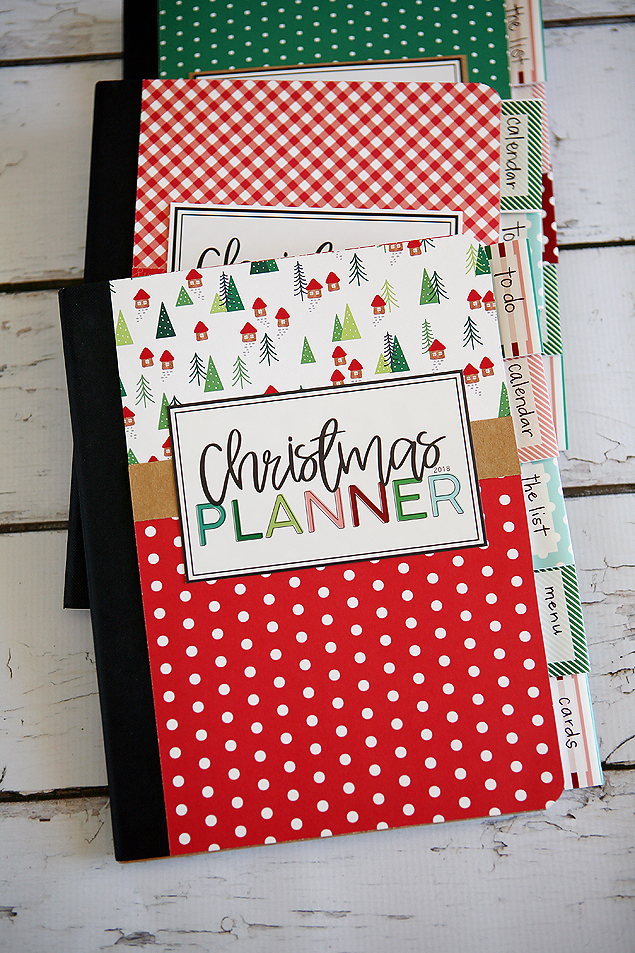
We always cut our 2 main 12×12 papers in half. That way we can use them on the front and back of our planner. We usually use 3 different sheets of scrapbook paper. A main paper on the bottom. A coordinating paper on top and then a strip of a 3rd coordinating paper across where the two papers meet.
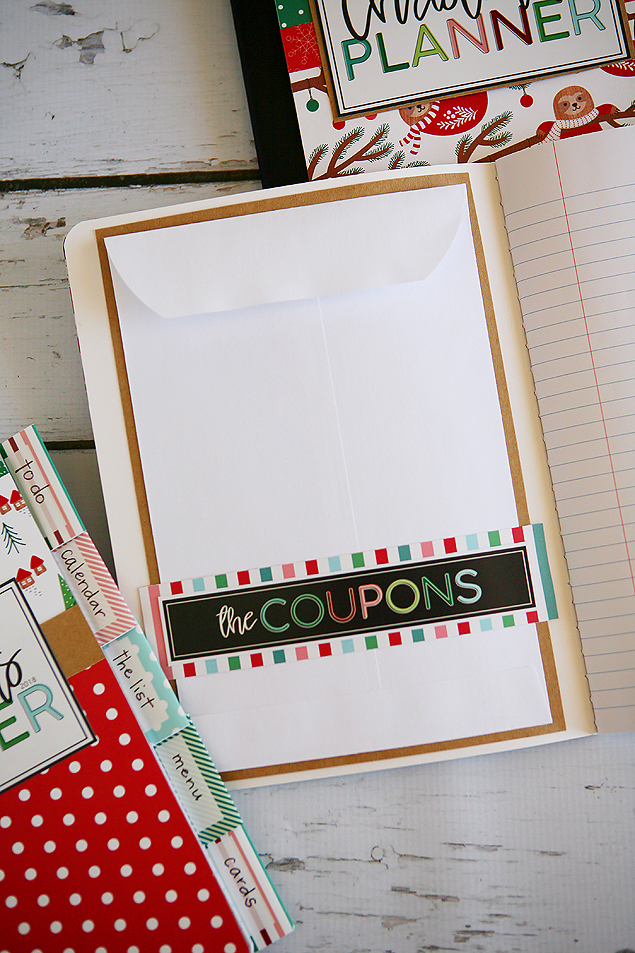
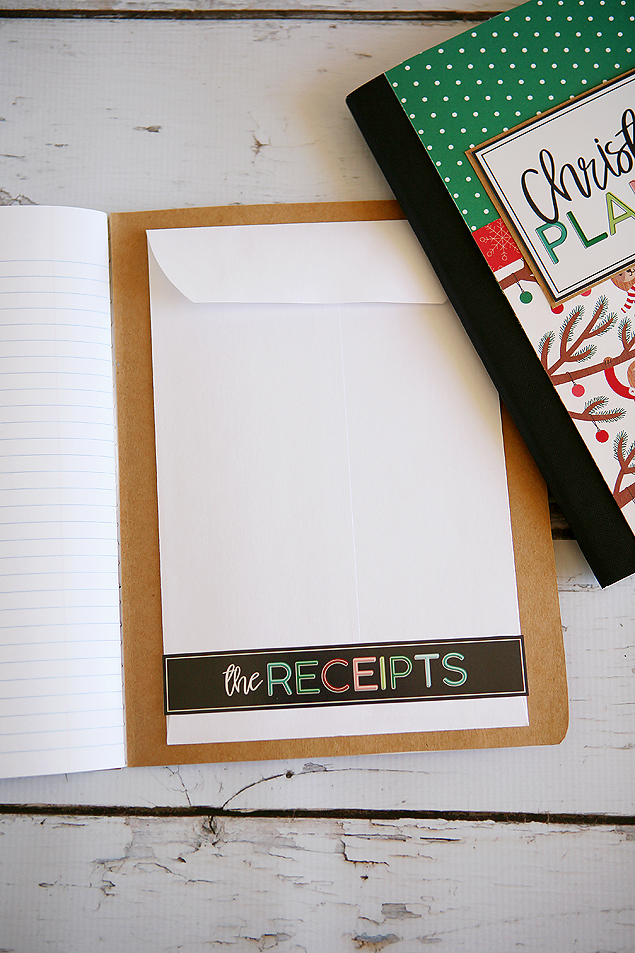
These envelopes are probably my favorite part! I love always knowing where my coupons and receipts are. You can also see how we did this part different from each other. You can either cover that inside cover completely with cardstock or just back your envelope enough that you can’t see the writing that is printed on the notebook.
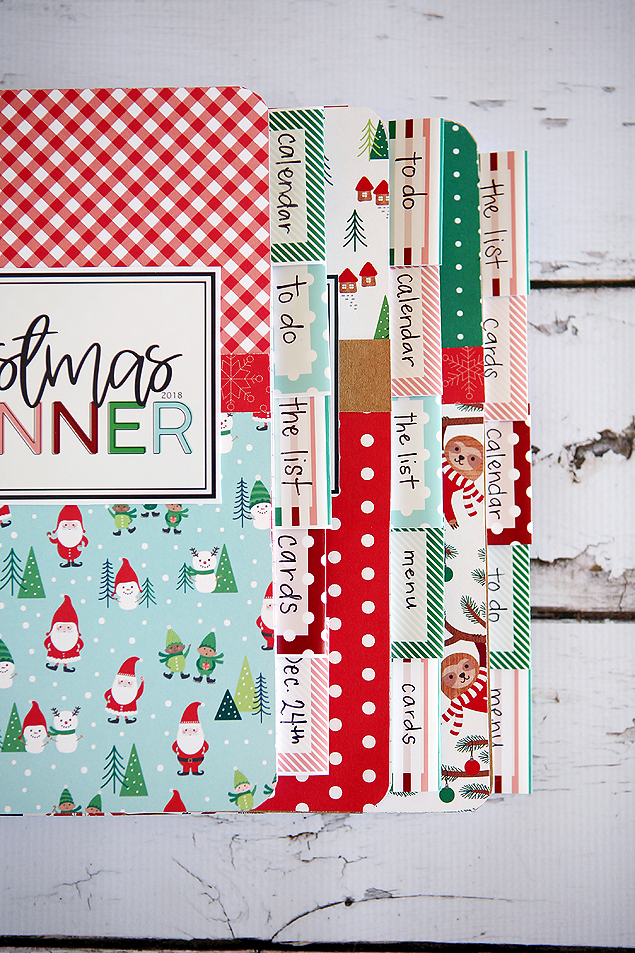
Feel free to write whatever you’d like on these tabs. Some other ideas we came up with (after) we did ours were Christmas Movies To Watch or Christmas Activities and I added Dec. 24th to mine because I always host the Annual Christmas Eve Talent Show and Dinner that night. It’s my most favorite night of the year. 🙂
To attach them we just group about 4-5 sheets of paper together and staple them right on. Then skip 10-20 sheets and do it again and again for as many tabs as you’d like to use.
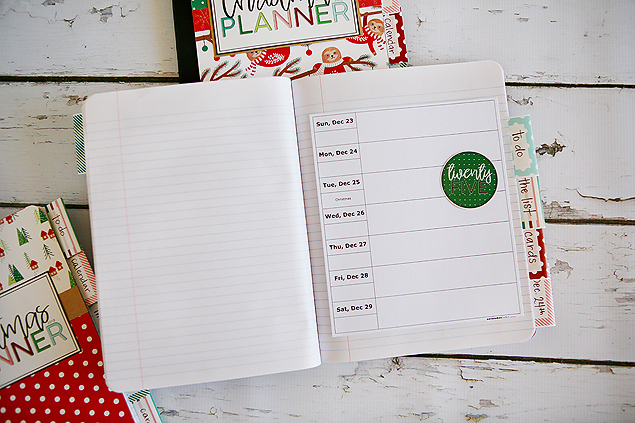
I don’t always add a calendar to mine, but I decided I did want it this year. Hopefully it can be filled with all of my most favorite things to do over the next two months. We always print the Weekly Calendar from Calendarlabs.com for free. Once it’s trimmed it fits perfect on the page. Find it HERE if you’d like to use it too.
Jamie also always includes a fun Twenty Five tag to add to Christmas day on your calendar. If you have a 2″ circle punch that’s the easiest way to cut it out, but you can always just use scissors of course.
There you have it. Such a fun little craft that takes just an hour or two to put together. Gather some friends and family and enjoy some Christmas music and hot cocoa while you make them.
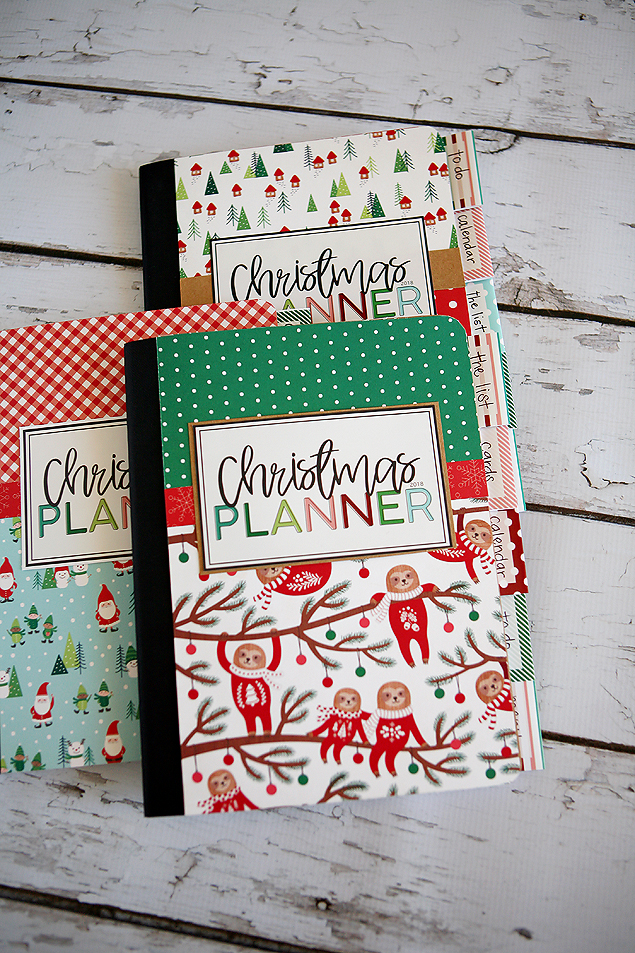
I still can’t get over how cute these papers are! Love, love!! It makes my heart happy and I’m officially ready for the magic of the Christmas Season. How about you?
Here are a few more fun Christmas posts for you to check out:
- Cutest Reindeer Rice Krispie Treats
- Friends, Neighbors and Coworker Christmas Gift Ideas
- Printable Christmas To Do List
- Footprint Christmas Ornaments
Latest posts by Jodie and Jen (see all)
- Our Friday Five 9.30 - September 30, 2022
- Our Friday Five 12.3 - December 3, 2021
- Composition Book Christmas Planner - November 28, 2021
This is charming! I am going to make one this weekend–just in time for Christmas!
So glad you like them!! 🙂
I’m having trouble printing the calendar for the Christmas planner, any tips? Love your planers, been using them for years!
I’ve loved this idea for years! Thank you for sharing! 😍
Yay! so happy to hear that. 🙂
HELLO!
I love these and want to use them as a sample for a Super Saturday craft class at my church on November 9th. for some reason the link isn’t working for me. It must be box because it won’t download any year. Any suggestions? Also wondering when you will have this years design out? I would love to have it for my Christmas Planner, but I am glad some do’t have dates!
Smiles, Cheryl
Can’t wait to see this years planner! I make them every year and the teachers love getting them too ❤
So happy to hear it! Hope to have it up next week. 🙂
Is the 2019 planner ready yet? I’m looking forward to making another one this year. Thanks
This is such a great idea. I start my Christmas everything in the Spring….I know that sounds crazy, but I make a lot of handcrafted gifts and cards so a lot of time is required. I can use this planner to mark craft shows to attend, dates I want to get together with my grandchildren to make “mom and dad” gifts, etc. I can’t imagine why I did’t Think of this before! Thanks so much for sharing!
Are you making printables for 2020 Christmas planner?