 Hey there! I’m Jessika from Hip & Simple. I am excited to be part of this year’s Spooktacular September. I love halloween. It’s my favorite holiday to decorate for and while I love a good scary movie every now and then, I prefer to keep my Halloween decor on the fun and cute side. Nothing too gory or gross for this gal. This Huge DIY Frankenstein works perfectly for that.

I love when a project turns out better than it was in my head and this, my friends, is one of those. This is huge and makes a big statement. I’ve been on this total no spending and repurposing kick lately so when I was thinking about what project to do for this post, I started looking around the house to see what I already had on hand. I was able to use leftover items to put this cute guy together. That means it is easy and inexpensive to make yourself.
Here is what you will need for this project:
- 2′ x 2′ – 1/4″ Birch Plywood Sheet
- Paint – Green, Black, White, Grey
- Paint Brushes
- Painters Tape
- Vinyl or Cardstock
- 2 – Shims
- 2 – 1x2s cut down to 2″ each (optional)
- Ribbon
- Wood or Tacky Glue
I started out by painting the board green. While that dries, you can print out and cut your stencils on vinyl or card stock using a personal cutting machine or xacto knife. Also, paint your shims and 1x2s grey.
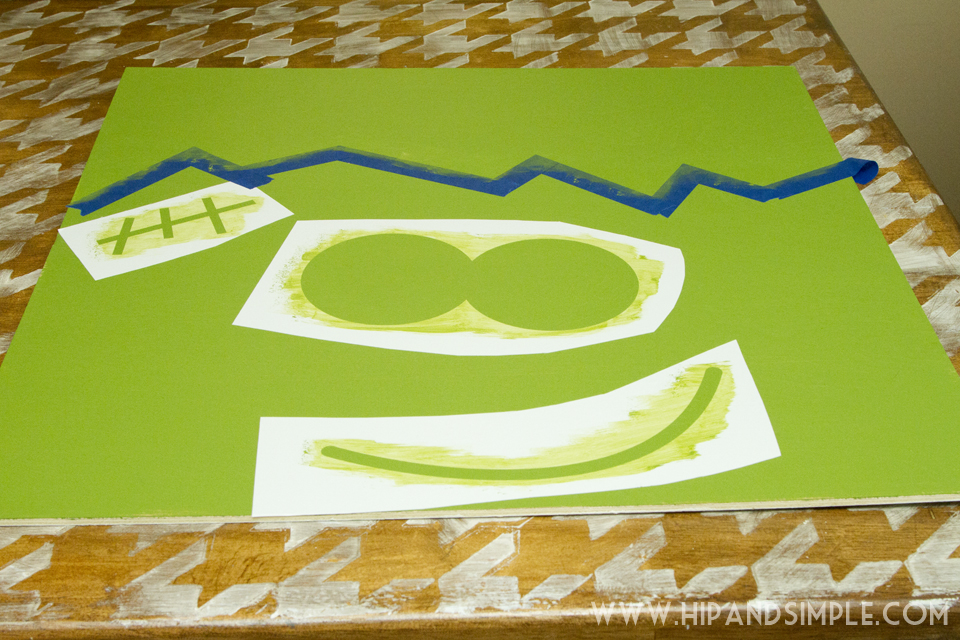
Once the board is dry, tape off the hair area. For my hair, I made random, jagged marks about 1/3 of the way down the board. Then place the stitches, mouth and eye stencils where they fit best. Apply a thin layer of the green paint over the stencils, this helps keep somewhat seal the stencil and avoid paint from bleeding under the stencil. As soon as that is dry (don’t let it dry for too long) start painting light layers over the stencil with the appropriate color. Let them dry for a minute or two in between coats but do not let it dry completely or when you pull off your stencil it will pull the paint with it and you won’t have crisp lines. Continue this until you have the coverage you want. Then carefully pull up the stencil while the top layer of paint is still wet. You will need to repeat this process for the pupils in the eyes.

Glue the shims to the back of the board where you want Frank’s bolts to be. (As you can see, I used an old board from a project that I messed up on didn’t want to sand down.) I wanted the bolts to be more 3D so I glued the 1×2 pieces to the front of the shim but you can skip that and just have the grey painted shim poke out, flat on the sides. You want to add some weight on top of the shims while the glue dries and be sure to let them dry really well. If you plan to put this outside, please don’t use hot glue, it can melt and your pieces can fall off! I also added some magnet strips on the end of the shims to keep it from knocking around on my door as we go in and out.
I sanded down the front a little and added some ribbon. You can add the ribbon with glue, nail gun or drill holes.
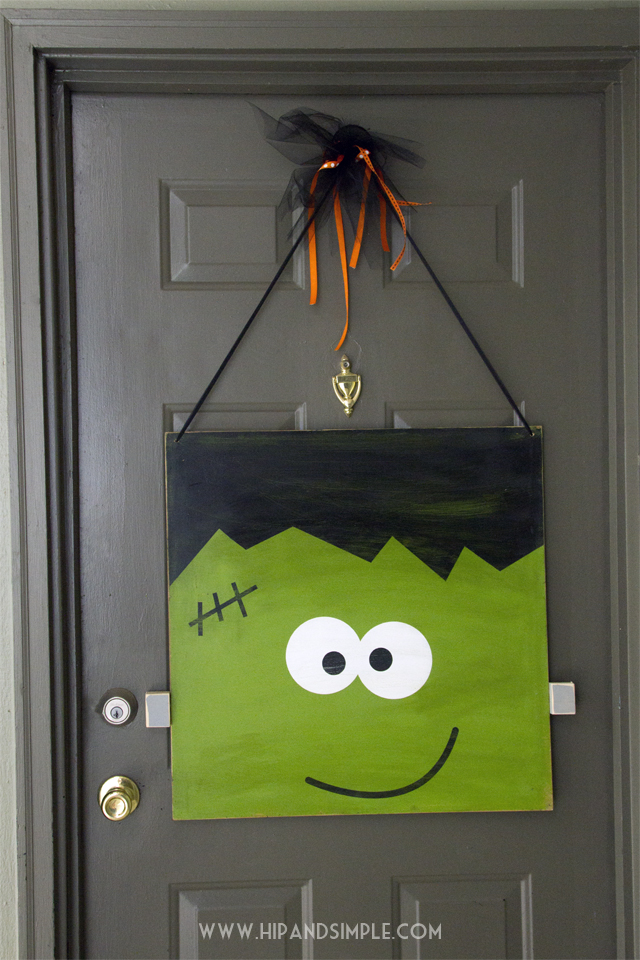
I love how big and bold this is hanging on our front door. My son is loving saying “hi” to Frank when we come home.
You can download the template for the stencils here.
I’d love for you to pop over to Hip & Simple to see what I’ve been up to. Here are a few of my favorite Halloween projects you might be interested in:


 Visit Jessika on her BLOG | FACEBOOK | INSTAGRAM | PINTEREST
Latest posts by Jodie and Jen (see all)
- Our Friday Five 9.30 - September 30, 2022
- Our Friday Five 12.3 - December 3, 2021
- Composition Book Christmas Planner - November 28, 2021
Love it! Super cute for the door 🙂