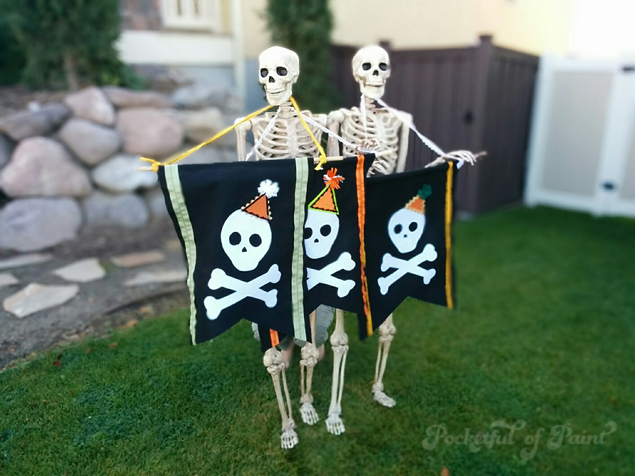
Hello fellow Halloween fans! I am Lynn from the Pocketful of Paint blog. I have been following Jen and Jodie’s Spooktacular posts for years and I am thrilled to be a part of it this year! Today I want to share my felt skull banner. It is an easy and inexpensive way to decorate your front door OR possibly every door in your house… Depends how much you love Halloween! Ha!
You will need:
white and black felt – a small piece of colored fabric – heat and bond iron on adhesive – ribbon/trims – a dowel or stick 22″ long – hot glue – scissors – ruler – iron
Let’s get started!
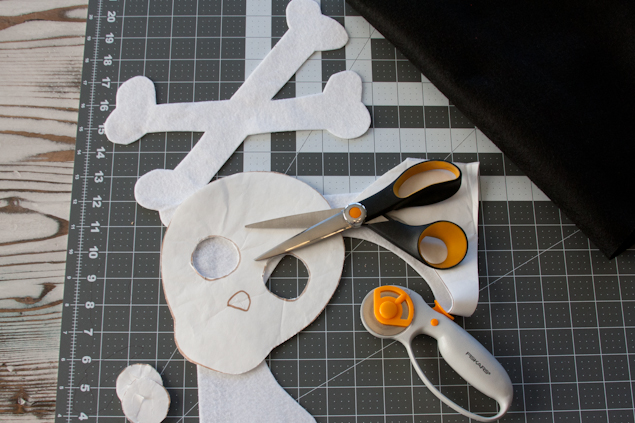
First print out the skull and cross bones pattern- CLICK HERE to print the head and CLICK HERE to think the cross bones.
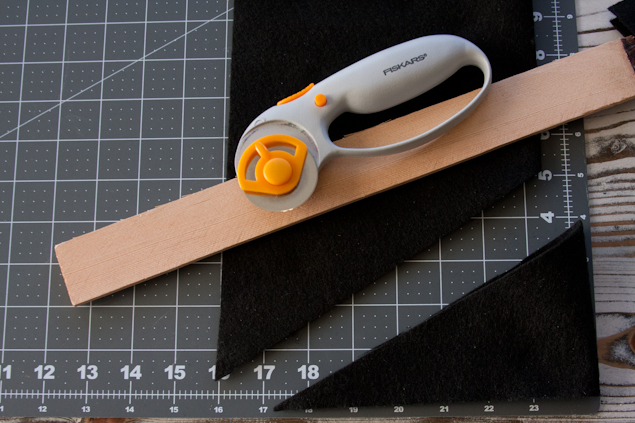
Iron your heat and bond onto your white felt. While that is cooling, cut your black felt into a rectangle measuring 18 inches wide by 27 inches long. Fold the black felt in half (hot dog style) and cut a triangle out of the bottom of the felt. You will start on the edge of the felt and cut towards the fold at an angle. Measure up 5 inches on the side with the fold. That is where your cut should end. Use a ruler or straight edge to help you cut a straight line.
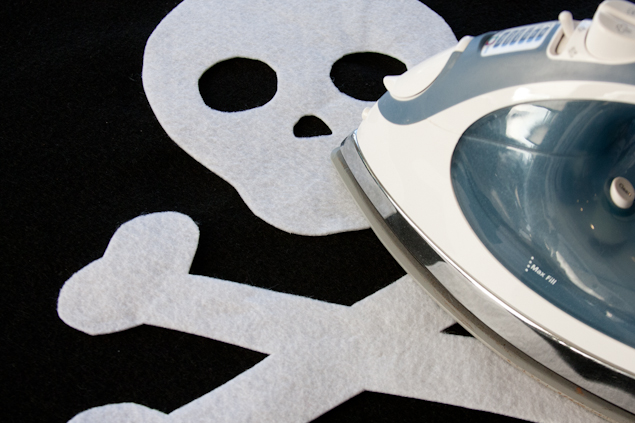
Trace the skull pattern onto the paper part of the heat and bond. Cut out the skull and cross bones and then peel off the paper backing. Unfold your black felt and place your skull in the middle. Keep in mind that two inches at the top of the black felt will be folded over the dowel, so you will loose those inches at the top. Now we are really getting somewhere!! Iron on your skull! *Be careful to not burn your felt! If you need to, place a thin towel in between the felt.
Once you have that part finished it is time for Mr. Skulls party hat! Everyone needs a good party hat.
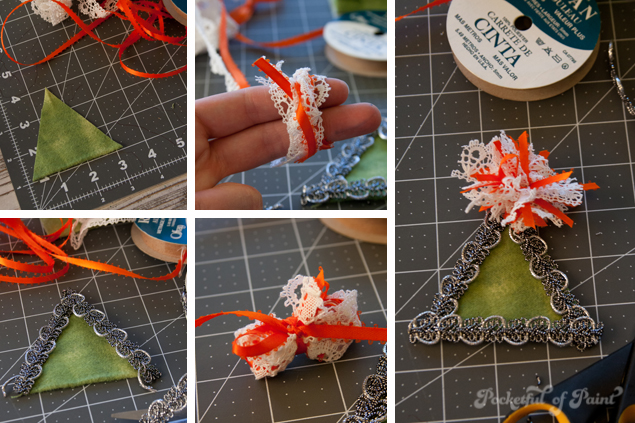
Start the cute hat by cutting a small triangle that is 3 inches wide at the base and 3 inches tall. Cut and hot glue on pieces of trim along the edges of the triangle. Create a small pom pom for the top of the hat. I glue the triangle with trim onto the skull and then place/glue my pom pom on last.
To add ribbon to the sides- cut the ribbon to length and either sew a cute zig-zag or straight stitch down the sides. If you don’t like to sew, just glue those bad boys on…it will still look just as cute!
Time to hang it up!! Flip your banner onto the back side and place a 22 inch dowel at the top. Fold the top over and glue down. Now, simply tie on some ribbon or rope to finish the job!

These banners make even dead guys happy!
I hope you enjoyed this craft! Thanks again to the Eighteen25 girls for having me!
Here are a few more of my favorite Halloween crafts:
 Visit Lynn on her BLOG | FACEBOOK | INSTAGRAM | PINTEREST
Latest posts by Jodie and Jen (see all)
- Our Friday Five 9.30 - September 30, 2022
- Our Friday Five 12.3 - December 3, 2021
- Composition Book Christmas Planner - November 28, 2021
Leave a Reply