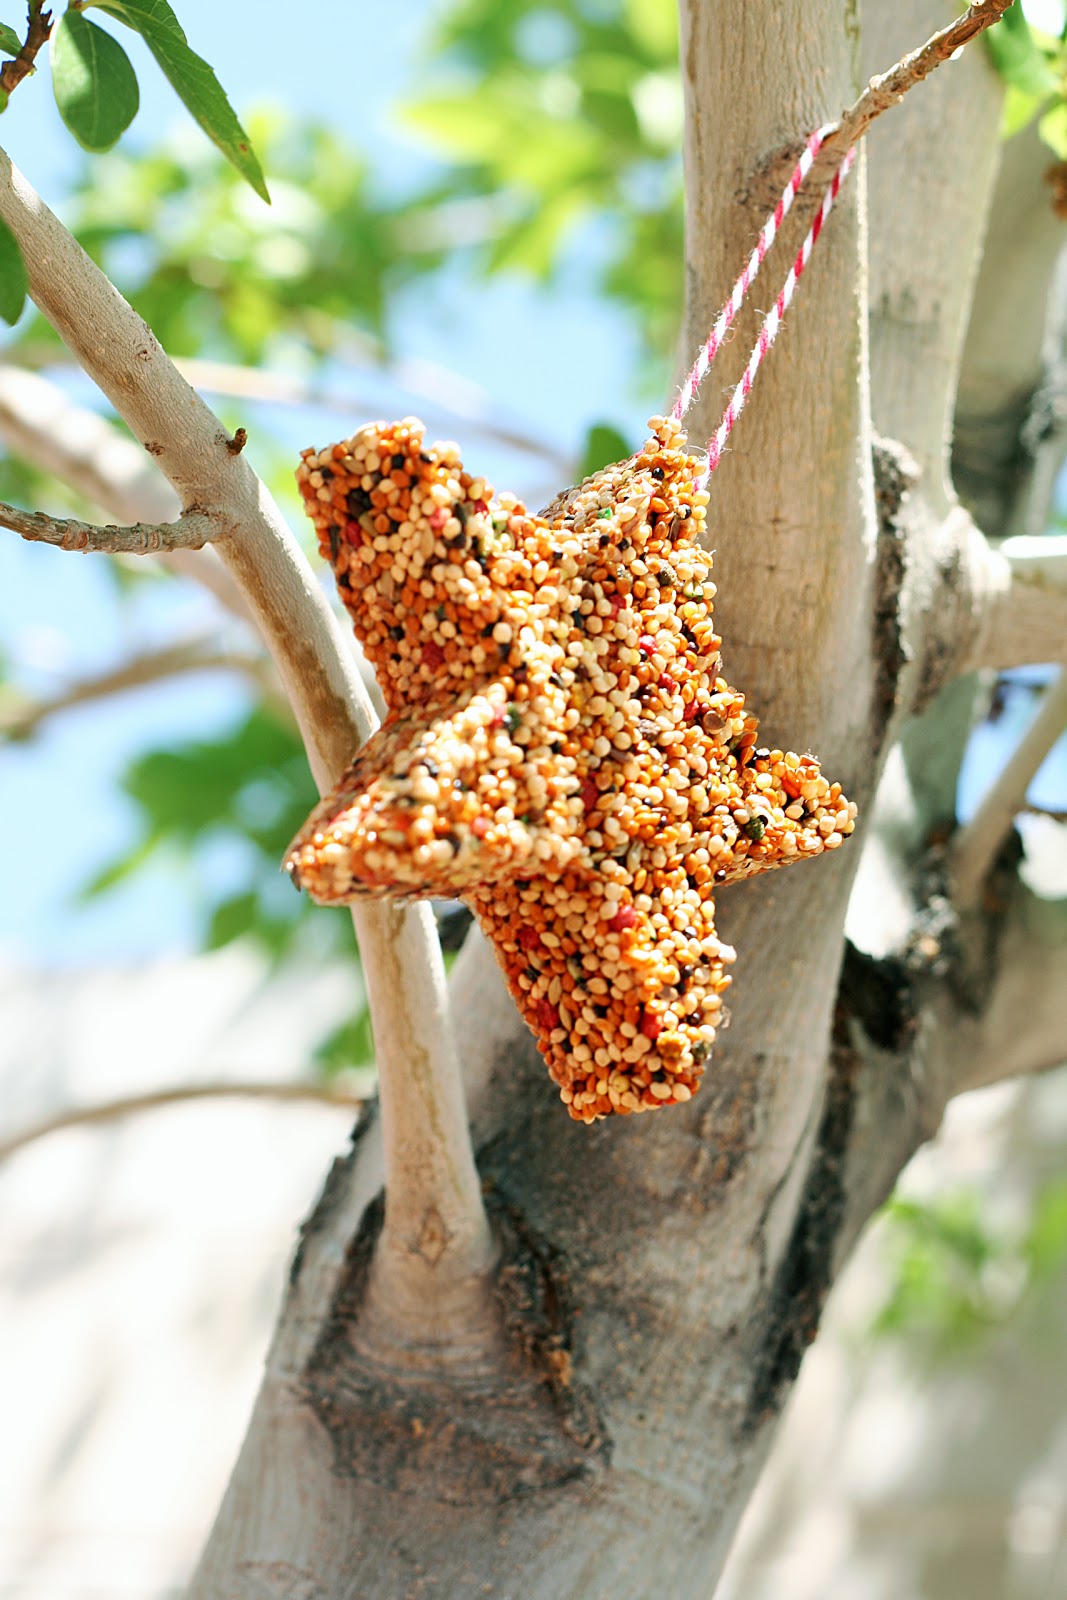
These Bird Feeders are fun for all ages to make! They are cute, easy and birds obviously love them. 🙂
One of our most favorite things to do during the summer is to have craft days with the kids. It’s dang hot here so we like to enjoy some indoor activities with the kids when we can. We are so happy to be sharing what we made recently. The kids thought they were fun to make (so did we) and they turned out so cute!!
Bird Feeder
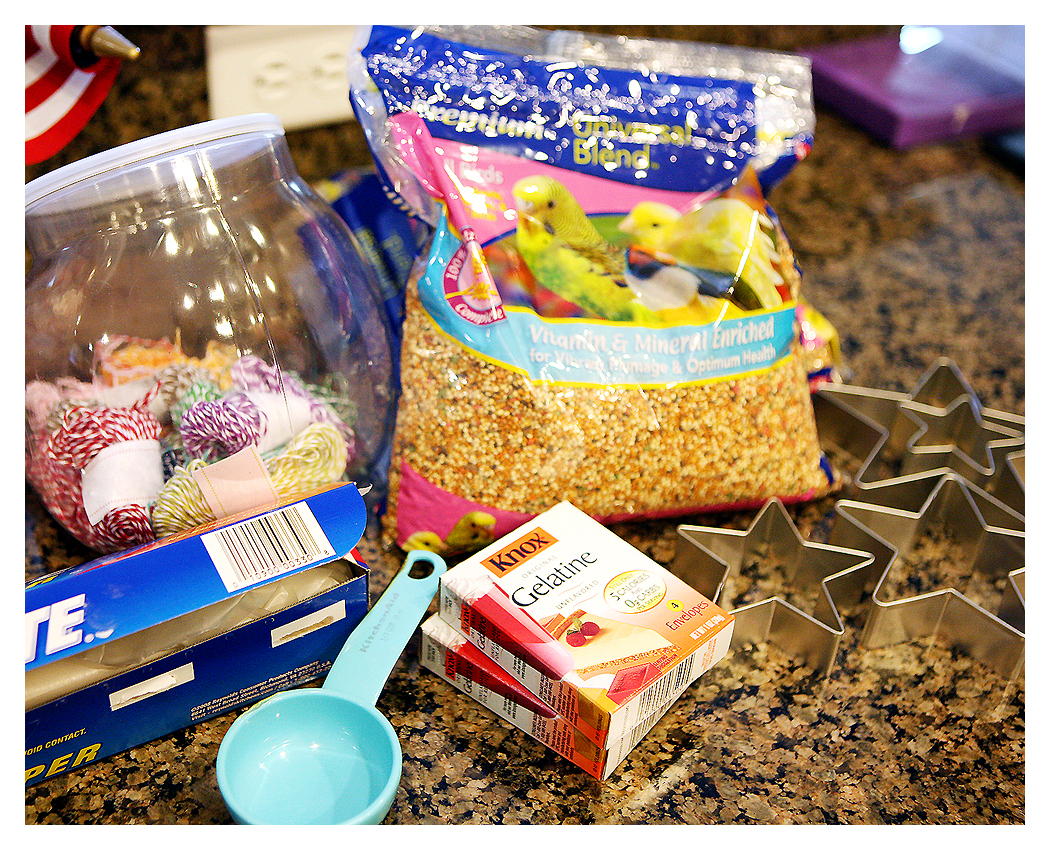
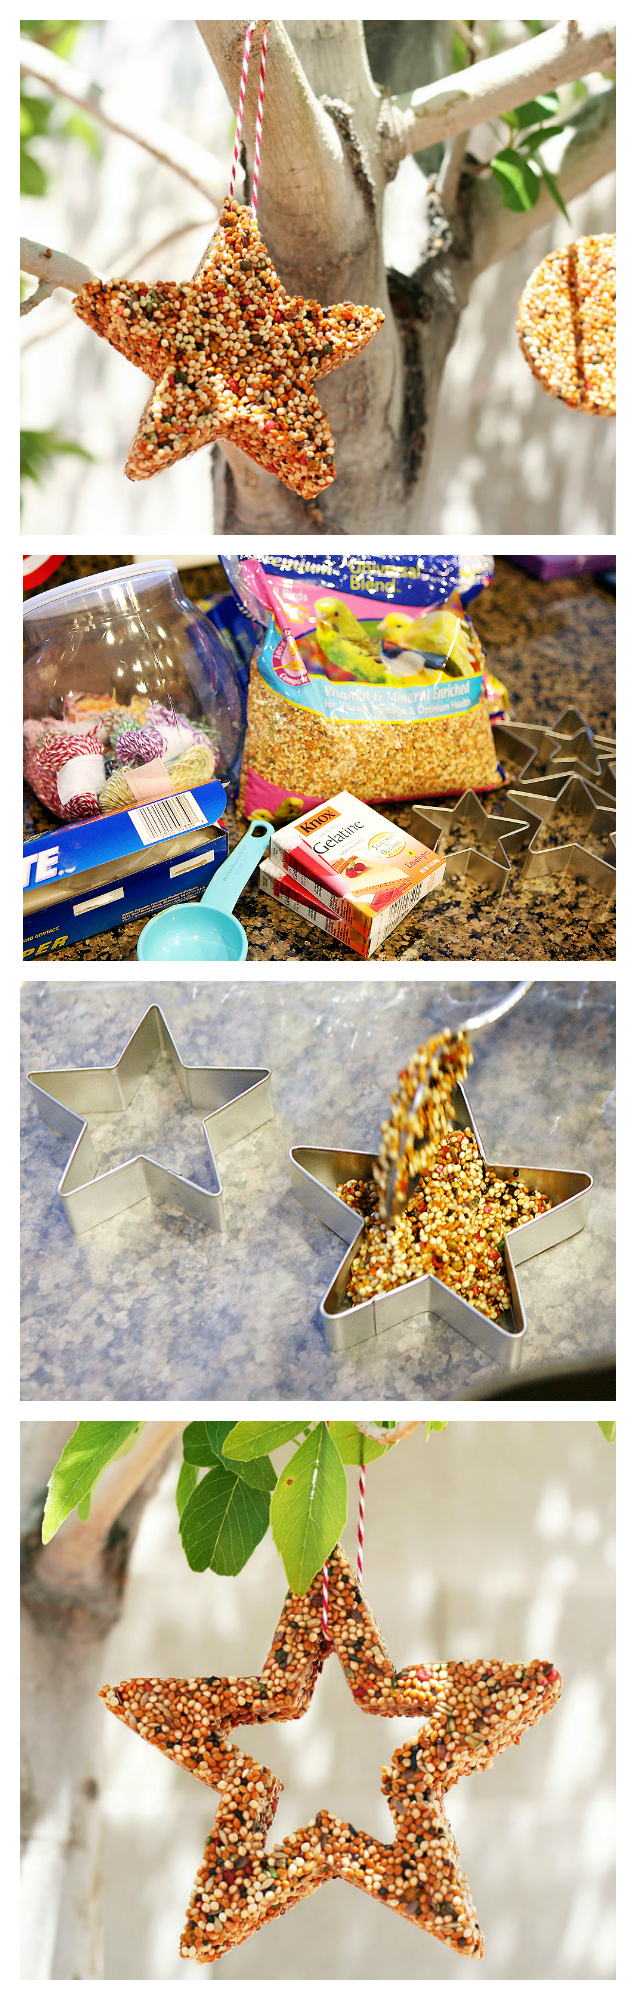
what you’ll need:
- 3/4 cup birdseed (we got the seed for small birds at wal-mart)
- 1/4 cup water
- 1 small envelope of knox gelatine
- twine or string
- cookie cutters, molds or mason jar lids
- wax paper
DIY Bird Feeder
- Mix together the envelope of gelatine with 1/4 cup of water and bring to a simmer while stirring. Continue stirring until the gelatine is dissolved.
- Remove from heat and let cool for a minute.
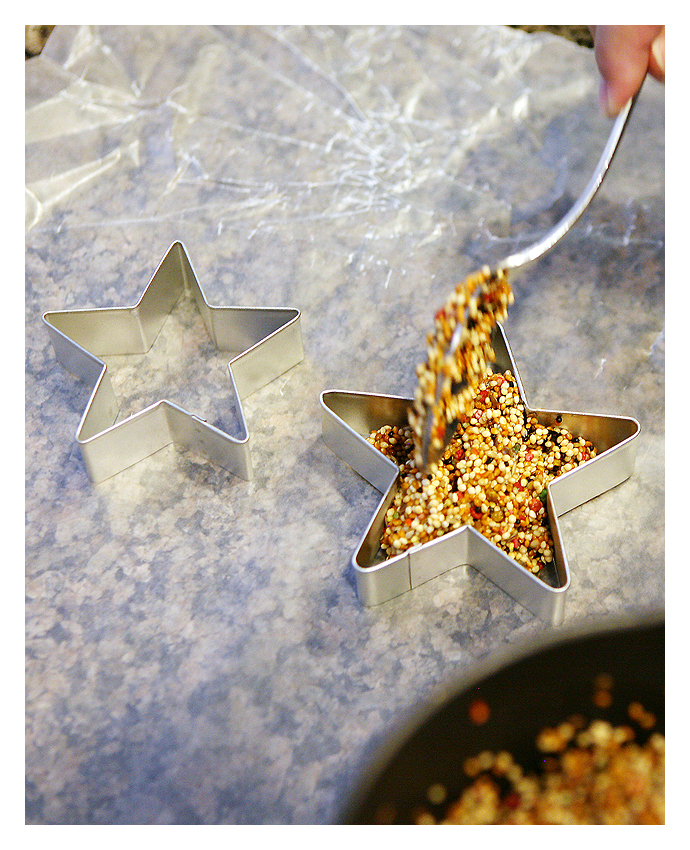
- Stir in the 3/4 cup birdseed, adding a little more if there is liquid still in the bottom of the pan.
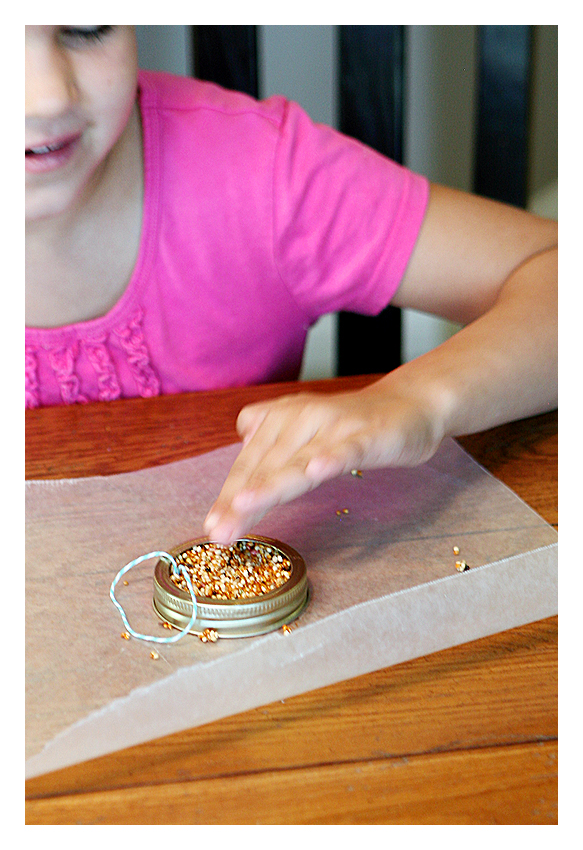
- Lay your cookie cutters out on wax paper and fill half way with the birdseed mixture.
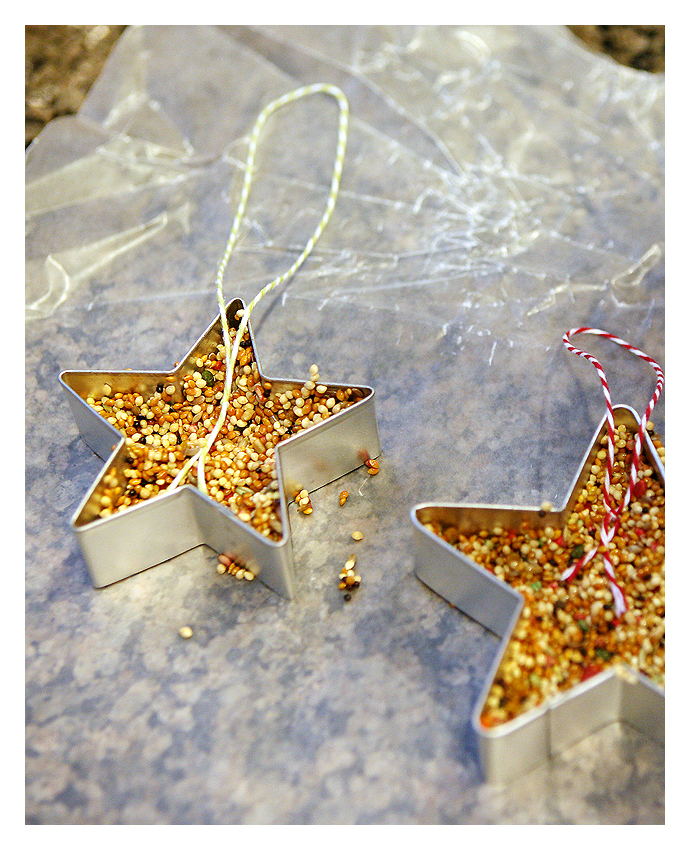
- Cut your twine, knot the end and push the knot down into your birdseed.
- Continue filling with birdseed, covering the end of your twine and knot.
- Push the birdseed evenly into the cookie cutter until it’s full.
- Allow your bird feeders to dry overnight, turning them over every now and then.
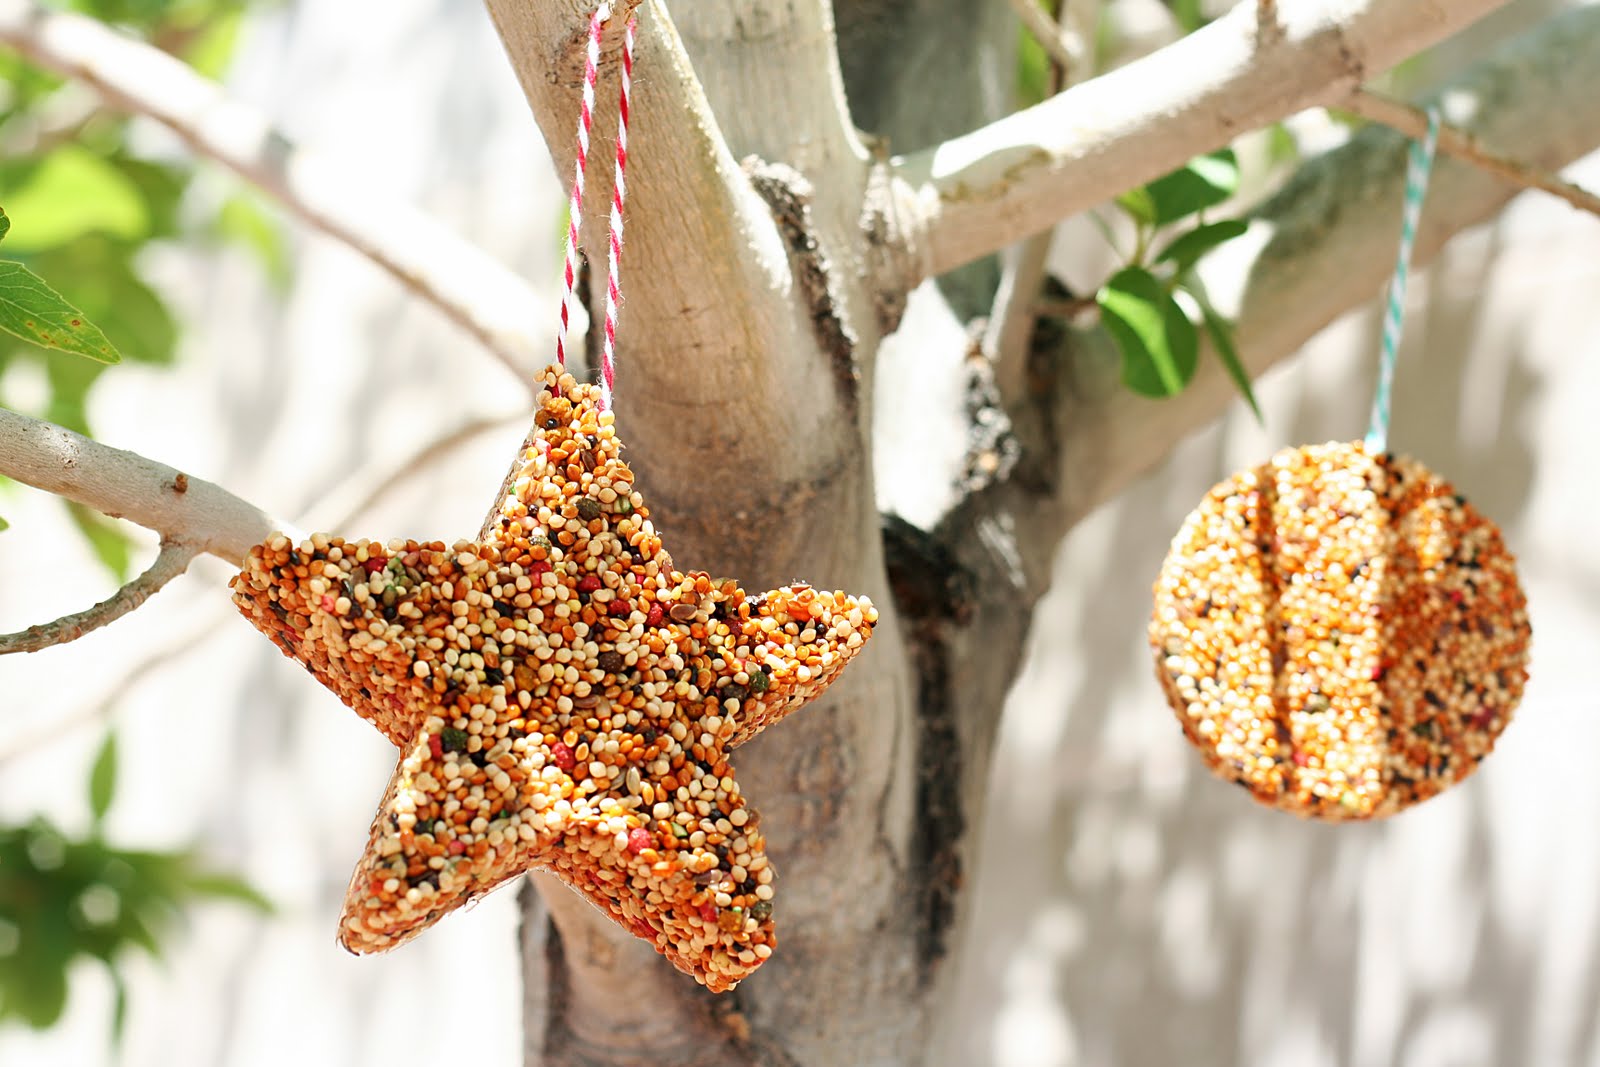
- Remove them from the cookie cutters and hang them in your trees.
- Then wait by the window to watch for your first guest.

pin this so you can save it for later:
Here are more fun Kids Crafts you’ll find on eighteen25:
Jamie
Latest posts by Jamie (see all)
- Bird Feeders - May 24, 2019
- [2014 WISHlists] Jamie’s List - December 12, 2014
- Avery Custom Photo Gift Tags - December 2, 2014
I love that idea. The kids must have thought it was so cool. Now they just have to wait for the birds! Thanks so much for sharing.
Jessica
nice post
So clever!
This is great. My kids will be excited to do this project.
So adorable, what a great summer project!
Love this! Looks a bit less messy from the p-nut butter pine cones we usually make too! 🙂
Can you give me an idea of how many you can make using small cookie cutters & one box of gelatin. These would be great crafts for my Girl Scout Troop. I am wondering about the supplies needed for 10. In the past I saw recipes with peanut butter. I have a girl in the troop with a peanut allergy so that was not an option.
Very clever idea! Will definitely have to try this as we love seeing the birds.
This is great, I always wondered how to make these, now I know! Cute!
This is a great budget DIY project! I hope you don't mind I blogged about it and referred readers to your site. I couldn't help but share such a simple & sweet project. I can just imagine a little hummingbird in the open star feeder.
This is such a great idea!! I have to print out these directions!
We will be trying these!!!
Your birds are tweeting about the gourmet meals they get. Be prepared for a whole flock to arrive. 🙂
This is a great craft for young and old alike! The birdies must love to visit your house!
I just made these with my 3yo son & he loved it. We can't wait for them to dry so we can hang them!
your blog is a wealth of creativity. so much to absorb. i have pinned many things on @pinterest. are u on there as well? do u need an invite? would love to see u on twitter so i can keep up with your craftivity. i just made that word up, but it fits your blog.
The bird feeders are adorable!
Love this idea. My son and I tried it and before any birds were able to enjoy the stupid squirrels knocked it down and ate it up 🙁 Guess we will have to figure out somewhere else to hang this cute project.
try adding some hot pepper to the mix – hopefully it will discourage the squirrels and the birds won't mind a bit.
What a great idea! My kids would love that. We'll have to try it out!
hey great blog dear
fantastic display of the creativity
i loved reading it and looking to the pictures you have uploaded
and would love to keep track of the your coming post
My kids loved this project!!! Thank you for sharing! And this project is what I used for my very first post on my new blog! I must say your pictures are way better than mine! I am still trying to learn to use my DSLR! Thank you for an awesome blog!!!
If you use suet instead of gelatin, it's even better for the birds. Love the cookie cutter idea.
If you use suet instead of gelatin, it's even better for the birds. Love the cookie cutter idea.
What a wonderful idea.. and so easy to do!
They look beautiful hanging!
I'm linking this post in my upcoming post about fun winter activities! Thanks for sharing!
My daughter and I will be making them this evening. My worry is all the squirrels I have in my wooded lot in my yard.
Try making some with crush peanuts and sunflower seeds. The squirrels will be attracted to the peanuts before the bird seed. Then hang them up away from the ones for birds.
We made these for favors at our spring wedding last year! Everyone loved them and they were very easy to mass produce! We made over 200 of them in small batches over the course of a couple weeks! Super fun!
Wonderful idea.. fun and so easy to do!
Thanks for sharing!
Thanks for the idea! My kids and I just completed them. We doubled the recipe and were able to fill 4 regular size cookie cutters! We can't wait for them to dry!
I did this last week with my 4 y/o and 6 y/o. It was fun and cute. The kids, the birds and the squirrels loved it! We will be doing this again! Thanks for the idea.
Great idea! Good idea for kids to do for Christmas presents.
Very Good Idea!!
Thanks for Sharing..
Awesome! We are going to make these for outside Christmas decorations! Thanks for the idea!
I'm giving these as gifts for Christmas, I have too many people that can't eat sweets, or have everything, or I just plain don't know what to buy. It's a very nice gift for elderly people too. Such a great idea! I hope mine turn out well.
Will do these as Christmas presents from my daughter to family, neighbors and her teacher.
Great idea!
My mom just planted a tree in memory of my dad who passed away 4 days after Christmas last year. I'm making these in Christmas cookie cutters for "ornaments" for her tree. Hope they turn out!! Thanks so much for the idea!!
Made these with my son and daughter. Had such a great time and they turned out great. You can see how it turned out on my blog.
This is really a nice post.Use a fantastic display of the creativity.
Thanks for sharing…!
I have a question, I tried these but when we tried to take the cookie cutters off they all just crumbled. I don't know if i mixed something wrong or didn't let them dry long enough (let them sit for 24 hours). any suggestions? I really want to try these again.
i made them at noon so can i give the birdies a treat at five in the afternoon i think five hours is pretty good what do you think?
Made these for the trees outside the windows of the nursing home, the residents loved them.
I made these 2 weeks before Xmas and wanted to give as thank you gifts….FAIL. They molded in the tissue paper. They were green and fuzzy white blobs with cute twine. So, word to the wise, make them when you want to use them, not ahead of time. Learn from my mistake!!!!
My daughter just did a project on birds at school. We used heart shaped ice-trays from Target so we could make small ones for her to hand out to her classmates after her presentation. They turned out real cute!
This is really a nice post and well written. Thanks for sharing this information.
I used 4 envelopes of gelatin and about 4 cups of birdseed (used wild bird seed) Started with 3 cups and had to keep adding. We made about 13 molds but we filled them up pretty well. You could probably get more.
We loved this. Thanks so much!! We blogged about it here and linked back to you!
Any idea how long the mixture can sit until they need to be put into a mold? I want to do this as a craft for my 1st graders class, but not sure how much time I would have.
You have nice blogging and very well written . Good idea for kids to do for Christmas presents.
This is really very nice and easy idea for kids to do for Christmas presents.
Every one should try this who love the bird. Nice info.
Good idea for kids to do for Christmas presents. Glad to find this amazing idea here.
Great ideas for christmas partites
I recently made these with my summer camp kids for our Christmas in July theme. They worked perfectly! We have peanut allergies, so this was a great alternative to the peanut butter and bird seed ornaments.
I love that idea. every one should follow this who love the bird. Thanks a Lot
I would like to make these as shower favors for my sister's baby shower. We wanted to make them over Christmas break, but her shower is in March. Can we freeze them so they don't mold? We need to make about 50.
Thank you! I've never made these before.
Sarah
Thank you so very much for sharing this project. I pinned it several months ago and my three year old and I finally got around to making some earlier this week. They turned out perfectly. We will definitely be making them again.
Wonderful recipe! I just finished making them. I also created a cute, vintage background for your recipe and gave you credit for the original recipe! Thanks so much for sharing!
How many do you end up making with this recipe typically??? Thank you! LOVE THIS!
Just made these with my daughter, she can't wait for them to dry. Hopefully the squirrels won't steal them 🙂
Thank you so much for your post! My wife and I have been looking for extraordinary DIY crafts/ideas that we can do together on the weekends and this bird feeder idea is great. Are there any other types molds that one can use for this project? Thanks!
These bird feeders are adorable and look like a lot of fun to make. However, I don't see how the birds are suppose to eat the food. Have you had success with birds coming to feed off these? I would love to have something creative and cute like this in my New Hampshire home.
1 cup water, 4 small packets gelatin, roughly 3+ cups of seed, makes about 12 regular cookie cutter sized "ornaments". They were about an inch thick. I left them dry 24 hours the normal way. Today I am making more. (for some reason cat ate 3…) Planning on trying to dry them in my dehydrater. Will let you know what happens. (with the ornaments not the cat) LOL
Do these turn out hard and shiny like the ones you buy at the store?
They turn out hard, but not really that shiny?? I'm not sure what the ones at the store look like. Sorry. 🙂
I think I’d like to try these for my indoor birds – cockatiels! Thanks for the great idea!
I assume that you take it out of the cookie cutter right away to let dry? Or do you leave it in the mold for 24 hours?
Leave it in and let it dry… once dry then remove the mold. 🙂
I love this idea but maybe use honey instead of gelatin.