 Howdy (that is Okie for “hello”). I’m Ashley and it is an honor to be sharing here today! My days consist of lots of Legos and lots of seemingly mundane moments. As mom to four kids (boys 3, 5, 7 and a 2 year old daughter), I try to find the most beauty in those mundane moments and relish the adventure of parenthood with my husband Chris. Aside from an addiction to painting everything that doesn’t move, I also can’t imagine life before hot glue guns. I chronicle my adventures as a mom, crafter, photographer and lover of randomness on my blog, Under the Sycamore.
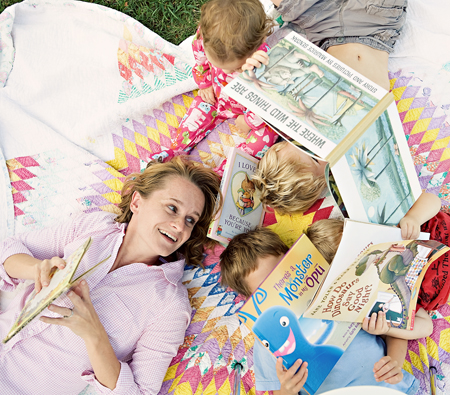
Life can be wild and crazy as a mom. I think most moms want to slow down and enjoy special moments with their kids, but the day to day running often leaves little time for just enjoying nothing. Today I wanted to share a very quick and simple craft that you can make to encourage a mom in your life.
I love the idea of surprising my kids with special treats, but often I get so buried in laundry and dishes I find it difficult to even think of something extra special to plan. I’m guessing a lot of moms are the same way. So, how fun would it be to surprise a friend with everything she needs to have a cupcake party with her kids for no special reason other than slowing down and enjoying a sweet moment together! A cupcake party kit…..
Supplies:
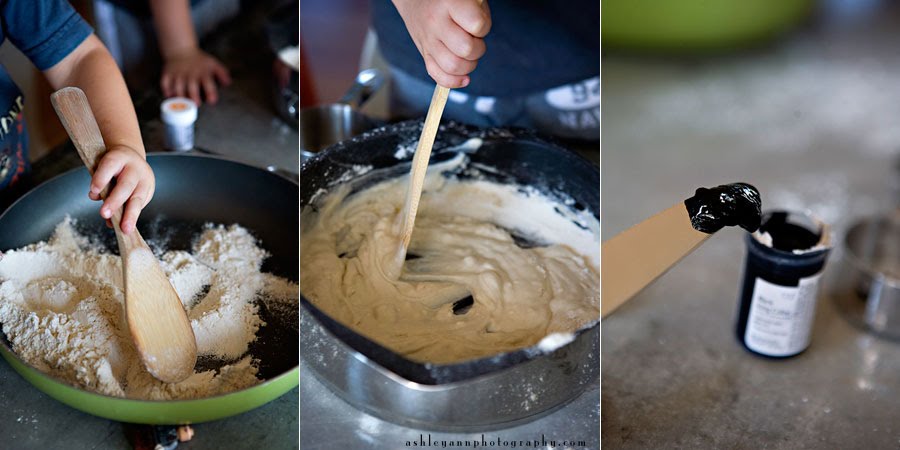
1 box cake mix
1 jar frosting
scrap paper
24 toothpicks
square adhesive tabs (or just a glue stick)
24 cupcake liners
2 sheets of vellum
decorative tape & twine
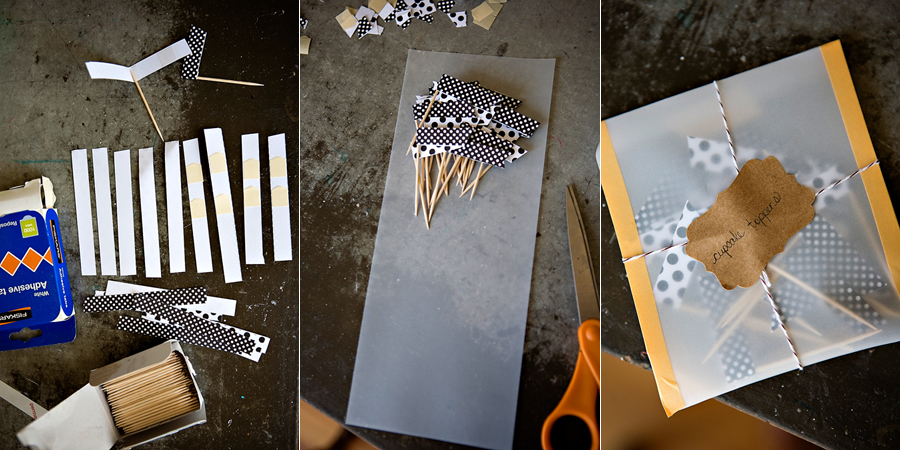
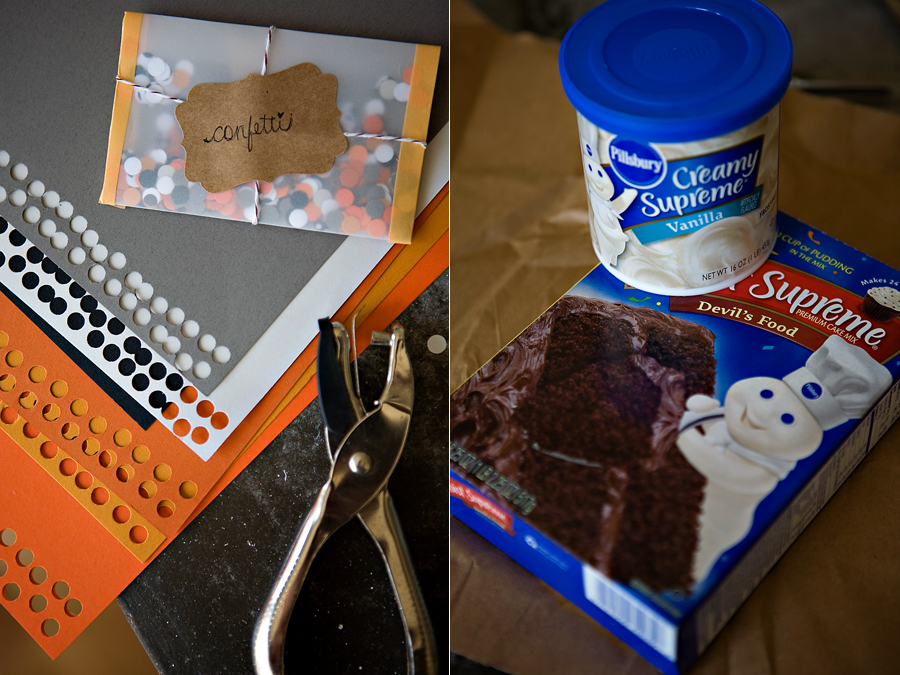
To create your cupcake toppers: cut random strips of scrapbooking paper to your desired size. You will then attach the strips to the toothpicks and then trim the ends. To do this, I used square adhesive tabs in the center and on one side, folded the paper over, pressed down, and trimmed the edge. You could create these a million different ways…or you could just buy some! I created an envelope for the toppers by folding vellum and taping the sides. It is finished off with a sticker tag & some baker’s twine.
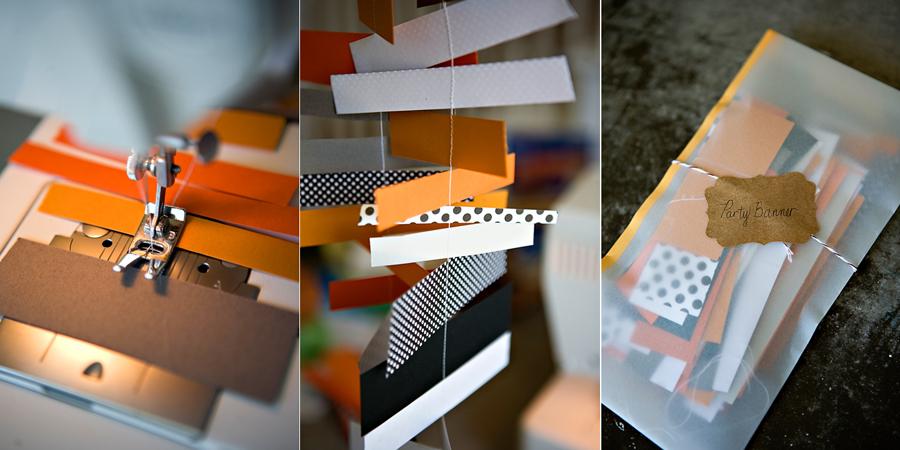
To create the party banner: Cut random strips of paper to different widths and lengths. One by one, run them through your sewing machine. I used a semi-long stitch and just white thread. Once you have a long banner, just stack it and create another vellum envelope.
Confetti & the cupcakes: Simple…hole punch and package. Confetti makes anything look happy!
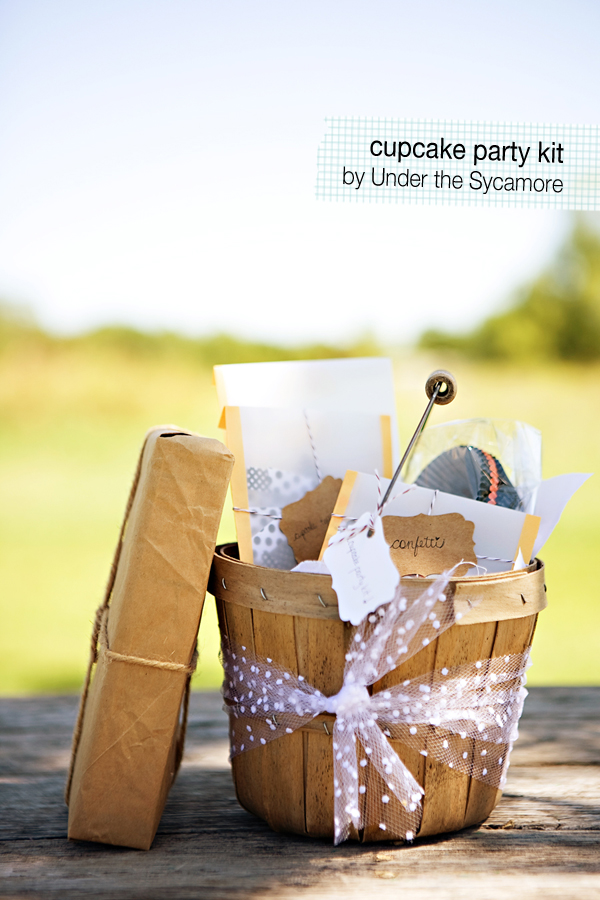
So here are all the party supplies….
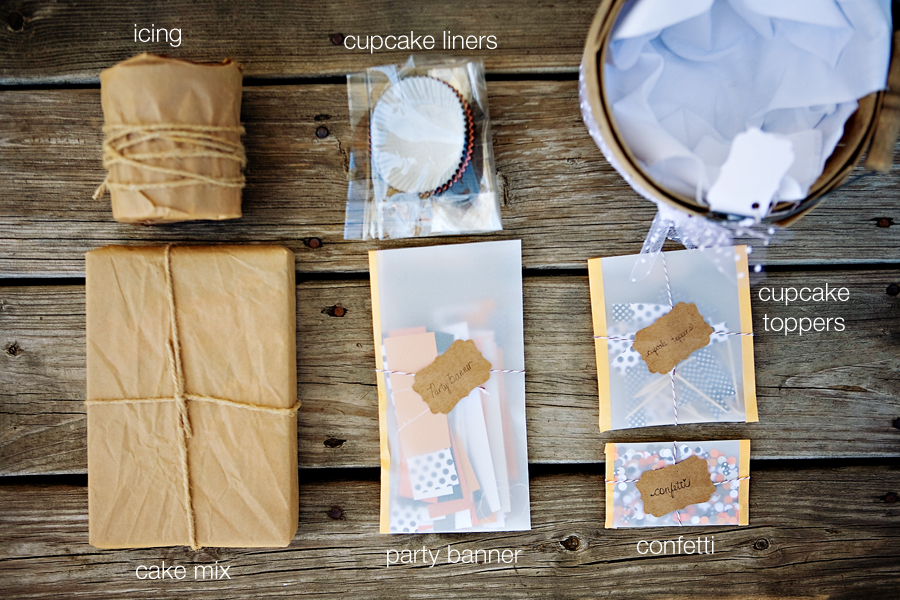
And one more look at it all tucked into a basket…


Resources: paper (Hobby Lobby), baker’s twine & kraft paper labels (Pretty Little Package)
Have fun encouraging and surprising a mom in your life!
. . . . . . . . . . . . . .
oh my goodness… i love it!! i know we would love to receive a cupcake party kit around here…. who wouldn’t?? i just love the attention to detail ashley puts into everything, but how simply it can be duplicated!!
under the sycamore is one of the very first blogs i fell in love with. i love the way she photographs the everyday life of her beautiful children. she’s also a wonderful example of love. the love she has for her family, her friends and for God and she continues to inspire me!
want to learn how to take awesome pictures like ashley? check out her snapshop!
want to learn how to take awesome pictures like ashley? check out her snapshop!
. . . . . . . . . . . . . .
this post is sponsored by:
Jamie
Latest posts by Jamie (see all)
- Bird Feeders - May 24, 2019
- [2014 WISHlists] Jamie’s List - December 12, 2014
- Avery Custom Photo Gift Tags - December 2, 2014


I love this so much that I have no words to describe how happy this makes me! Just brilliant.
I make cupcake kits every year for when we "BOO" our neighbors!
That is brilliant. The possibilities are endless!
Ashley's blog is one of my favorites… she's so creative! And I love this blog too. 2 stops I must make daily- i guess that makes me a blog stalker! lol!
aghhhh! so cute! they should box these up and start selling them!!
I love the sweetness all tucked into a little basket! This is such a great idea for any busy mommy.
This is such a great idea! I think I might send this to my girls far away.
Love Ashley and all her DIY ideas, this one is no exception!
What a great way to bless a friend! Love this!
I love, love this. Bought some cute galvanized oval buckets with wooden handles last night at Target for $2.50 to do this for a few friends…also grabbed some of their cute fall napkins/plates ($1) to put in with it too! Think I'll do a spice cake mix and cream cheese frosting…
I can't tell you how perfect timing this post came. I JUST texted my SIL that her 13 year old daughter, who wants to be a cupcake designer (this week at least) that she should have a cupcake party!
Our work is doing a "secret phantom" at work. I'm making a cupcake party kit for one of the guys at work so he can have a party with his kids. I added invitations inviting them to a cupcake party with dad (left the time/date blank of course) Thanks for a great idea! I am excited!