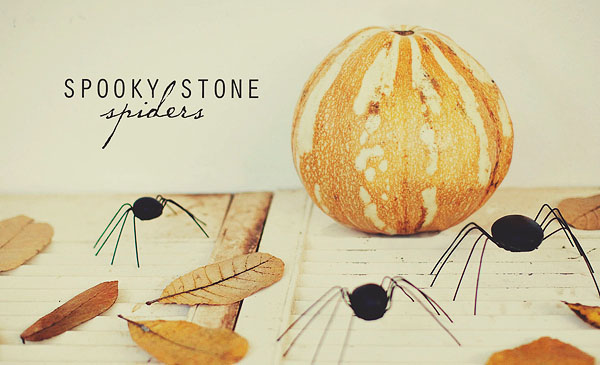
Hello everyone, my name’s Rebecca and I’m super excited to be here at eighteen25 to join in all the {spooktacular} fun going on around here!
Here’s how to make your own:
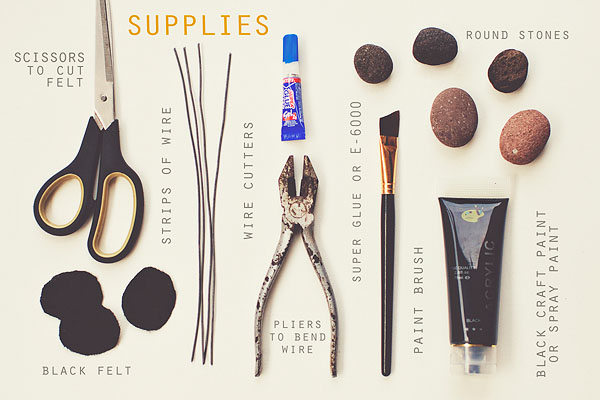
2. Grab one of your stones and four equal lengths of wire and we’re going to give our spider some legs. You’ll need a strong adhesive for this, my first attempt using my trusty glue gun didn’t quite hold up. The only thing I could find to do the trick was some super glue, but E-6000 would have worked great for this project.

3. Using sandpaper, rough up a small area of the wire where you’ll be attaching it to your stone. Nothing major, just scratch it up a bit. Now take some of your adhesive, apply it to the stone. Centering each piece of wire attach each one to the bottom side of the stone. You may need to bend your wire a bit and mold it to the shape of your stone in order for it to stick.
4.Once you’ve attached all four pieces of wire allow your adhesive to dry thoroughly. While you’re waiting, cut out a small round piece of black felt to fit on the bottom of your spider. You will stick this over the area where the wire attaches to the stone to cover it up.
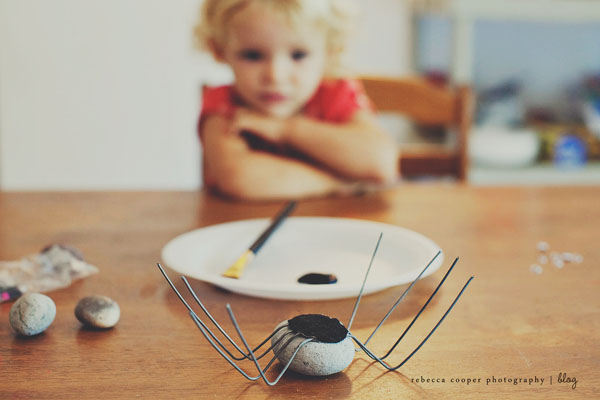
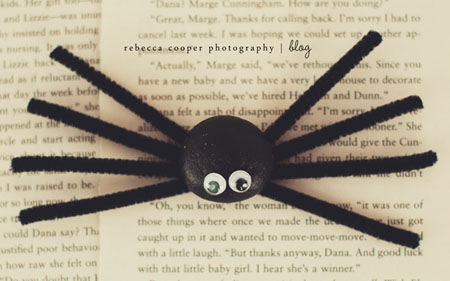
5. With the pieces of wire attached you can now start bending and molding them to form the spiders legs. I took each leg and bent them straight up and then using my pliers bent them back down again {see photo below.} I did a little bit of adjusting to get the shapes I wanted and trimmed some legs that were too long.

6. Once you have the legs exactly how you want them you can start putting the finishing touches on your spider. I painted mine black with some acrylic craft paint, using spray paint would have been my first choice, but I didn’t have any available. Once you have your spiders painted you can leave them as is or you could even attach a few googly eyes.
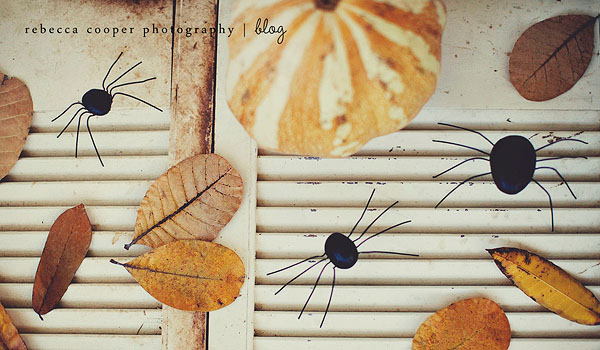
These spooky little spiders will add a fun touch to your halloween decor and the best part is they are quick to make and cost next to nothing! Love me an inexpensive simple project, don’t you!? Thanks for having me everyone, its been fun! I’ll be sharing a child friendly version of this project on my blog tomorrow, so be sure to pop in and say a quick hi!
See you soon! 🙂
Rebecca
. . . . . . . . . . . . . .
those spiders are just awesome! they will go perfectly scattered throughout my halloween decor… i can’t wait to make some. and i’ll most definitely be by simple as that tomorrow to see the cute kiddie version!! i just love that the kids and i can both be working on the “same” project!! 🙂
thank you so much rebecca! we just love you… and your photography of your tutorial is just amazing!! (as always!)
if you want to take better photos of your kids, rebecca has an eBook out called Don’t say cheese! you should totally check it out here!!
. . . . . . . . . . . . . .

Latest posts by Jodie and Jen (see all)
- Our Friday Five 9.30 - September 30, 2022
- Our Friday Five 12.3 - December 3, 2021
- Composition Book Christmas Planner - November 28, 2021
Love the spiders – especially since I have all those products on hand!!
Those spiders are terrible! I mean they are awesome but they are so realistic it gives me chills. Creepy.
These are great! And the photography is amazing!!!
i just love those spiders!! i can't wait to try them… and now i'm heading over to your site to see the child version! so fun. thanks.
Excellent! Those are really fun and creepy.