Hi everyone! I am so happy to be here at eighteen25 today. Last year this series was one of my favorites for the year, so I was so excited when I was asked to share something for this year. And of course, I love the ladies at eighteen25. Each day I look forward to seeing what their creative minds have come up with!
I’m Kiki.

I blog at Kiki Creates where I love to share a bit of my crazy creating life with you! I share projects, tutorials, free printables and the inspiration it all comes from! I also have a fun little etsy shop where I sell all kinds of inspirational art prints for your home.

I can honestly say that 90% of what I do is inspired by my 3 little kiddos. Their love and enthusiasm for life’s little details keeps me on my toes and on the look out for the next fun project.
This project today was no different. As I was looking through the Pottery Barn for kids magazine lately, I saw a sight that I was inspired by immediately:

I loved everything about this tree, but I was LOVING the little treat baskets that were hung as well. They would make a cute little bucket to send with your kids for Halloween parties for each kid in his/her class. I love how small and quick the baskets I made are to whip up…and even easier if you do them in an assembly line!
To start each basket you will need:
toilet paper roll
colored paper
hot glue
shape cutter (anything to cover the bottom of the bucket)
craft glue
glitter
Here are the first 6 steps to get you started:

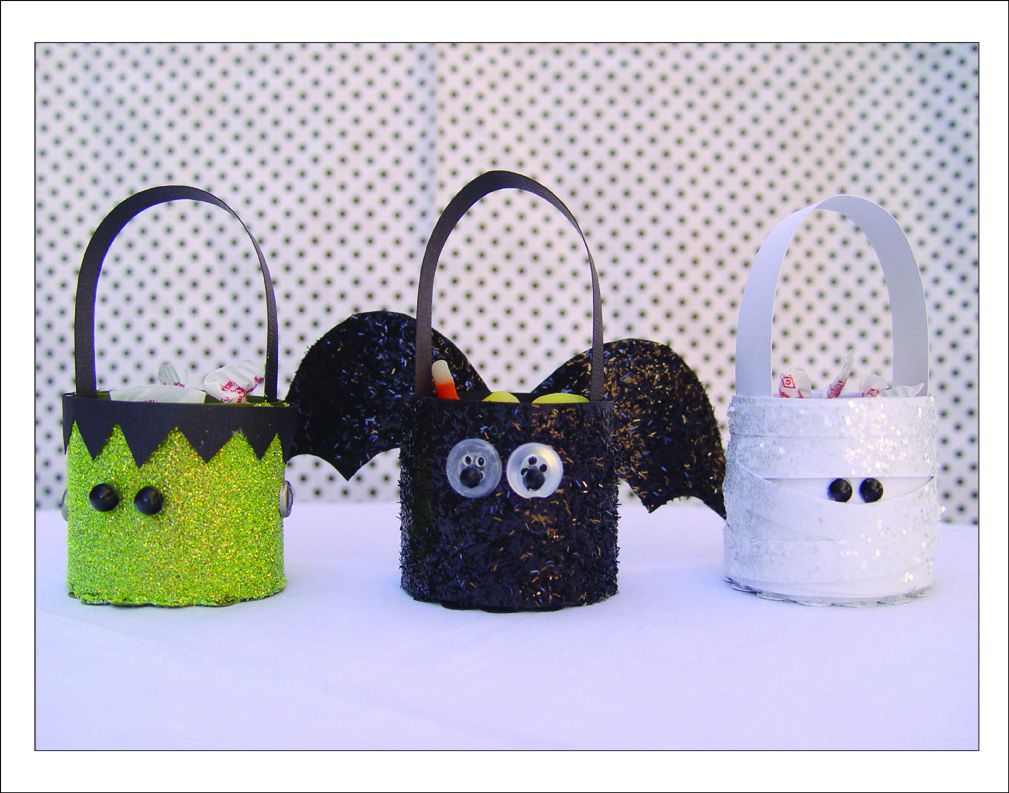
Today we will be making a Frankenstein, a mummy and a bat treat bucket.
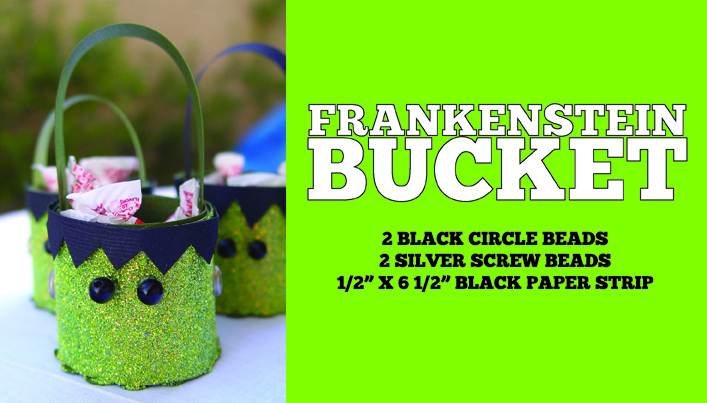
To make the Frankenstein bucket:
I used green paper on all but the hair, in which I used black. After getting your bucket to step 6, take your 1/2″ x 6 1/2″ strip of black paper and cut triangles out of it for his hair. Glue the hair on with hot glue. Glue the beads on for eyes, then simply add the screw brads on the side of his head. I found my brads that look like screws at Michael’s a few years ago and they are seriously perfect for these! Any silver circular brads will work, though.

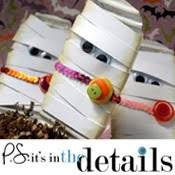
To make the mummy bucket:
Do NOT glitter the base paper. Instead, skip straight on to gluing down the 6 skinny strips of white paper. I found it is easiest to glue the eyes down first and then work the white paper around the eyes to make it look like a mummy. Lastly, glue and glitter the mummy in white!


To make the bat bucket:
Cut out the bat wing template in black paper and glue and glitter it first! Simply click on the above picture and print as you please. After getting to step 6, let your black glitter dry and then glue the buttons on, followed by the beads on to the buttons. Lastly, glue the wings on the the back of the bucket for one super cute bat!
Aren’t they just sweet?!
I couldn’t resist making a tree for them to hang on:

And excuse my “non-professional” photography..and bask in my beautiful ROCK back yard 🙂 as I show you the Pottery Barn Knock off Halloween tree that I whipped up. Aren’t those little treat buckets so cute on there?! I can’t wait to give one to kids who come by to visit and play this next month.

If you want a double dose of Halloween today, stop on by my blog for directions on how to make this Halloween tree for under $20! I look forward to seeing you there.
Thanks again, eighteen25. You are three amazing ladies and I feel SO lucky to know you.
. . . . . .
those are just adorable! i mean you know how we feel about glitter, right?
and kiki is right up there with glitter in our book. she has a heart of gold and we just love her to pieces!
i’ll meet you over at kiki creates today because i need to know how she made that fun tree too!!
kiki is also the mastermind behind this awesome print that we get emails about ALL the time!!
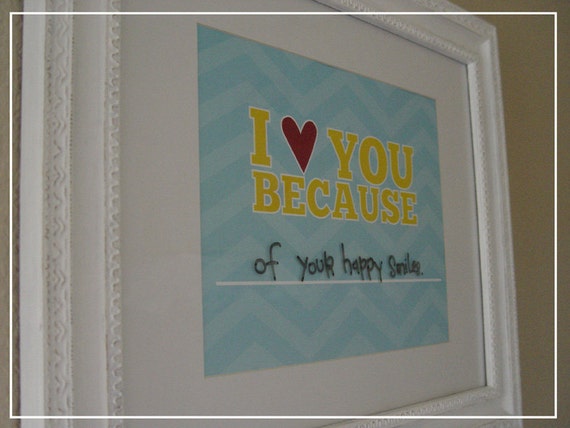
it’s pure genius!! 🙂
. . . . . .
this post is sponsored by:
I'm Jen Sedillo, one of the bloggers behind Eighteen25. I love creating and crafting, reading good books, visiting new places and being with family!
Latest posts by Jodie and Jen (see all)
- Our Friday Five 9.30 - September 30, 2022
- Our Friday Five 12.3 - December 3, 2021
- Composition Book Christmas Planner - November 28, 2021
I'm not sure what's more amazing….the cute little buckets, the spooky tree, or the chevron table she photographed it on!!! Gosh! Thanks so much for sharing!
I love the idea of cutting down the toilet paper rolls to make baskets. Very cute!
WOW! That is the cutest thing ever! I have to go visit her blog now. Thank you for introducing us!!! 🙂
Recycle-Reuse! I love that you started with toilet paper rolls and I'm assuming paper towel rolls work well too. Great idea to do with the grands!
one word- "ADORBS." winks-jen
That is soooo cute and creative! Lovely project!
These are super adorable!!
Clever idea! Toilet paper rolls. who would of though! Pure genius! : )
Natalie
http://www.projectdowhatyoulove.wordpress.com
Those are so cute! I love a good recycling project and adding glitter makes it even better! These would be really great classroom treats for my boys!
so very clever and cute, Kiki!