this is my first attempt at project life.
and i realize we’re three weeks into january already, but here is my title page.
i’m hoping to share my pages with you every week.
(and maybe some free downloads once i get the hang of it)
[PROJECT LIFE] TITLE PAGE
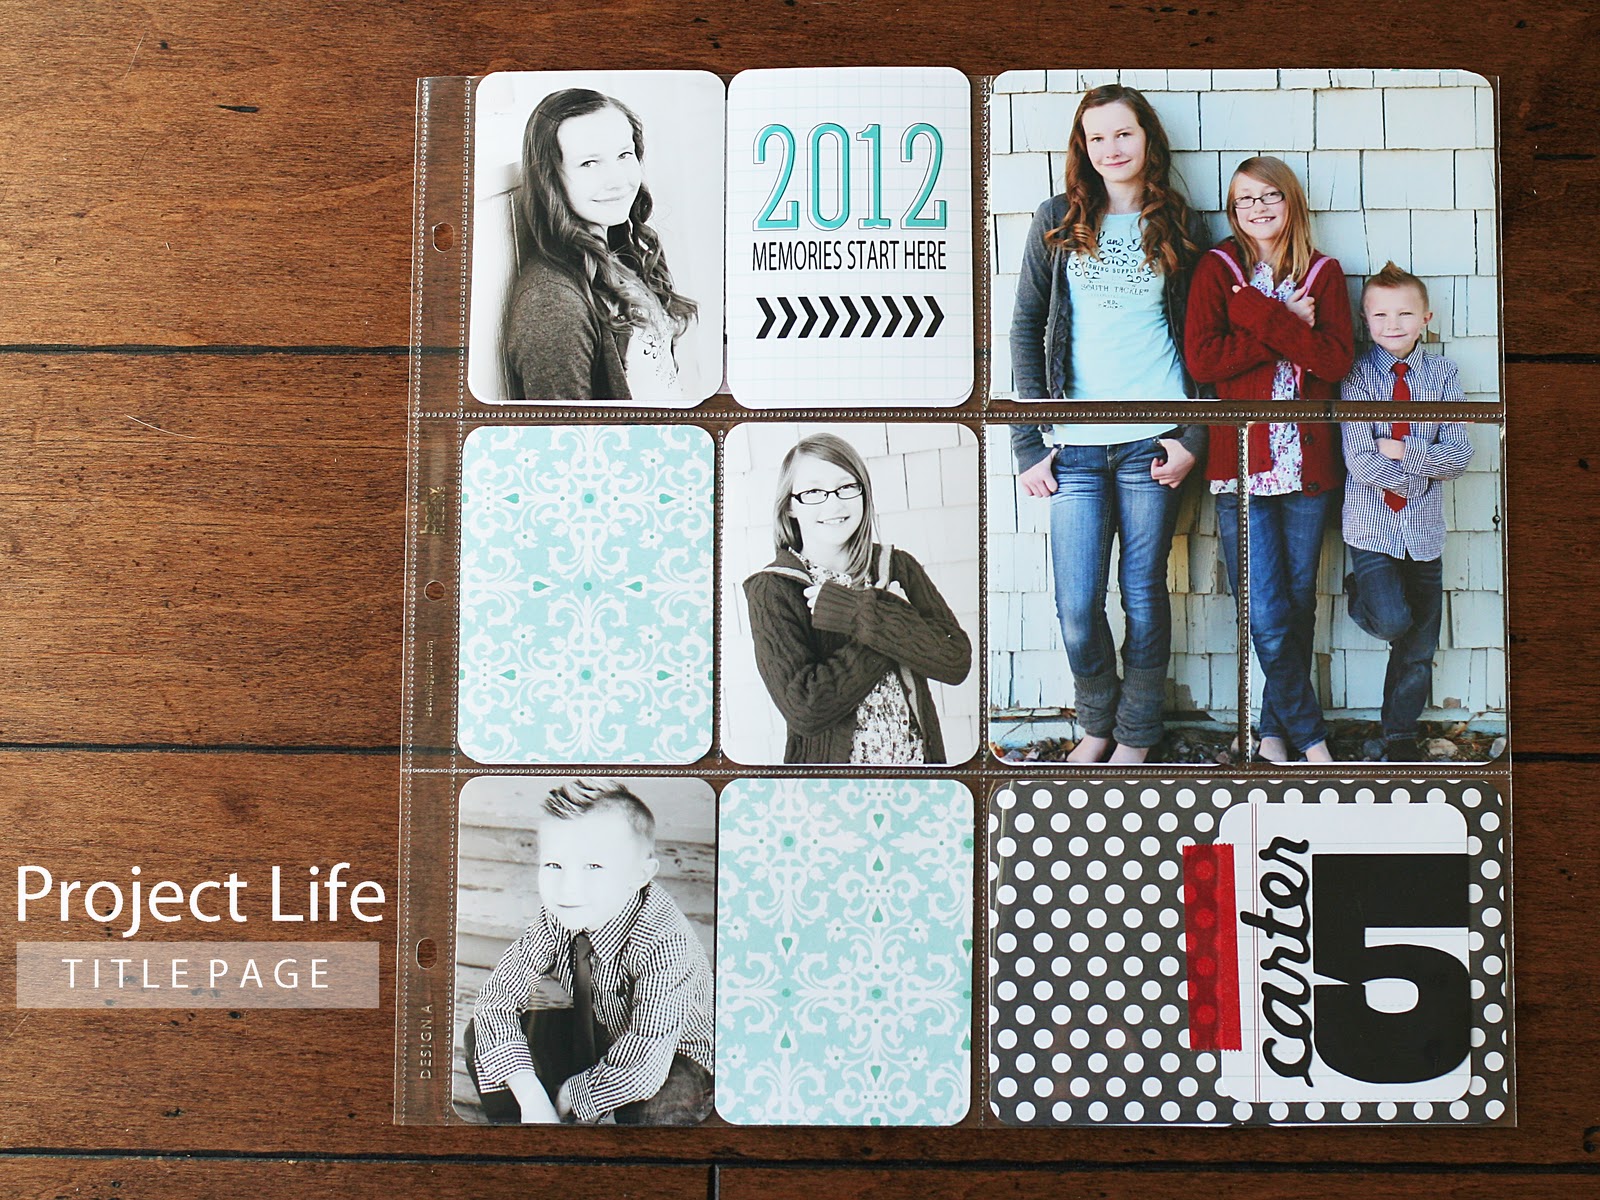
SUPPLIES USED: clementine edition project life kit… silhouette cameo… washi tape… copied the cute idea for the 2012 card from here
i think my silhouette and washi tape are going to be my two best of friends during this project. it’s been YEARS since i’ve done an actual paper scrapbook page and i’m really having fun getting back into the groove.
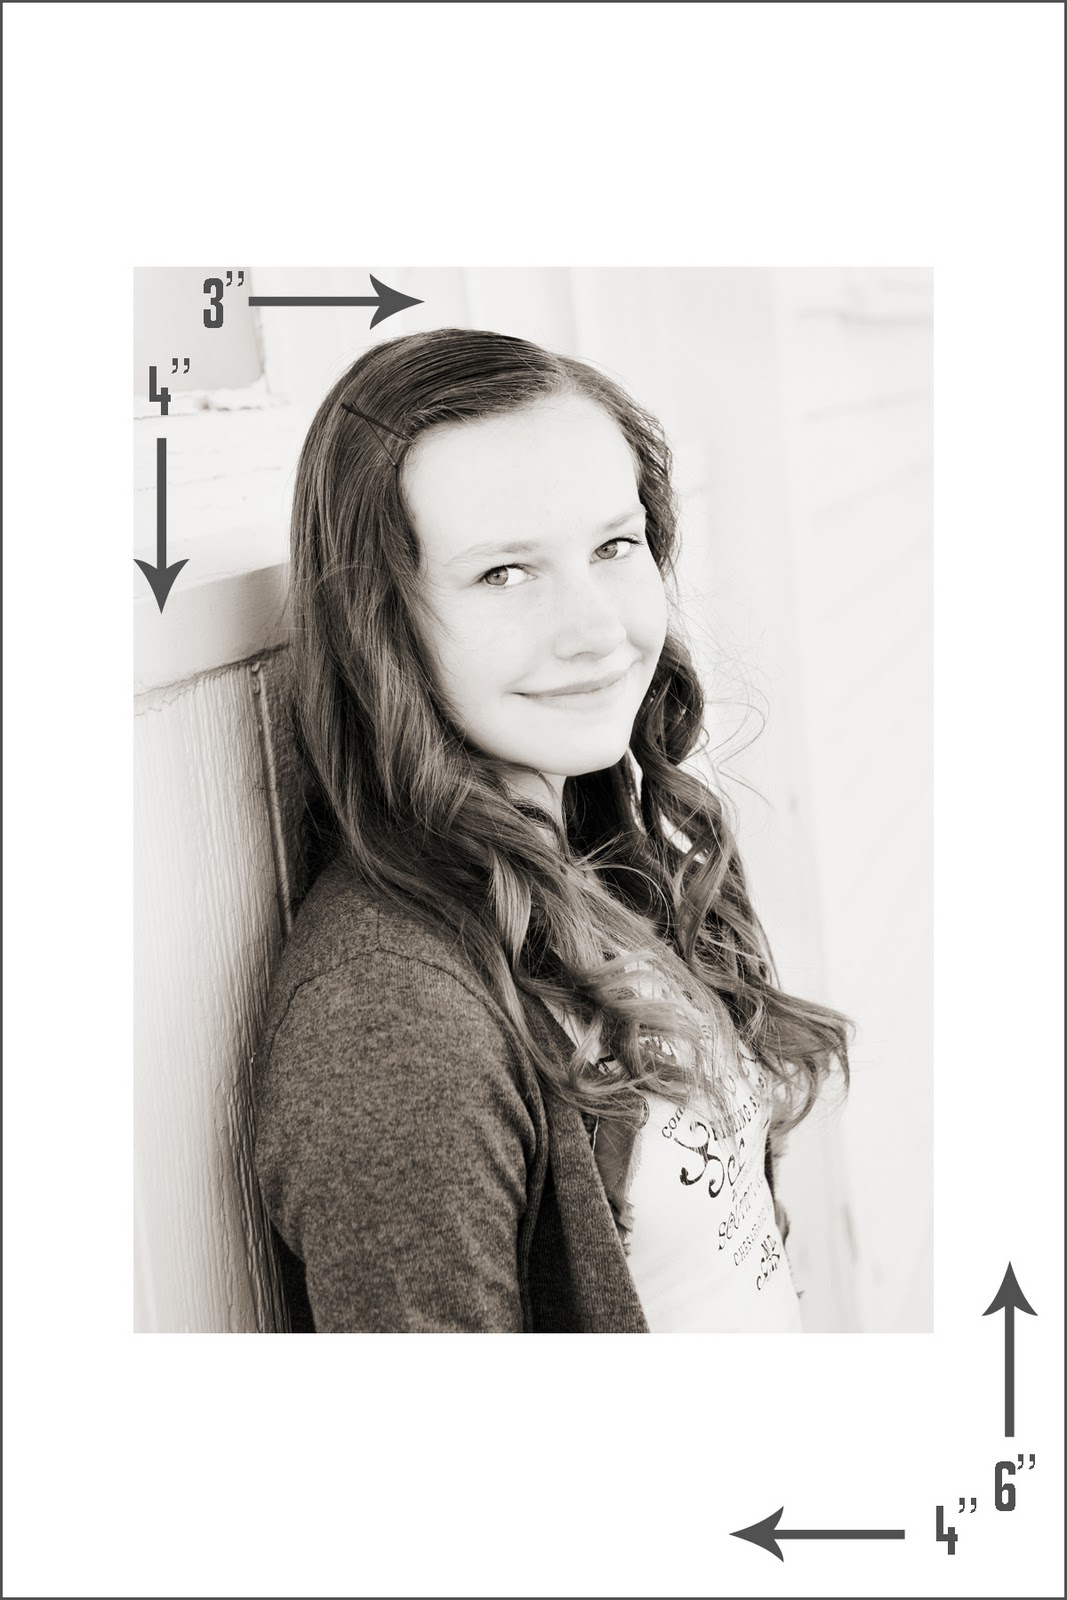
ETA: the large photo was an 8×10 and i trimmed it down to a 6×8 (using a pencil and ruler to mark my lines). then i cut it in half and then cut the bottom half in half again. did i lose you there? 😉
for the smaller photos, i shrank them down to 3×4’s in photoshop and then put them on a new 4×6 photo and printed them that way. the 4×6 prints are only 13 cents each at costco, so i will be printing off a bunch for this album.
Jamie
Latest posts by Jamie (see all)
- Bird Feeders - May 24, 2019
- [2014 WISHlists] Jamie’s List - December 12, 2014
- Avery Custom Photo Gift Tags - December 2, 2014
I LOVE how you divided the large (5X7?) photo of the kids between the 3 page protector sections! I NEVER think to do this!
Lovin'it 🙂
Wow, it looks so good. I'm impressed. I'm new to project life this year too, but I don't know how to do any of those fancy things like dividing the pictures or making a picture fit into the small 2X3 spaces. Maybe you could show us some of those things soon?! If it's with photoshop then I still won't be able to do it though… is it with photoshop? I'm too cheap for that. Thanks for sharing your ideas. I'd love to see more! 🙂
This looks wonderful! I love the way you cut up the bigger picture to fit into the smaller spaces, very visually interesting! Happy Project Life!
Ok, I've done PL for three years now and your first attempt just blew away anything I've ever done. You have nothing to worry about…..
Ok, I've done PL for three years now and your first attempt just blew away anything I've ever done. You have nothing to worry about…..
I love your title page and am so excited to see your take on this throughout the year!
What a great start! Love how you split the group photo into 3 sections!
LOVE it!! I have been wanting to start a Project Life book for each of our kiddos instead of a photo album (I don't need the yearly one since I print off our blog) but want to keep it simple. This layout is great!! Would love some tips on doing the divided photo… that's my favorite part!
What size did you print that big picture? So awesome!!!
I am sooo behind on mine.I started last year,and am only up to May!!You have inspired me to get moving!This year,I think I'll try the digital version…have fun with it!
PLEASE do a tutorial on how to design the larger picture between the three slots!
Why don't you rotate the smaller photos and print them 2 to a 4*6 ? Then you'd only have to make one cut instead of 4 and it would be less expensive.
I think your scrapbook page is fabulous. The color combination and layout are very unique.
good thinking leslie anne. 🙂
every time i'm working on a project, i always think "there's got to be an easier way to do this" and this time that was so true. haha.
This looks fabulous! Love how you divided your big pic. Glad you liked my title card idea too-thanks for linking to my post!
SO IN LOVE!!! I have got to get with it and just order my kit! Been drooling over them too long!!!
Thanks for all the cute things you share
DARLING!!!
I was going to suggest the same thing as Leslie. I made a template using this tutorial http://www.clickinmoms.com/blog/storyboard-tutorial-and-free-template/
so I don't have to create it each time. I just saved it in my project life folder in a folder I named My Templates. Once you get the hang of making them you can do all sorts of configurations for a 6×4 photo, like one side 3×4 and then two 2x4s on the other side.
Looks awesome! Love your 3-part pic! TFS!
Love your title page! You can also fit 2- 3×4 pictures on a 4×6 print if you put them side by side… that's what I'm doing before I get mine printed. Then you just cut down the middle and you have your 2 photos ready! No extra trimming required. 🙂
I love this! I started project life this year to, so I'm very excited but I'm totally psyched to watch your unfold each week! Love how you cute that photo in half, I totally going to do that with one of mine! Thanx for sharing!
Natalie
http://www.projectdowhatyoulove.wordpress.com
I love discovering new projects like this…a lot of times we incorporate this stuff into our candle shop!
Thanks!
I wanted to thank you for this design genius!! I was just stressing because I can only afford one project life album (last year I had to use 2…it just got too full) and was trying to decide if I should scrap the whole project and then I saw this and was totally inspired….and am now going to order my project life stuff….amazing!!