• About
  • Advertising
  • Contact
  • Meet the Team
  • Blog
    • Bloglovin
    • Facebook
    • Instagram
    • Pinterest
    • Twitter

Eighteen25

Create A Life You Love.

  • Home
  • Printables
  • DIY + Crafts
  • Holidays
  • Recipes
    • All Recipes
    • appetizers
    • salads/side dishes
    • main dishes
    • Desserts
  • Misc.

Please Welcome: Jeran from Oleander and Palm

Apr42013 posted by Jodie and Jen 4 Comments

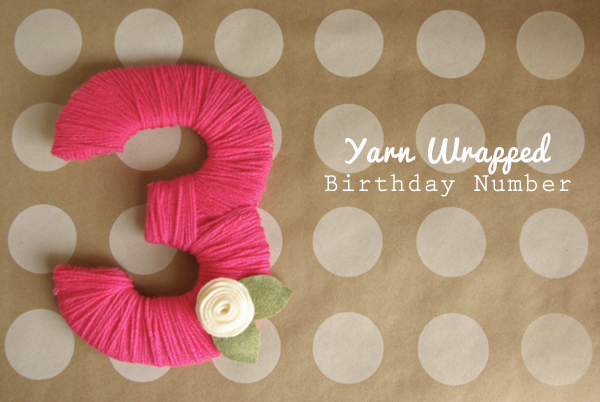
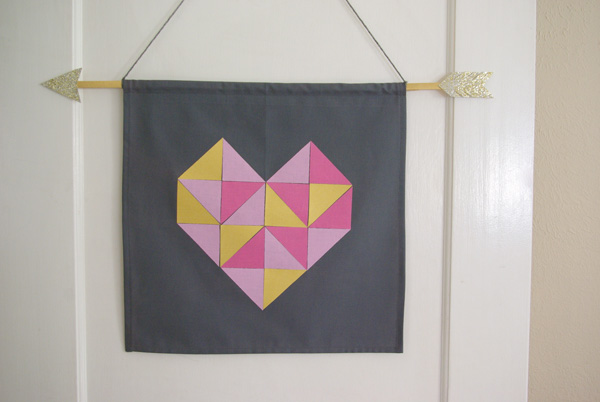
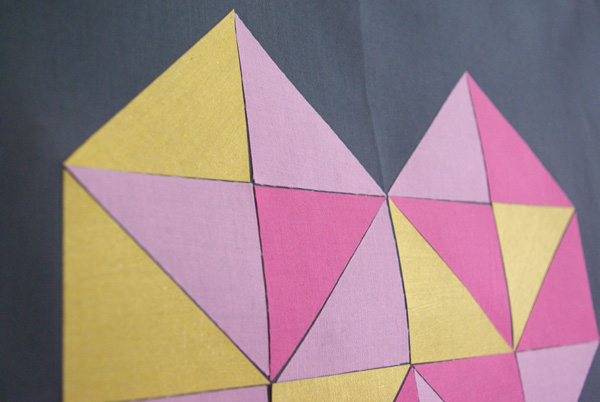
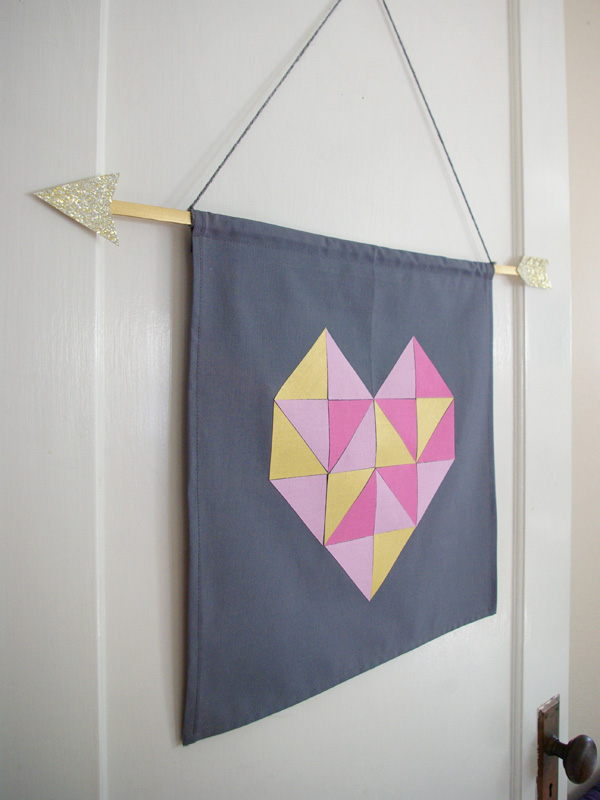
Hi again, it’s Jeran from Oleander and Palm.  A couple months ago I was here and shared with you a no-sew geometric heart pendant.  I’m excited to be back and wish a big Happy Birthday to Eighteen25!  Thanks for all the great inspiration, DIYs and gorgeous printables. Let’s celebrate their 3rd birthday with a Yarn Wrapped Birthday Number.  
 
This is a fun party decoration that doubles as a great keepsake.  I made a number 1 for my daughter’s 1st birthday party, and now it sits in her bedroom on her dresser.    

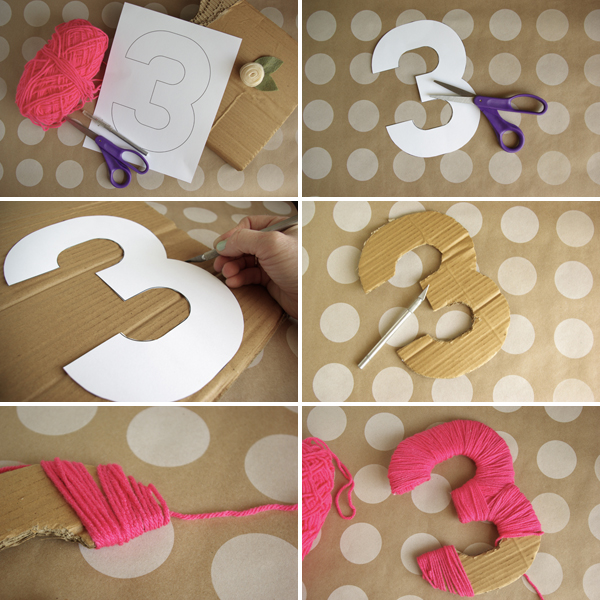
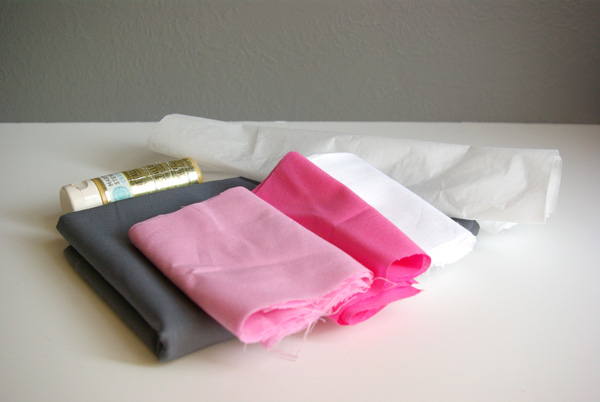
These are really easy to make and use very simple tools and supplies.  You’ll need to print off a large copy of the number you are making.  I used the font Homestead, because is has a nice flat bottom and edges (and also it’s probably my favorite font right now).  You will also need some yarn, a piece of heavy cardboard, scissors, some felt flowers and leaves, an x-acto knife, and a hot glue gun (which I forgot to photograph).
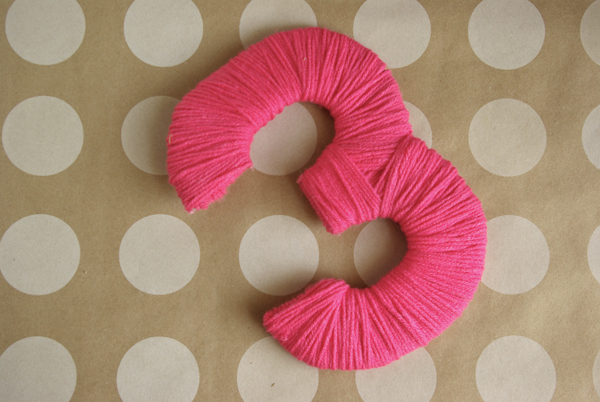
Cut out your printed number and use it as the template for cutting out the cardboard form.  Begin by wrapping the ends of the numbers first.  You will want these covered so that the cardboard is completely covered.  Then, simply wrap and wrap and wrap.  I used a couple dots of hot glue to start the yarn and also to keep it in place on some of the curves (where the yarn wanted to slip).

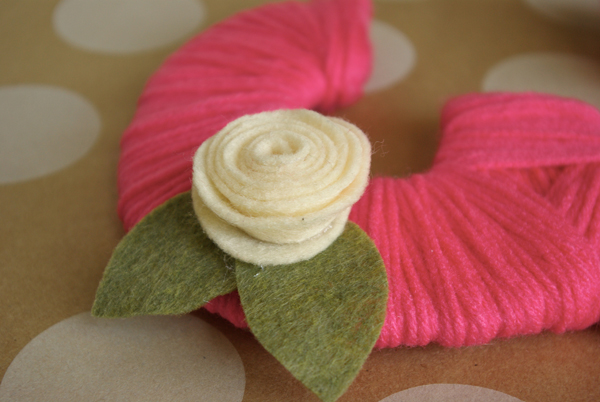
For a little more cuteness, I added a simple felt rosette and a couple leaves.  If you’d like instructions on how to make a few different felt flowers, I have a video tutorial here you can check out.  

Thanks again Eighteen25 for letting me be a part of your 3rd Birthday Celebrations.

________________________________


Visit Oleander + Palm on Facebook
: Pinterest : Twitter

_________________________________


this post is sponsored by:
  • Bio
  • Twitter
  • Facebook
  • Pinterest
  • Latest Posts
Jodie and Jen

Jodie and Jen

I'm Jen Sedillo, one of the bloggers behind Eighteen25. I love creating and crafting, reading good books, visiting new places and being with family!
Jodie and Jen

@eighteen25girls

Jodie and Jen
Jodie and Jen

Jodie and Jen

Jodie and Jen

Latest posts by Jodie and Jen (see all)

  • Our Friday Five 9.30 - September 30, 2022
  • Our Friday Five 12.3 - December 3, 2021
  • Composition Book Christmas Planner - November 28, 2021


4 Comments

« [GIVEAWAY] JoTotes
[GIVEAWAY] Blurb »

Comments

  1. kiki comin says

    April 4, 2013 at 3:51 pm

    super cute! love this.

    Reply
  2. Anonymous says

    April 4, 2013 at 7:40 pm

    such a fun and inexpensive way to customize the birthday!
    April

    Reply
  3. Eva {Tales of the Scotts} says

    April 6, 2013 at 12:41 pm

    I love yarn wrapped letters and numbers. Cute!

    Reply
  4. Verlene says

    August 12, 2013 at 7:32 am

    This is cool!

    Reply

Leave a Reply Cancel reply

Your email address will not be published. Required fields are marked *

This site uses Akismet to reduce spam. Learn how your comment data is processed.

Please Welcome: Jeran from Oleander and Palm

Feb72013 posted by Jamie 13 Comments

Hi there, this is Jeran from Oleander and Palm.  I’m really excited to be here and share this Valentine’s Day wall pendant with you.  I’ve been having a lot of fun with this geometric heart pattern for Valentine’s day.  I even made a giant paper version of this for my wall.

I don’t know about you, but I love working with fabric. It comes in every color and pattern imaginable and adds a tactile and textural element to crafts. I think a lot of folks are intimidated by fabric because they think sewing will have to be involved. But, this fabric craft is really simple and requires NO sewing at all.  So don’t be scarred, let’s have fun with fabric.

 
Supplies:
1 large fabric napkin (at least 16″ wide) 
4″ strip of cotton fabric (I used white, pink and light pink)
a small piece of wonder under (iron-on paper backed fusible web)
18″ piece of wood dowel
small piece of glittered card stock
string or yarn for hanging the pendant
fabric glue (I like Fabri-Tac)
scissors or rotary cutter

So, here’s how you make it. First, start by ironing on your wonder under to the backs of the fabrics you will use for the triangles. Once it is adhered, remove the paper backing.

For the gold triangles, I painted a small piece of white fabric with Martha Stewart’s metallic gold craft paint. Once it was dry, I ironed it to set the paint. Then the wonder under can be adhered to the back of this fabric as well.

 
Now you will need to cut 20 triangles. Start by cutting ten 2 1/2″ squares and then cut the squares in half diagonally. I used a rotary cutter, but scissors and a template would work find as well. I cut 8 each of the pink fabrics and 6 of the gold.
 
Arrange the triangles in the pattern you would like. 
 
Then arrange them in the middle of the cloth napkin and when you are satisfied with their placement, iron them in place. 
 
Then to hang the pendant, you will want to either sew or fabric glue the top of the napkin down 1″, making a tube opening for the dowel.
 
I painted my dowel gold and attached an arrow and feathers on either end that I cut from some glittered card stock. And finally, I simply tied a string to either end of the dowel so that I could hang it.
 
I hope you enjoy this Valentine’s Day pendant, I’ll be hanging mine for years to come.  Happy Valentine’s Day!

___________________________________________
Visit Oleander + Palm on Facebook : Pinterest : Twitter  
  • Bio
  • Latest Posts
Jamie

Jamie

Jamie

Latest posts by Jamie (see all)

  • Bird Feeders - May 24, 2019
  • [2014 WISHlists] Jamie’s List - December 12, 2014
  • Avery Custom Photo Gift Tags - December 2, 2014


13 Comments

« Baked with Love KitchenAid GIVEAWAY
[our friday five] jodie edition »

Comments

  1. Nat and Holly says

    February 7, 2013 at 4:20 pm

    I love this! We loved the original, too and this twist on it is so fun! Thanks for sharing!

    Reply
  2. Julia [life on churchill] says

    February 7, 2013 at 4:45 pm

    I've never thought of ironing fabric for artwork. great idea Jeran!

    Reply
  3. Melanie Routhier says

    February 7, 2013 at 5:12 pm

    Great project and so simple! Neat idea.

    Reply
  4. Jason says

    February 7, 2013 at 8:15 pm

    It's got that geometric origami feel to it. What a fun concept and a beautiful piece. You guys always find the cream 'o the crop.
    You think that would work with, say, an Iron Man pattern? Musings….

    Jason
    The Cheeky Daddy

    Reply
  5. Penny says

    February 8, 2013 at 3:07 am

    I'm not a huge Valentines day person (might be a cultural thing – I'm from Australia) but I've been wandering around the house, then popping back here again, trying to figure out how to push other things aside and find the time/space to make one! Thanks for sharing this idea, lets just hope I have enough wonder under in the cupboard…

    Reply
  6. TL says

    February 8, 2013 at 3:31 am

    The arrow on the dowel is just plan clever! Looks cute!

    Reply
  7. Lindsay says

    February 8, 2013 at 3:36 am

    The whole piece is beautiful, but I especially love that the dowel is an arrow!

    Reply
  8. Anonymous says

    February 8, 2013 at 3:49 am

    Love this… and just checked out your blog- and I love how you have incorporated this design all over your home. So fantastic… and not too cutesy. Love it!

    Reply
  9. Anonymous says

    February 8, 2013 at 5:12 am

    Great idea and great directions! donita

    Reply
  10. Karen Mary Butterfly says

    February 8, 2013 at 2:05 pm

    This is very cool and original! I am so surprised you paint the fabric like that….to change the color! That's so smart!
    Karen

    Reply
  11. grace kuhns says

    February 8, 2013 at 3:33 pm

    love the pendant idea! you got my creative juices goin', Jeran!

    Reply
  12. Anonymous says

    February 8, 2013 at 6:45 pm

    I really like your idea to paint the fabric! I'd love to make one of these! – heidi adams

    Reply
  13. Jenna Pennell says

    February 20, 2013 at 7:06 pm

    This is really neat. I love that it's a no-sew fabric project! I'd love to use this method to make a quilt wall hanging… much easier than actually quilting!

    Reply

Leave a Reply Cancel reply

Your email address will not be published. Required fields are marked *

This site uses Akismet to reduce spam. Learn how your comment data is processed.

welcome!

We are Jodie & Jen, born & raised in Vegas, in a little brick house. The number hammered onto our mailbox was 1825. Visit us often & be inspired to create a life you love. Read More…

  • Bloglovin
  • Facebook
  • Instagram
  • Pinterest
  • Twitter

Subscribe by Email

Get our latest & greatest posts straight to your inbox.

featured posts

Bird Feeders
Instant Pot BBQ Chicken Sliders
Free Printable Watercolor Notebook Covers
DIY Disney Ideas
Disney Trip Fun Bags
Printable Recipe Binder

eighteen25 loves

Disney banner 350

Privacy Policy

stay updated on latest
posts on Facebook

The Girls at Eighteen25
  • Bloglovin
  • Facebook
  • Instagram
  • Pinterest
  • Twitter

Copyright © 2025 · All rights reserved · Site by Melissa Rose Design