Yay! It’s the 10th of the month and we have our friends back today sharing Snowflake projects! When we heard what the theme was going to be we knew we wanted to give these Clothespin Snowflakes that we saw on Under the Table and Dreaming a try.
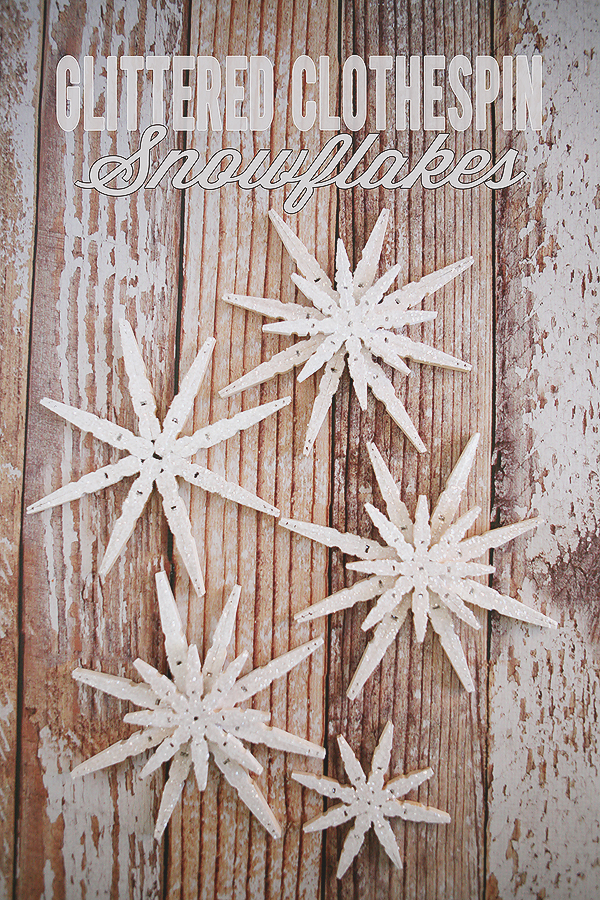
Love that something so pretty can be made out of clothespins. And besides the drying time they are pretty quick to put together.
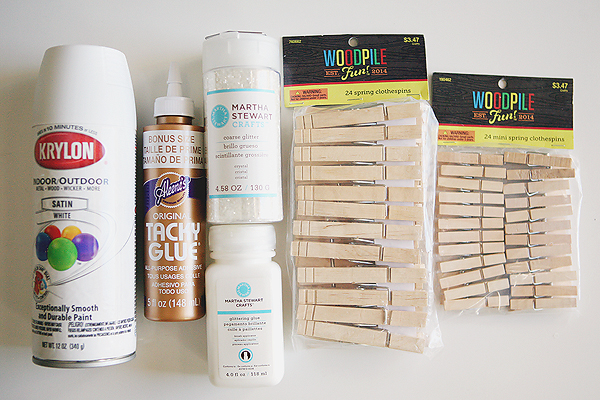
Supplies: [affiliate links included]
– 8 regular size clothespins (each snowflake)
– 8 mini clothespins (each snowflake)
Steps:
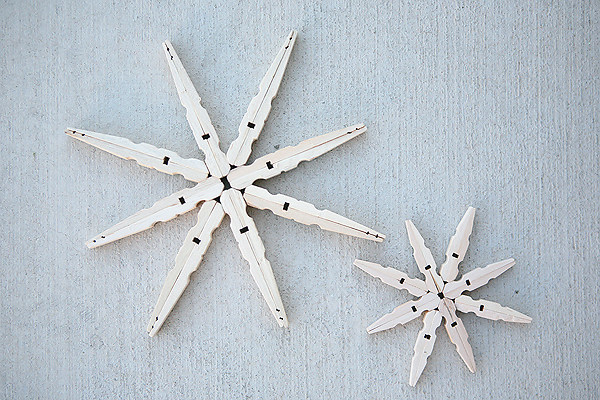
– Disassemble the clothespins. It takes 8 regular and 8 mini clothespins to make one double snowflake.
– Using the tacky glue we glued the snowflakes together and allowed them to dry for about an hour.
– Once dry, we gave them a quick coat of white paint. Spray paint or acrylic paint works fine. We only painted the top.
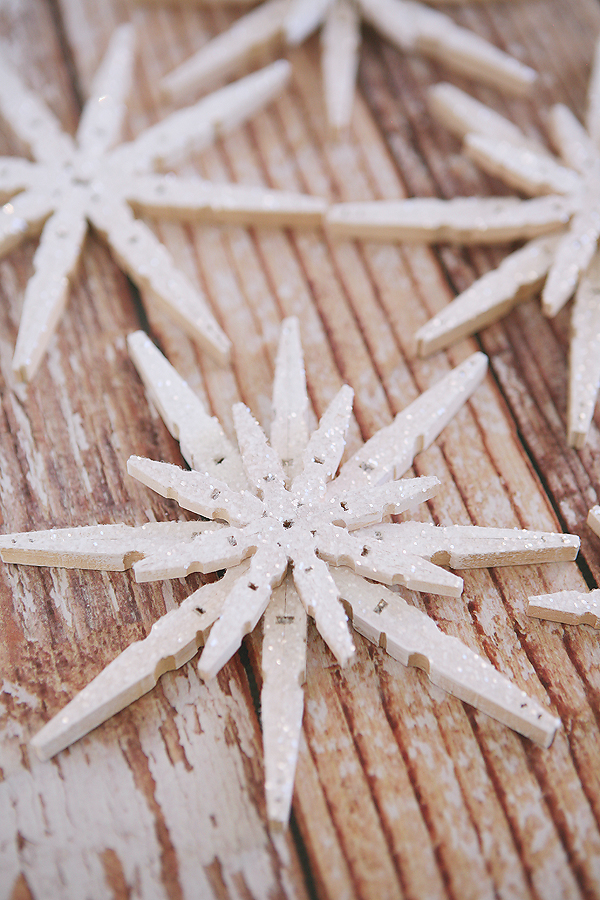
– Once the paint is dry we brushed on a thin coating of glue and sprinkled with the glitter. Again, we only bothered with the tops.
– When the glue has dried you can glue your small snowflake to the top of your large snowflake or leave them separate if you’d like.

They’ll look so pretty nestled in your Christmas tree or they would even make great embellishments on your gifts.
Now it’s time to check out what our friends have made this month..
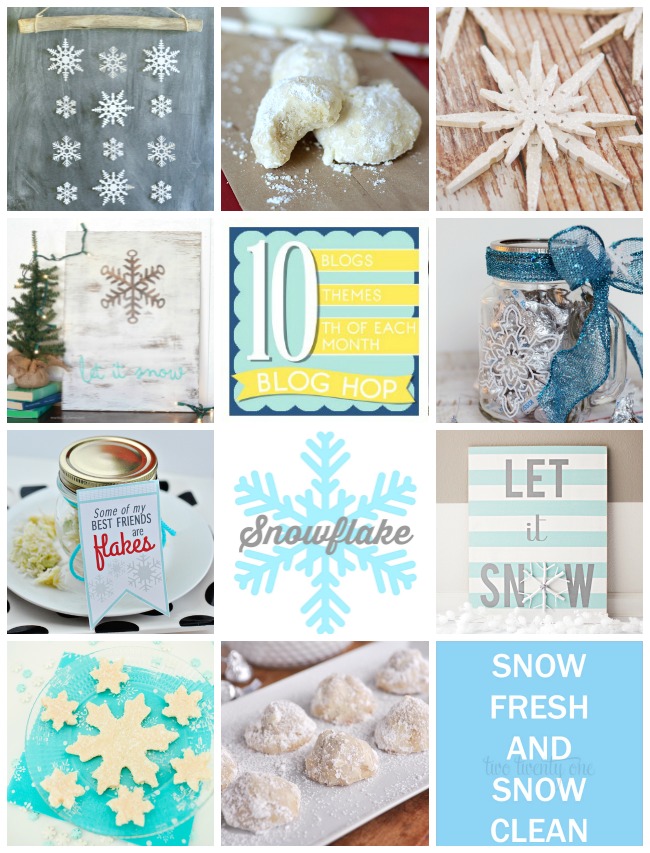
1. Snowflake Wall Hanging | The Crafted Sparrow
2. Snowball Cookies | Simply Kierste
3. Glittered Clothespin Snowflakes | Eighteen 25
4. Let it Snow Sign | Lolly Jane
5. Silk Screen Mug & Snowflake Poem | Or so she says
6. Printable Snowflake Holiday Tag with “Snowflake” Apples | Thirty Handmade Days
7. DIY Let It Snow Sign and Snowflake Craft | Landeelu
8. Snowflake Almond Fudge | Capturing Joy
9. Snowball Cookies | Your Homebased Mom
10. Snow Fresh Snow Clean Printable | Two Twenty One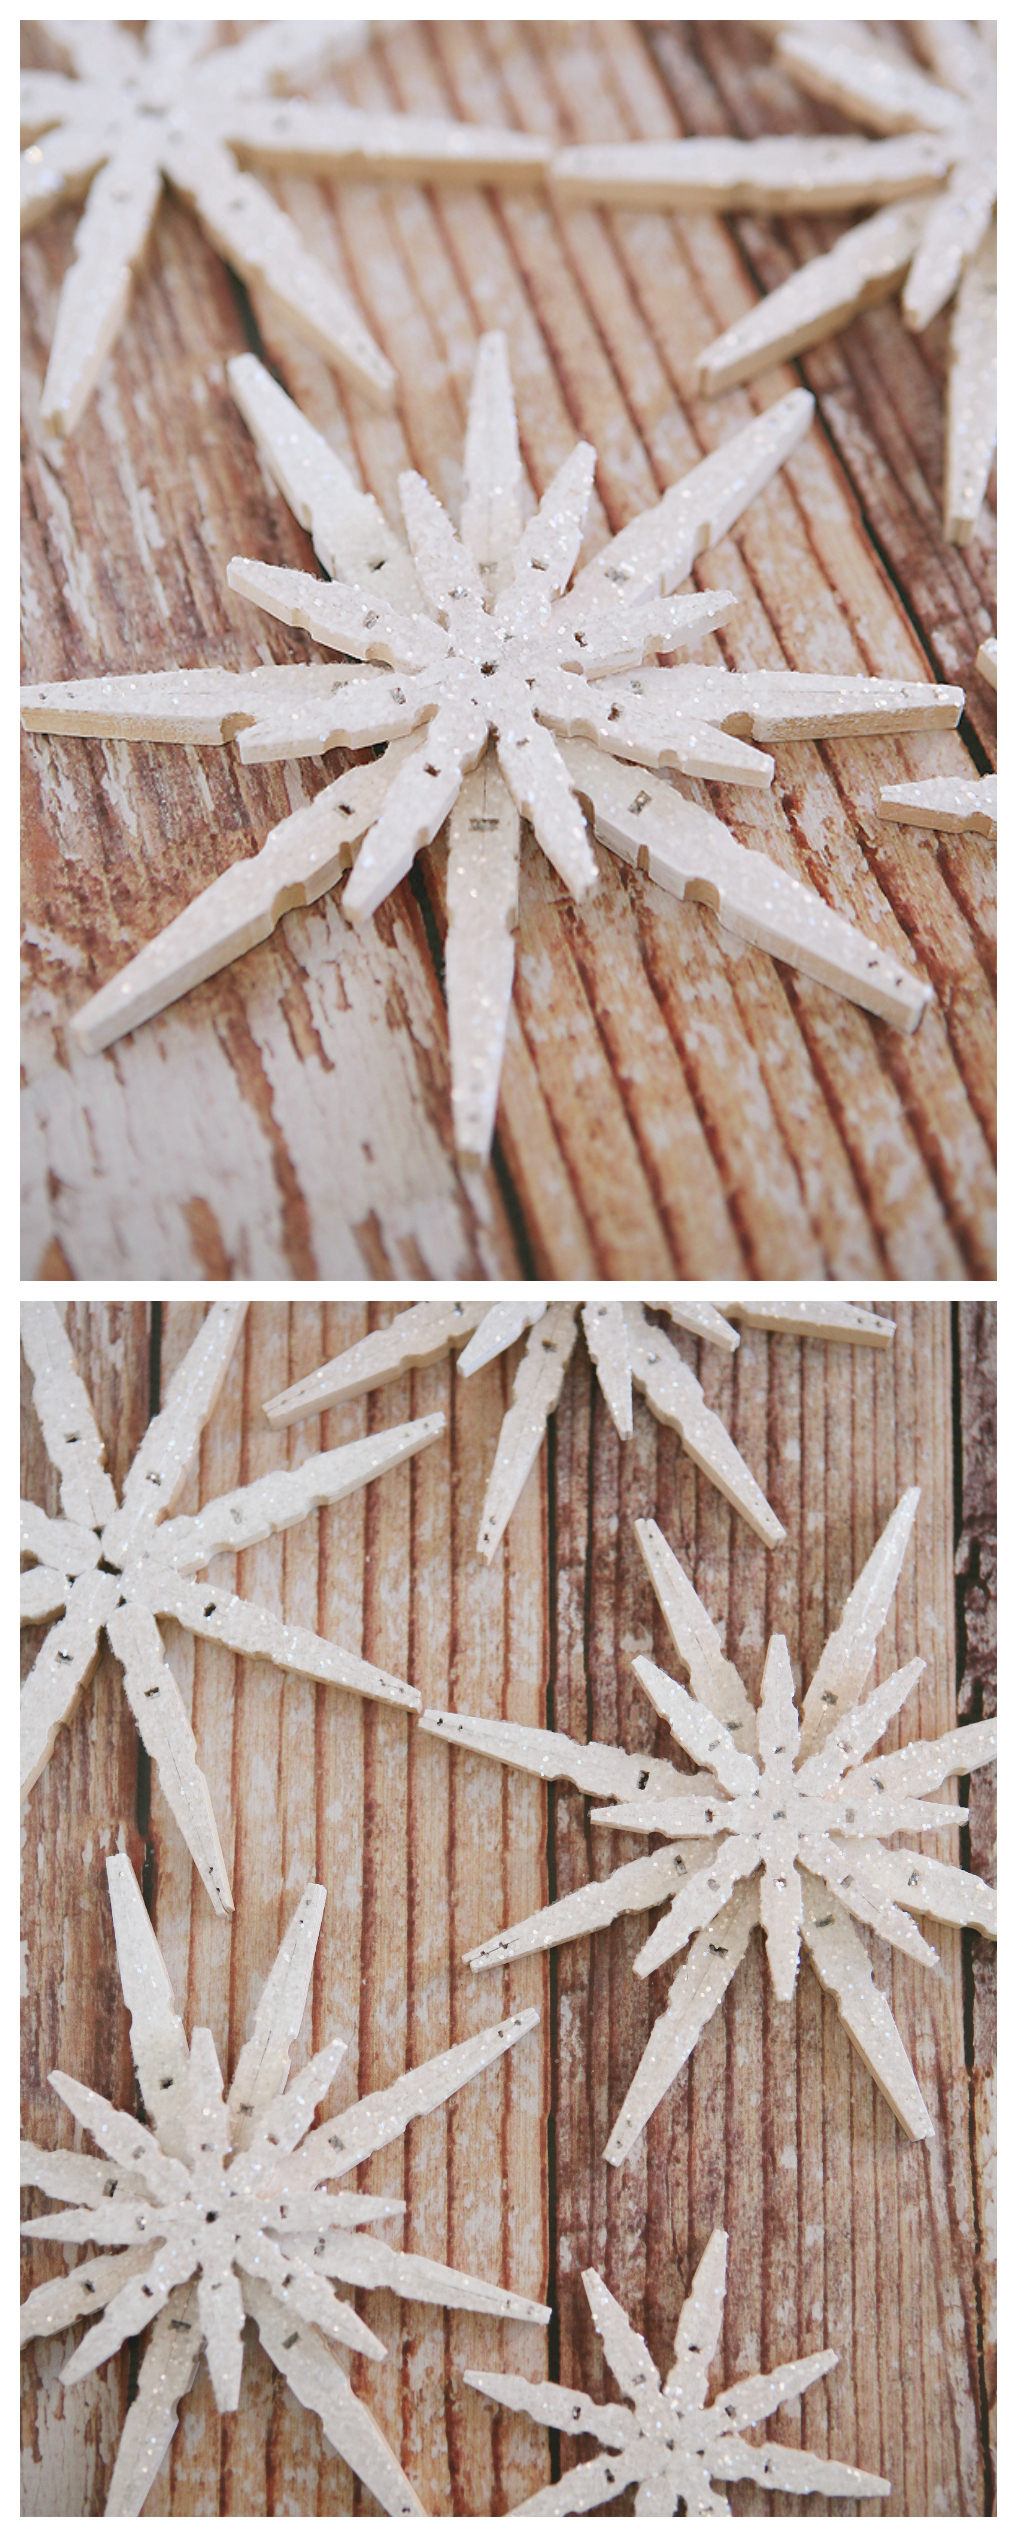
I'm Jen Sedillo, one of the bloggers behind Eighteen25. I love creating and crafting, reading good books, visiting new places and being with family!
Latest posts by Jodie and Jen (see all)
- Our Friday Five 9.30 - September 30, 2022
- Our Friday Five 12.3 - December 3, 2021
- Composition Book Christmas Planner - November 28, 2021
OH! I love these! Sharing on Twitter! They look so classy!
Thanks so much Liz!
Well that's just CUTE!
thanks so much girls… 🙂
So pretty! Love them.
Thank you Leigh Anne… can't wait to try your cookies!!
Somehow the clothes pins in the bag don't look the same as the ones in the finished snowflake to me; I am having trouble figuring this out!
When you say disassemble, do you mean take the metal things off? And then glue those two pieces together to form one individual "arm", which in turn need to be all glued at the center??
Sorry to be so dense!
Yes. Remove the metal piece. glue the two pieces back to back and that makes one of the eight "arms". Make eight of those and then glue together in the center where they touch. Let us know if you have any other questions. 🙂
Thank you!
So cute girls!!! Love these!
thanks miss landeelu!! 🙂
Love them! I will be making some of these I think for my tree.
Love the snowflakes!!! So super cute!!
Where can I buy the mini clothes pins? Thanks. 🙂
Super cute… Pinning!
I want to make these with my kids! So cute and fun!
I would like to make this craft in my adult craft class at a public library. Would you grant me permission to use the photo at the top of this page on our flyer? We would give you proper photo credit.