

what you’ll need:
- 1.55 oz Hershey’s bars
- white cardstock
- double sided tape (or other adhesive)
- paper trimmer
- boy candy bar topper download
- girl candy bar topper download
First off, I’m going to try to explain how to add a photo onto the candy bar topper using Photoshop Elements. (I’m sure it’s pretty similar using other photo editing software)
If you already know how to do that, you can skip down for the final instructions.
. . . . . . . . . . . . . . . . . . . . . . . . . . . . . . . . . . . . . . . . .
step one: Open the png candy bar topper

step two: Open the photo you are going to use
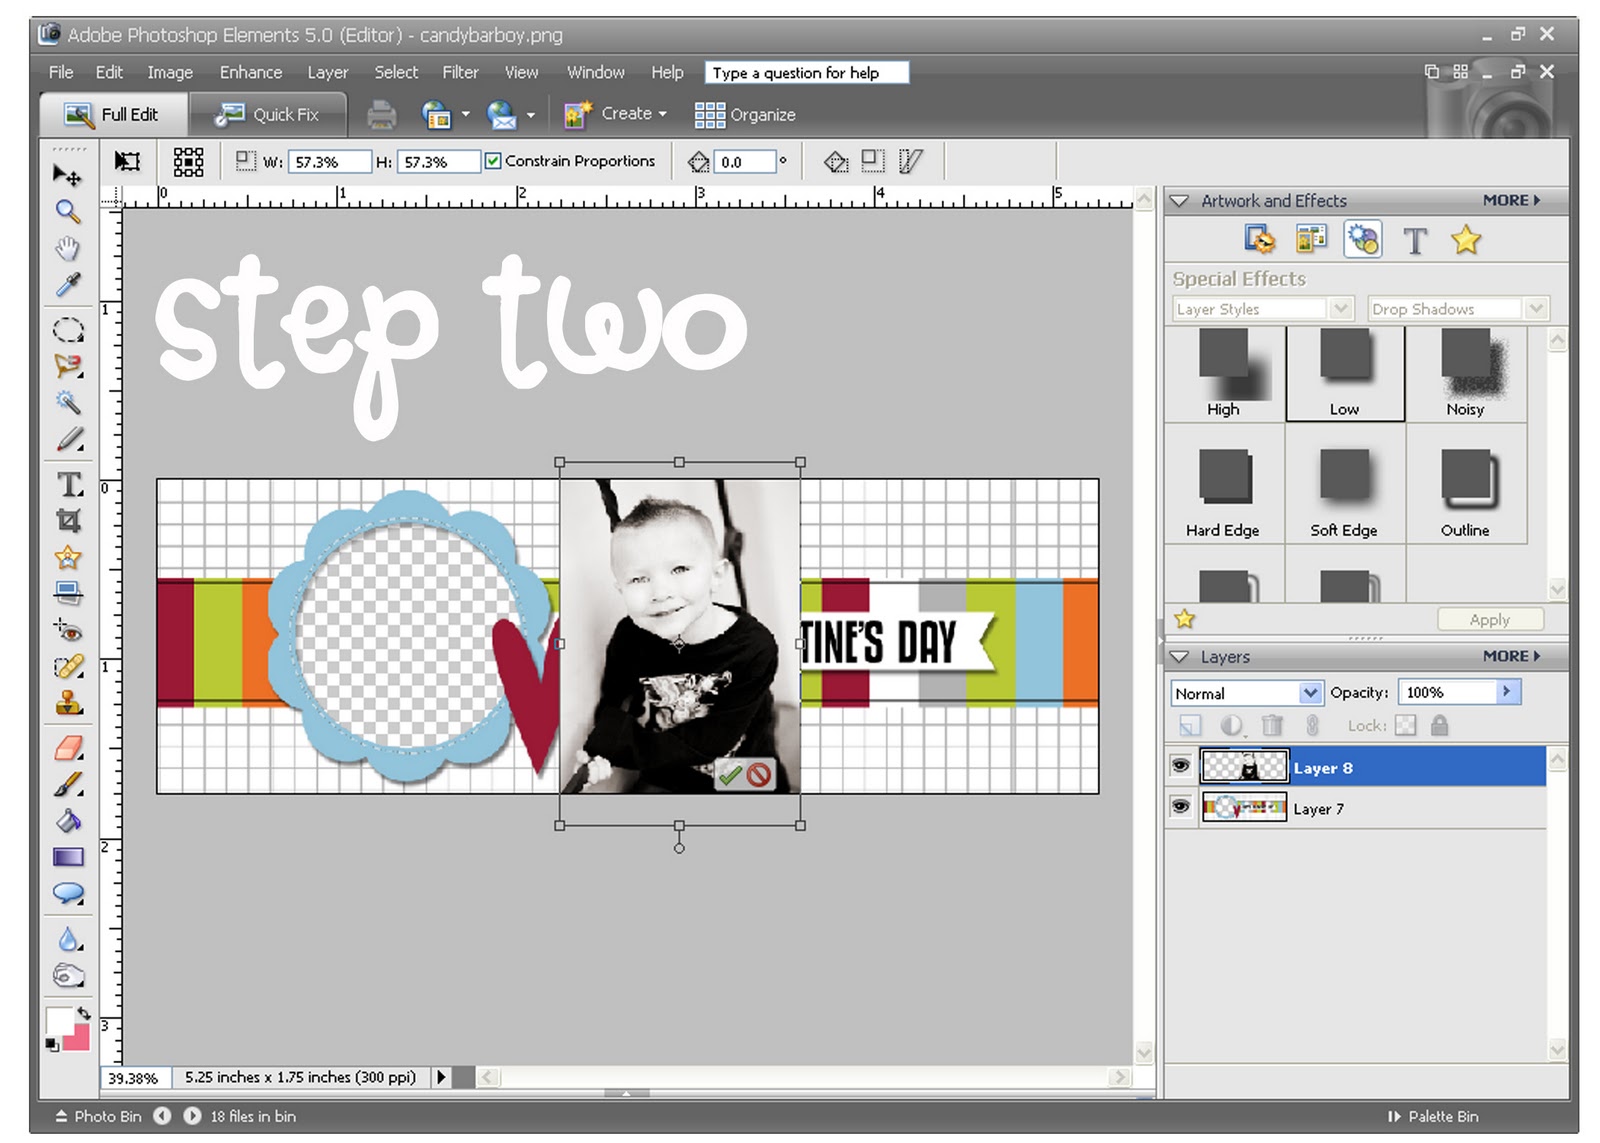
step three: [Ctrl-T to transform the shape] Move the photo over the spot you want it to be.

step four: Over in your layers (where the blue bar is) drag the photo layer underneath the candy bar topper layer.
step five: Well, just ignore step five because I used the same screen for this one. haha.
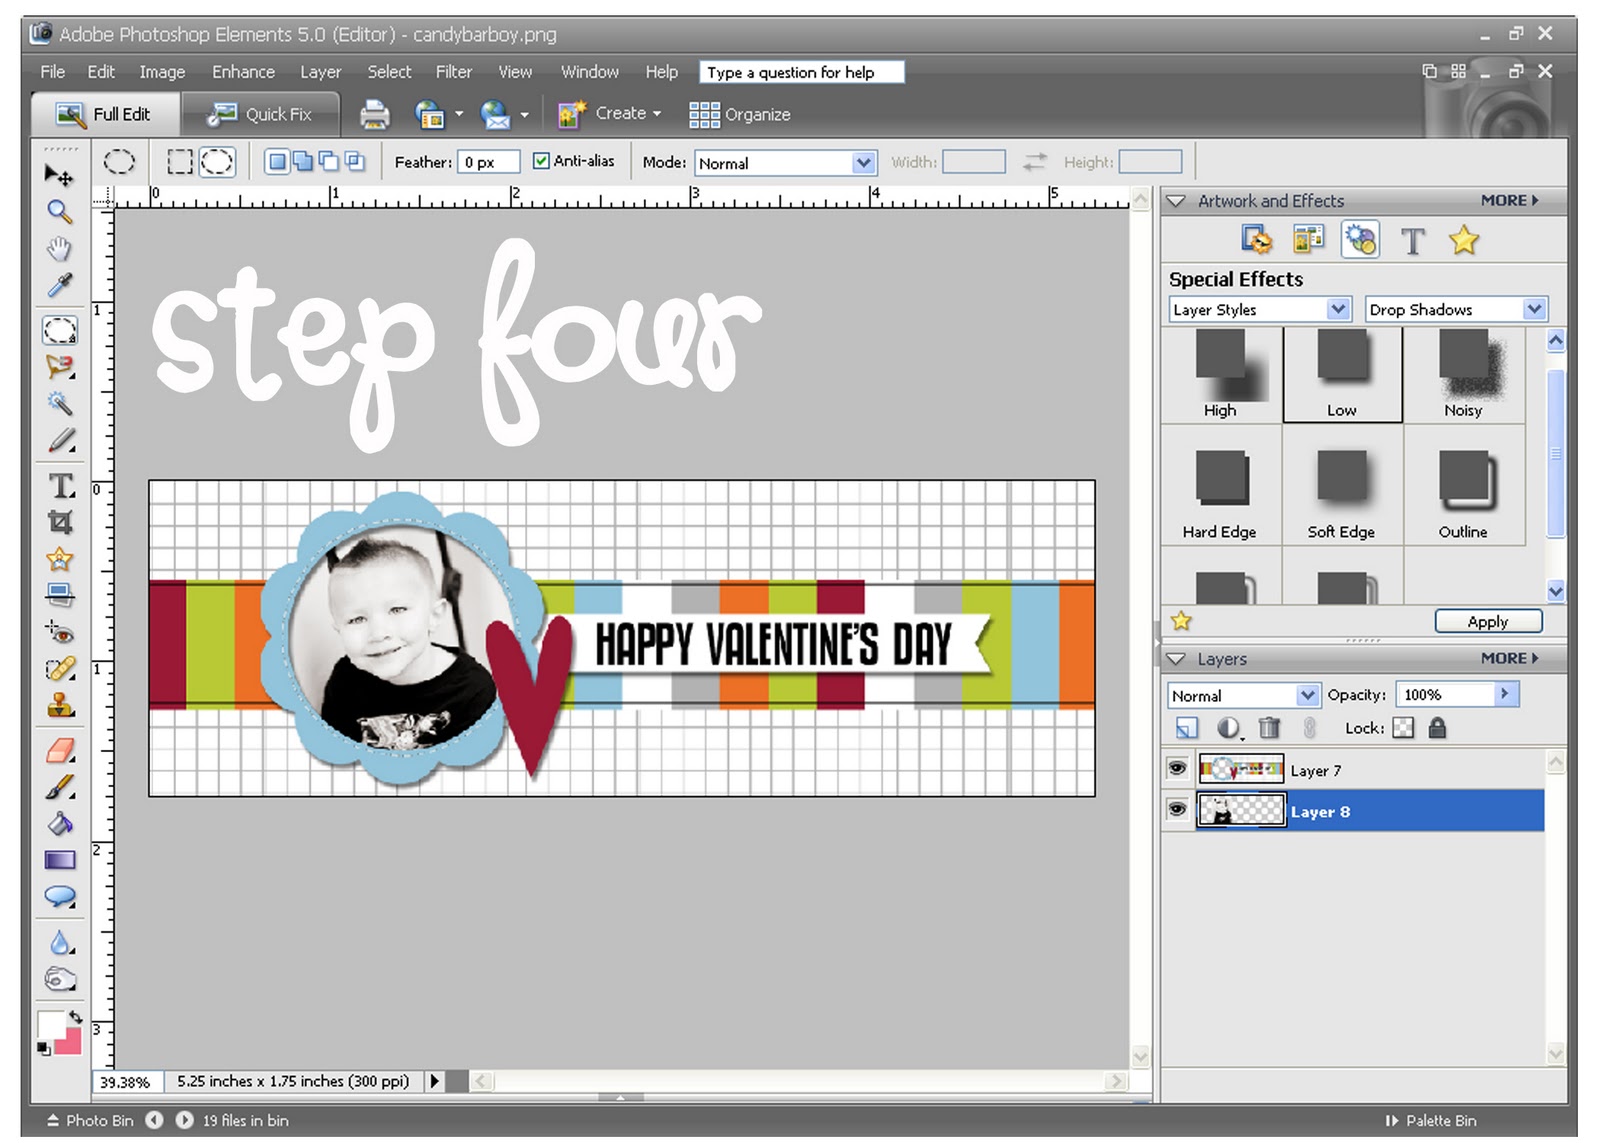
step six: Under the MORE tab, select FLATTEN IMAGE.

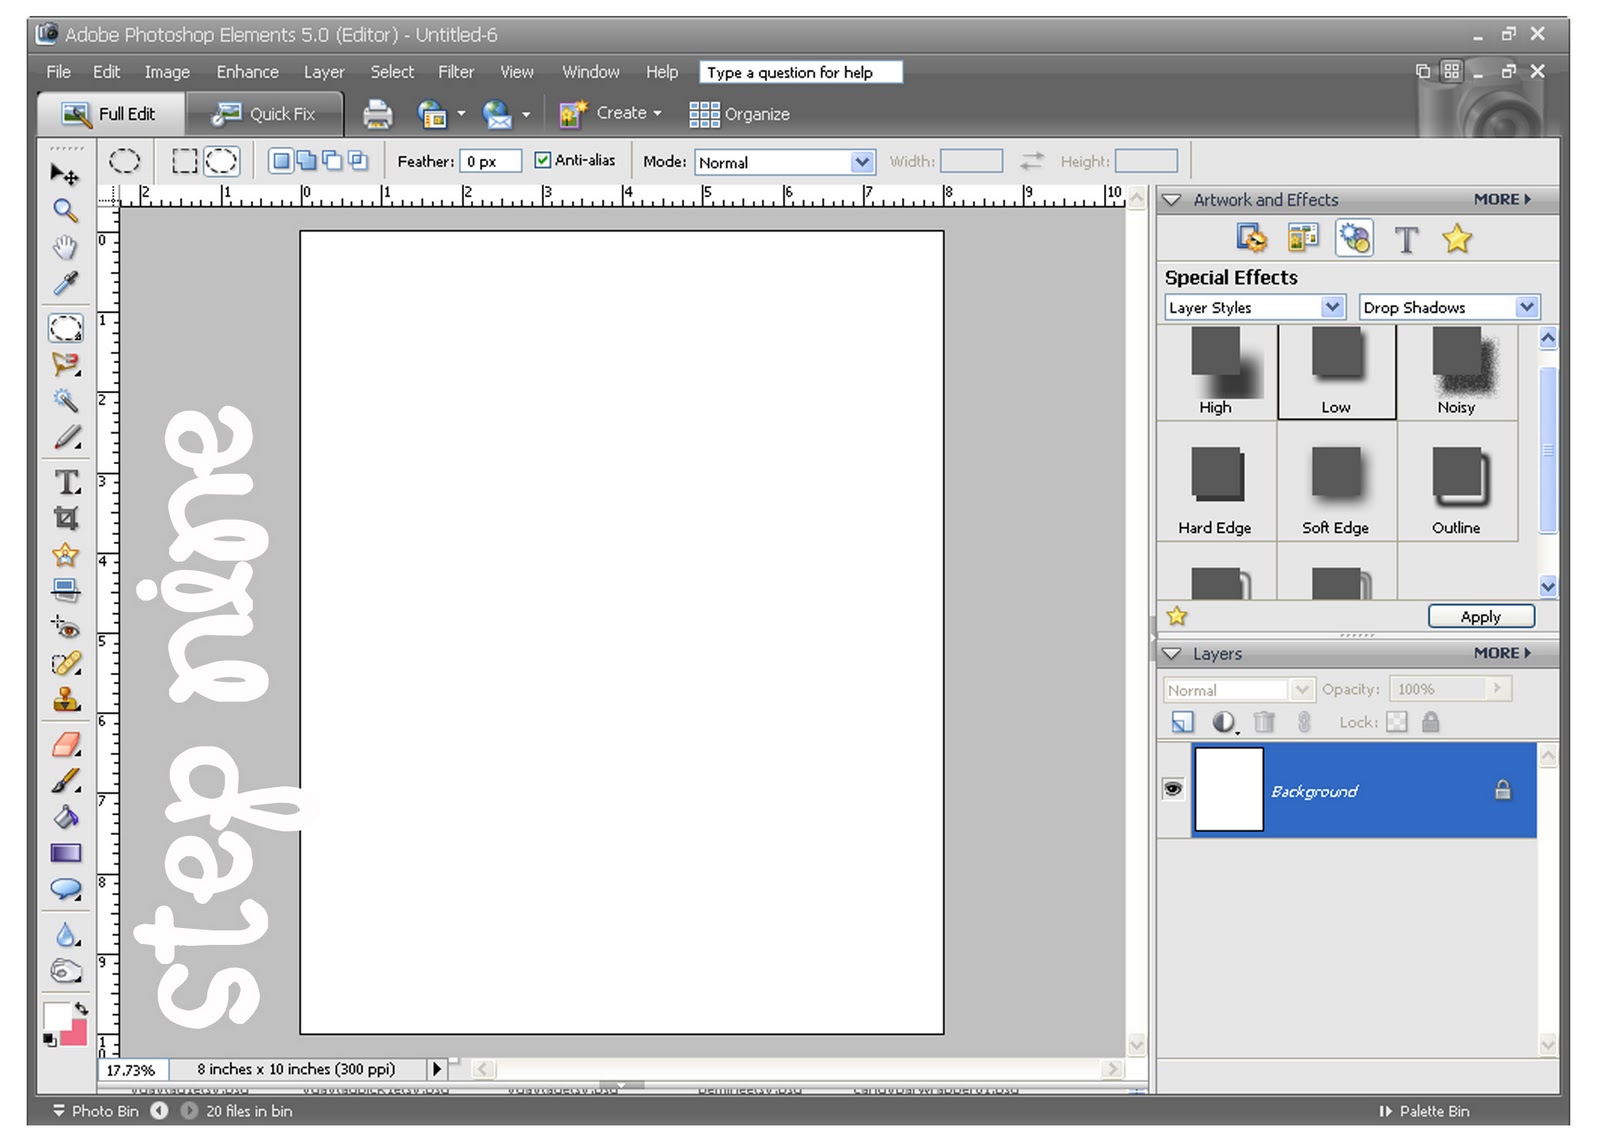
step seven: Now, go up to FILE > NEW > BLANK FILE…

step eight: Create a new file 8 inches wide, 10 inches long and 300 for your resolution

step nine: You now have a new document to place your candy bar toppers on to have printed. I always print my stuff at Costco, so that’s why I made it an 8×10. But, if you are printing at home, you could make it an 8.5×11
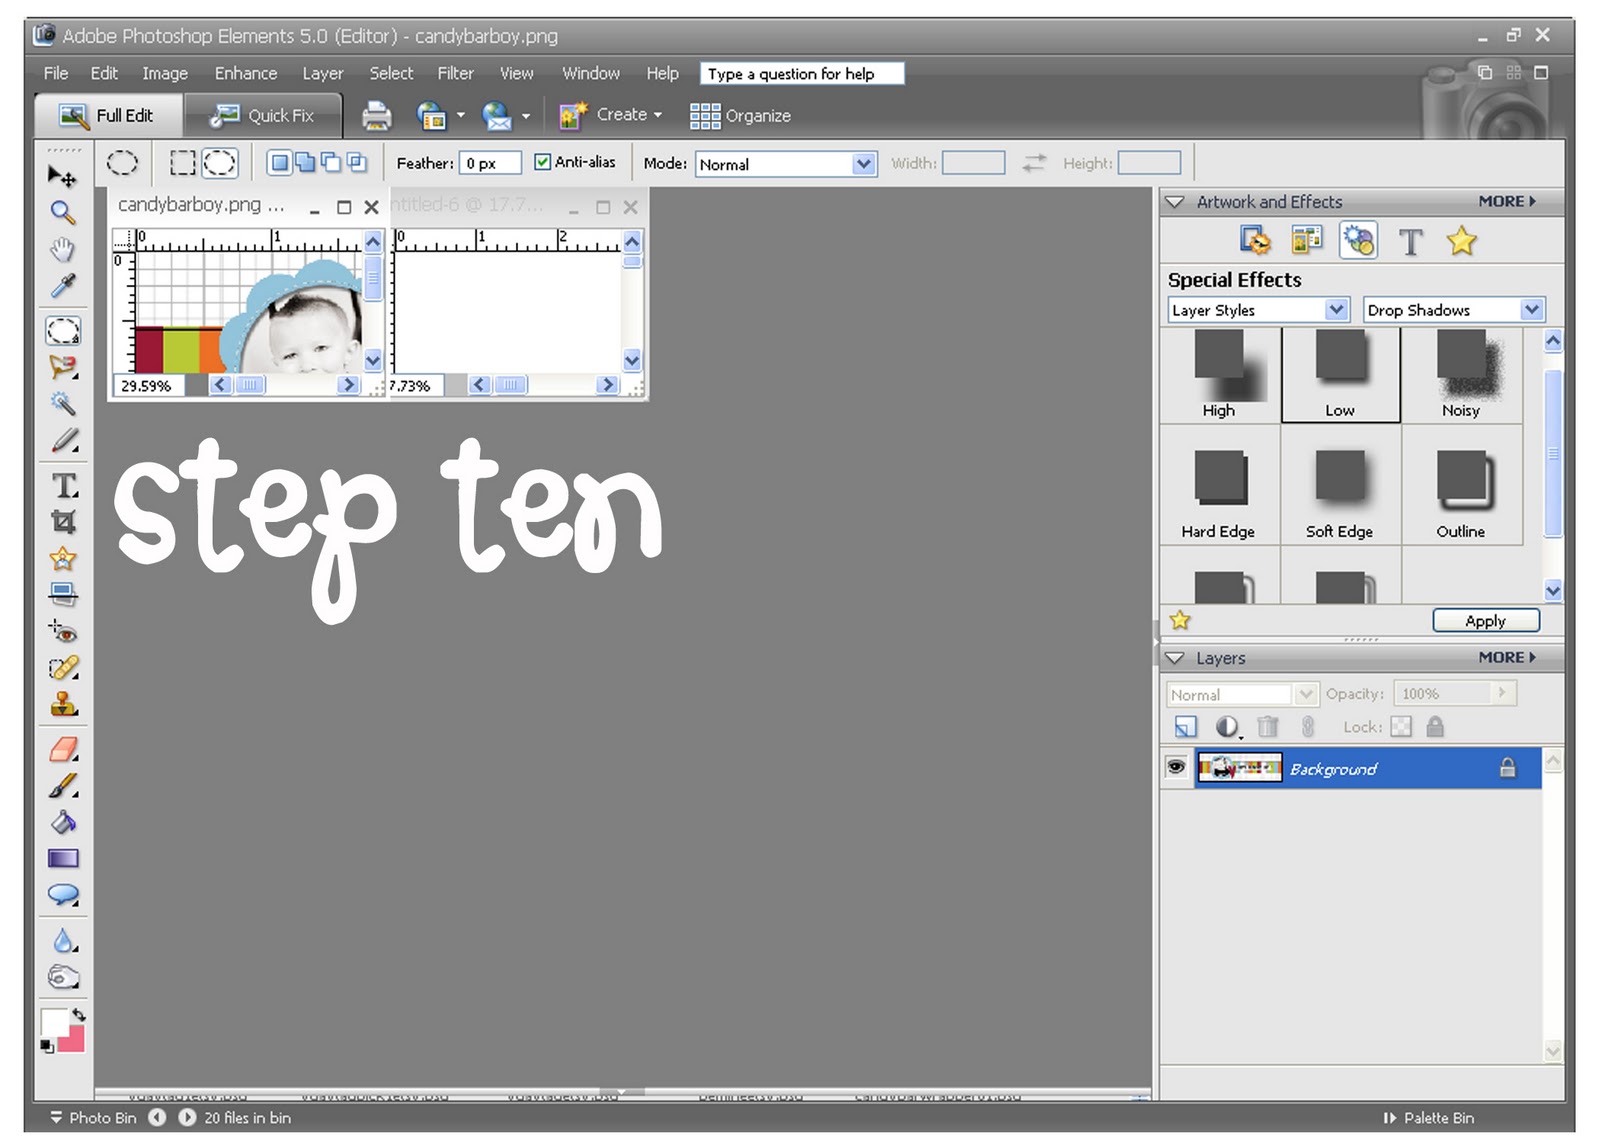
step ten: Go up in the right hand corner and select the four squares to AUTOMATICALLY TILE WINDOWS so it will show both the candy bar topper and your new 8×10. Select the candy bar topper and over in your layers (bottom right corner) click and drag on the layer and put it right onto your 8×10
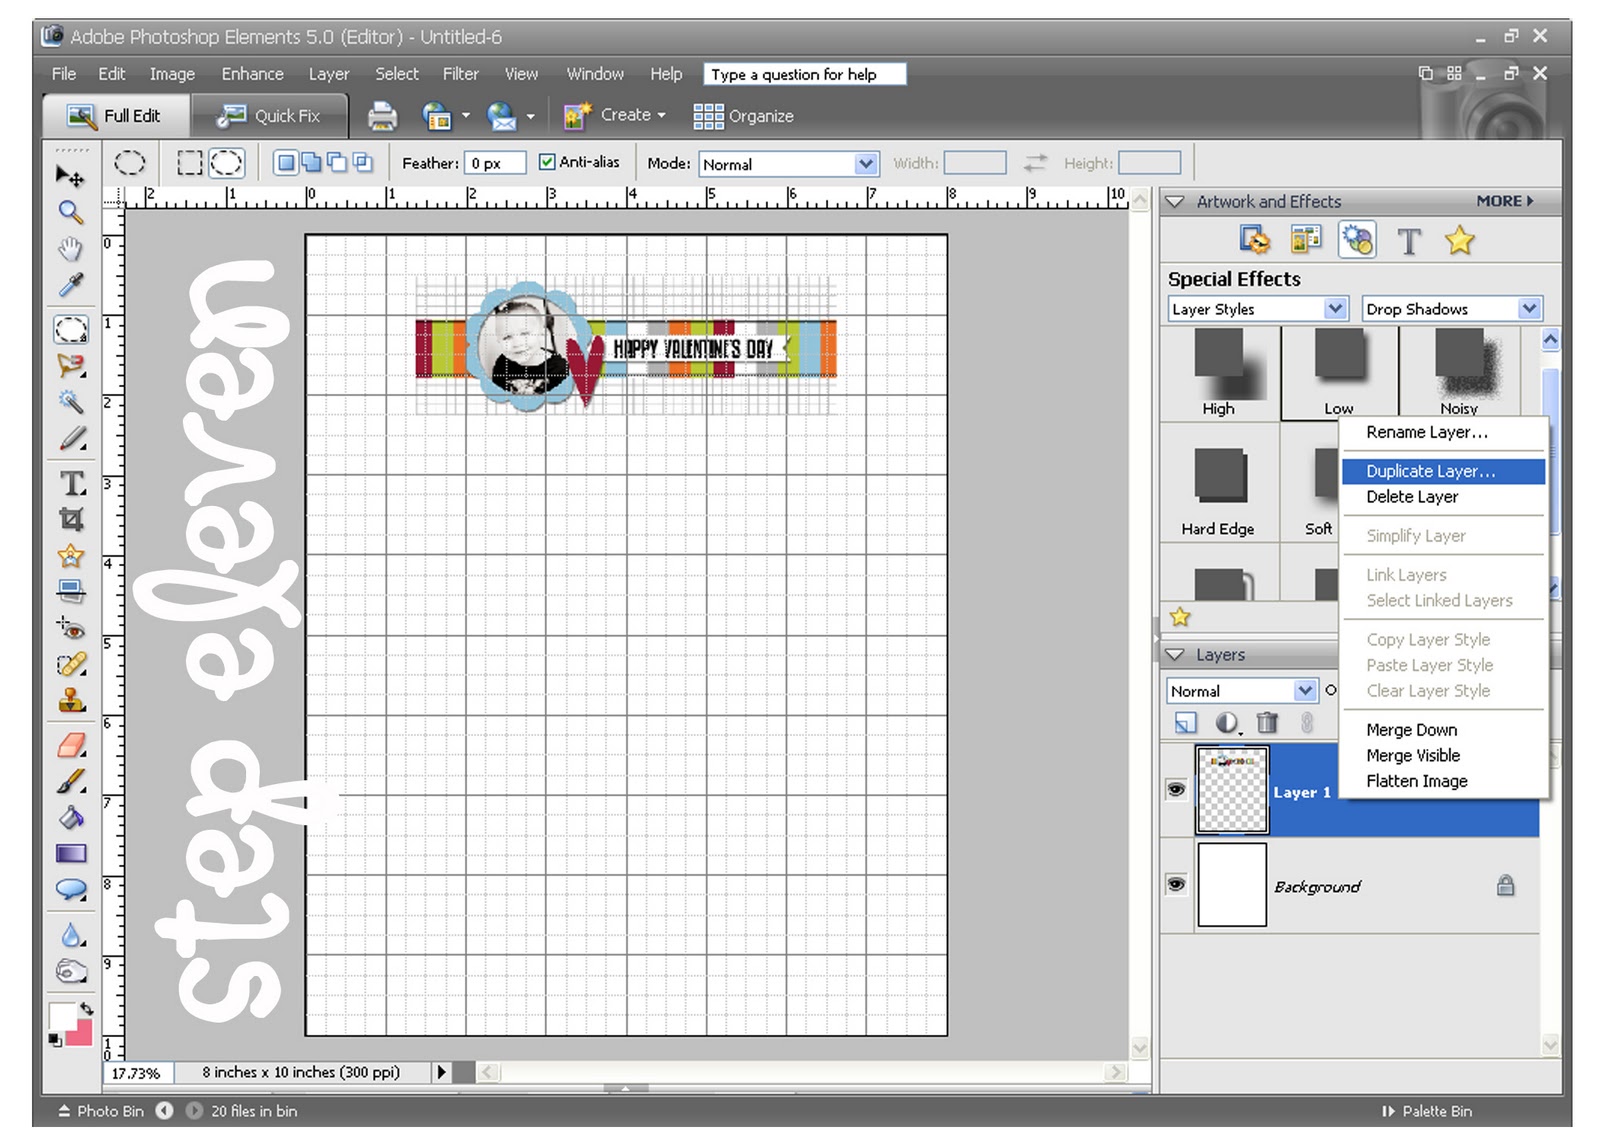
step eleven: Right-click on the candy bar topper (in layers) select DUPLICATE LAYER. Do this four or five more times to fill up the entire page (making sure not to put them too close to the edge – sometimes the photo labs trim some of that off)
step twelve: Flatten your image, save it to your computer and then send it off for printing.

. . . . . . . . . . . . . . . . . . . . . . . . . . . . . . . . . . .
After your toppers have been printed…
- trim your cardstock to 5 1/2 x 6 1/2 strips
(you can do two bars with one 8 1/2 x 11 sheet) - wrap it around the candy bar and adhere with the tape
- trim your candy bar topper and attach it to the bar
and now they’re ready to pass out to all your Valentines.
Jamie
Latest posts by Jamie (see all)
- Bird Feeders - May 24, 2019
- [2014 WISHlists] Jamie’s List - December 12, 2014
- Avery Custom Photo Gift Tags - December 2, 2014
In my opinion, chocolate is the perfect gift for any occasion, and the custom candy bar wrappers are adorable!
thanks! these will go over great with the kids!
Those came out SO cute! Thanks so much for such a wonderfully detailed tutorial, I'll be linking.
i figured it out!! LOL love this idea by the way 🙂
too cute!! I love this idea. it'd be cute party favors or something too!
Of course, this is fab-O. As usual. But I'd like to comment on the OUTSTANDING screenshots. I love them! Look at that font! You gals! Geez!
oh cool thanks, these will make great school valentines.
These are so dang cute! This would be cute for grandparents. Thanks for showing how to make these.
that's so great…thanks for the how-to!
LOVE these & just made them! Your tutorial made it so easy! Thanks for sharing your genius!
Darling idea. Thanks so much for sharing it and the great tutorial.
Thank you for the tutorial. I always see bag toppers etc. and wonder how to make them. Does costco print on cardstock too(not just glossy or matte photo paper?)
Super cute! Thanks for sharing the download & tutorial (love photoshop elements!!). We'll be posting a link!
missy & kimi
ificould-ificould.blogspot.com
Great (detailed) tutorial and very cute idea.
hello friends ^_^, nice to know u
Thanks for this!! The tutorial is awesome…I'm totally technology challenged! I posted this on my blog.
Michelle
http://www.maddycakesmuse.blogspot.com
Thank you soo much for the tutorial, I've never done this before and you make it sound super simple.
Thank you soo much for the tutorial, I've never done this before and you make it sound super simple.
Super cute!! I'm having problems with mine though. I feel rediculious asking, but when I open my photo that I want to use, it is opening in a new tab in Photoshop. I haven't ever used my photoshop elements (it's brand new!) and I'm clueless!
I'm having trouble too. When I open then photo I want to use, that's the only layer it is showing even though I had already opened the wrapper as the first layer. I'm fairly new to photoshop also. Think I'm gonna have to give up on it. Getting to frustrating.
Love this tutorial! I'm new to Photoshop and couldn't have done this without your detailed help! It turned out so cute!
Simple, cute and fun! Love it!
I linked to this in my Friday Favorites!
http://www.laniejandco.com/2011/02/friday-favorites-2411.html
Determined to do this but having the same trouble as Angie and Misty. Pretty new with Elements. Love this idea!!
I cannot thank you enough for this idea! It took a little adjusting but I was able to put the two pictures together in a word document by selecting the text wrapping function and having the picture highlighted to go behind the text. They are so cute!
I love this! Thank you so much! I had to get a bit creative because I don't have any fancy picture software. I was able to copy and paste your picture into a word document. Then I put my picture in the same word document. I used the text wrapping function and chose "behind text" for the picture. I was able to drag it behind the wrapper and it turned out great! So fun! Thank you for sharing your idea!