Hi! I’m Tiffany. My partner, Jaimee, and I are the bloggers behind
Craft, Interrupted. I have to say, I am super excited to be visiting over here at
eighteen25. In fact, I may have jumped up and down and texted Jaimee with
a “SQUEAL” when I got the message that they wanted me for Spooktacular September.
But I’ll never admit to any of it ; )
Craft, Interrupted. I have to say, I am super excited to be visiting over here at
eighteen25. In fact, I may have jumped up and down and texted Jaimee with
a “SQUEAL” when I got the message that they wanted me for Spooktacular September.
But I’ll never admit to any of it ; )
Over at Craft, Interrupted, I am mostly known for my Fun Jar Friday posts –
my weekly post where I bring you a fun activity to do with your kids. But one
of my favorite crafts to make are peggie dolls. I have done, super heroes,
princesses, zombies and now Halloween peggies.
my weekly post where I bring you a fun activity to do with your kids. But one
of my favorite crafts to make are peggie dolls. I have done, super heroes,
princesses, zombies and now Halloween peggies.
And now I get to show you guys how I do my Halloween peggie dolls!

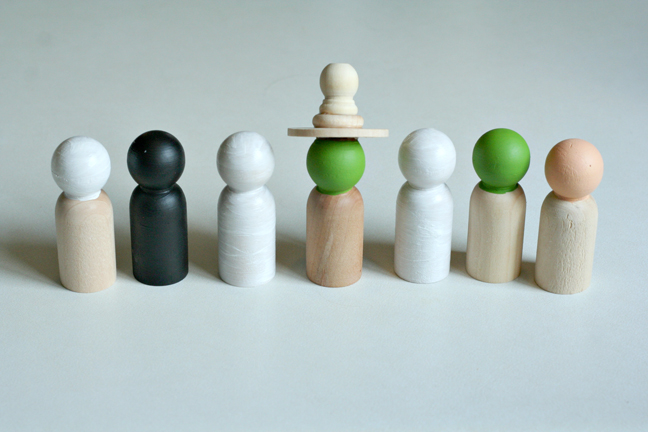
You can find unfinished wooden peggie dolls at your craft store. I get them
at Hobby Lobby. They are about $3 for a pack of eight. The first step is to
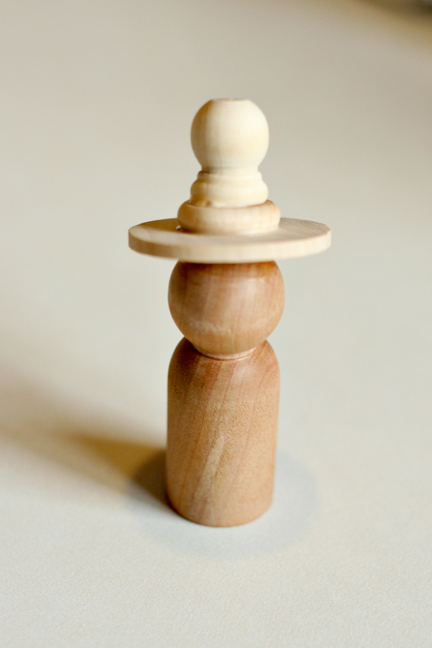
construct the witch. It’s easy enough. I searched my stash of extra wooden
pieces to make the hat and came up with these.

Using an electric sander, I sanded down the back of the wooden peggie head until it
was flat enough for the hat to lay flush. Then I used Gorilla glue to glue it all together.
Now you are ready to paint! I like to use two brushes – a bigger one for covering
larger areas, and a small one with a good point for smaller details.
A sharpie works well for details, too.

I realize my brushes are trashed. As an illustrator, I use them a lot.
It doesn’t matter what they look like as long as they do the job!
For painting I like to use a liquid acrylic but don’t get the cheap stuff. You get what you
pay for. If you go cheap, you’ll be painting a lot of layers. Some of my favorite
paint for crafts is Liquitex or Delta Creamcoat.
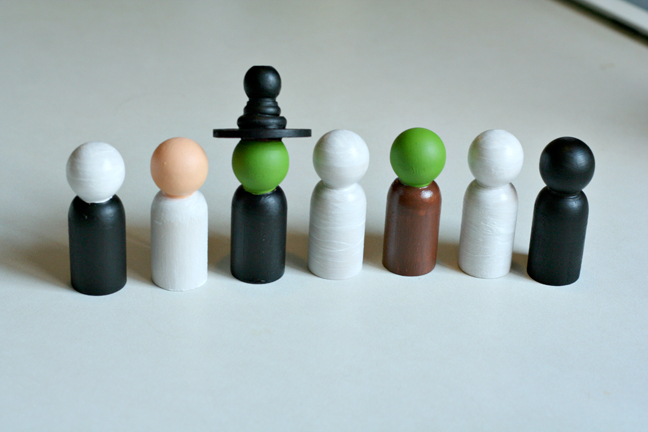
The first thing I like to paint is the heads. I do this with the bigger brush.
If the head and the body are the same color, I paint the whole thing
like I did for the cat, ghost and mummy.
Once that part is dry, the next step is to paint the rest of the bodies. When painting the body, I place the (dry) head in between my fingers to hold the peggie while I paint the body. That way, I can leave them between my fingers to dry and still have the tips of my fingers to keep painting other peggie dolls. You can see a pic of this technique in my Super Hero Peggie Dolls Post. I also painted the witch’s hat at this point.
Next comes the face details. I do this with the thin brush, but eyes are easily
applied with a black sharpie. If you are uncomfortable with a paint brush,
use a pencil to lightly draw the details and then paint them in.

Finally, you will paint in the clothes details. Again, draw it in first if you are cautious. And a sharpie works great for the mummy’s wraps. I painted in grey ears for the cat and little bolts on the side of Frankenstein’s neck area. When they are all dry, apply a clear top coat to the entire peggie and you are finished!
Hope you all enjoy your peggie dolls! Thank you so much for having me. Here are some other projects I’ve done for kids, along with many more at Craft, Interrupted!


. . .
This post is sponsored by:
I'm Jen Sedillo, one of the bloggers behind Eighteen25. I love creating and crafting, reading good books, visiting new places and being with family!
Latest posts by Jodie and Jen (see all)
- Our Friday Five 9.30 - September 30, 2022
- Our Friday Five 12.3 - December 3, 2021
- Composition Book Christmas Planner - November 28, 2021
this is a super idea!
Oh my these are so cute!!! Love it:)
Thanks so much for sharing some Craft, Interrupted goodness with your readers! It's pretty exciting for us! Tiffany is super creative, isn't she?! I'm so stoked to have her coming on as my blog partner : )
These are so great! I love all of the little sets of these..you ladies are SO talented!:)
I seriously want to make some of those.
Those are so cute!
I am headed to my local craft store this morning to get the supplies for these! They are absolutely adorable and I know my little girl will have a blast playing with them! She built a pumpkin patch out of little plastic pumpkins and Popsicle sticks yesterday…I think these will make great little play figures for it! Thanks for sharing the idea!
great ideas!! Thanks!
Any special paint you all use for these?