• About
  • Advertising
  • Contact
  • Meet the Team
  • Blog
    • Bloglovin
    • Facebook
    • Instagram
    • Pinterest
    • Twitter

Eighteen25

Create A Life You Love.

  • Home
  • Printables
  • DIY + Crafts
  • Holidays
  • Recipes
    • All Recipes
    • appetizers
    • salads/side dishes
    • main dishes
    • Desserts
  • Misc.

Please Welcome: Kristyn from Lil’ Luna

Sep42012 posted by Jodie and Jen 16 Comments

It’s Kristyn from Lil’ Luna, and I cannot even tell you how excited I am to be here today. One – because I love the Eighteen25 girls and think they are adorable along with everything they create, and two – I love Halloween and look forward to Spooktacular September every year!!

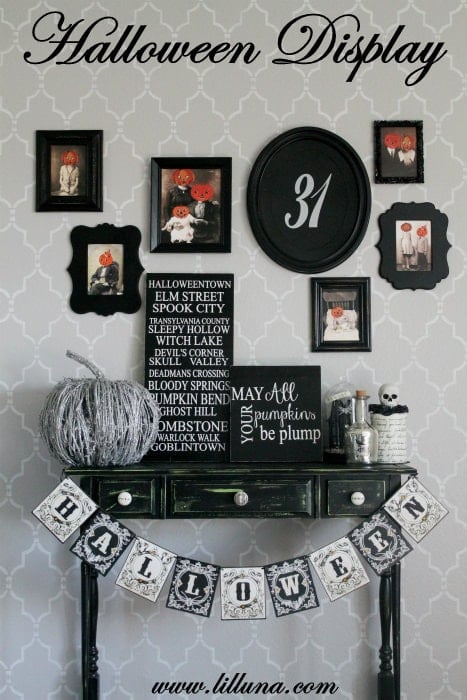
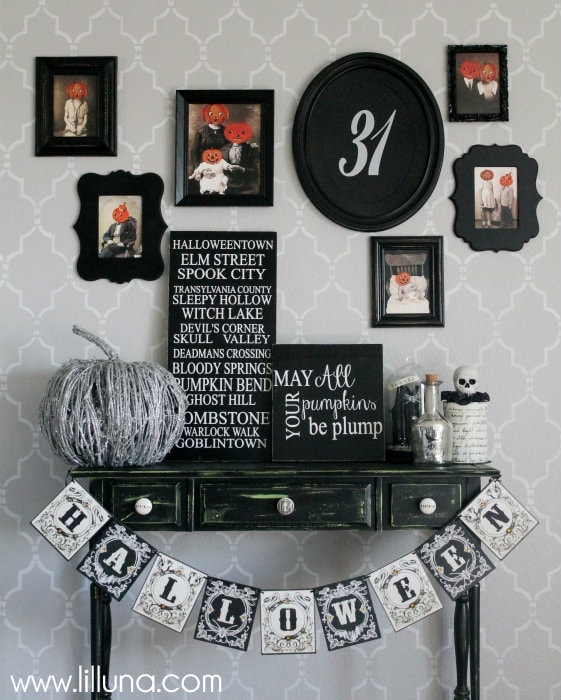
As Halloween approaches I’ve obviously been thinking of decor and what I wanted to do for my house. I knew I wanted an awesome entryway and decided this year to use mostly White, Black and Silver decor with accents of orange. With that in mind I decided to come up with a Spooktacular Halloween Display with a creepy tablescape and Gallery Wall. I hope you like it… 😀

Almost everything in the picture above was made, except for the pumpkin and few pieces on the right (purchased at Marshall’s). Even the table was made (thanks to the hubby!!)

To begin I decided to make a few Subway Art pieces. The first one is inspired by a Subway Art Drawer from Matthew Mead that I fell in love with listing several spooky Halloween locations. I changed mine up a bit and added a few more cities that I either made up or found online that are real locations here in the U.S. Here is how I made it…


SUBWAY ART SIGNS

SUPPLIES:
– Wood (1 ft x 2 ft)
– Vinyl
– White Spray Paint
– Black Spray Paint
– Polyurethane
– Sand Paper
– Silhouette

DIRECTIONS:


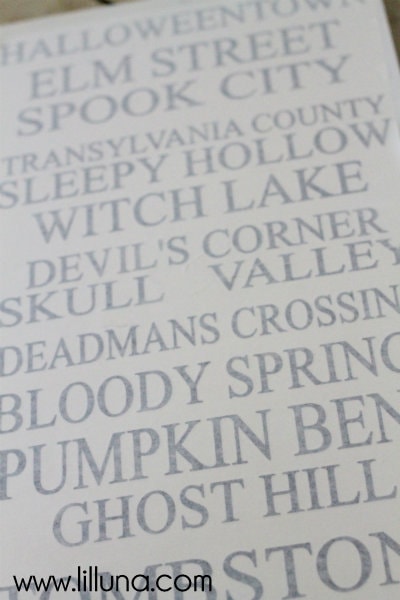
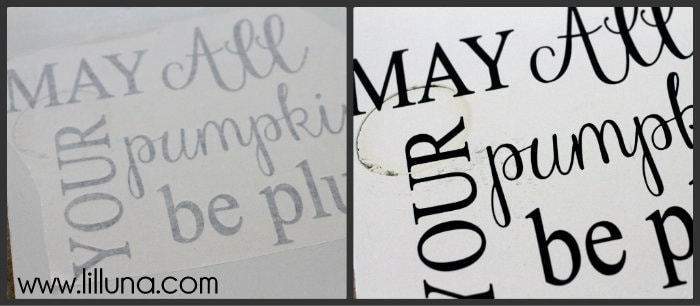
1. Begin by spray painting your piece of wood white. You can use craft paint as well, but I love Rustoleum Spray Enamel. It works so well with the vinyl and looks really nice! Let your paint dry.


2. As the paint dried I designed my vinyl and cut it out using my Silhouette. Peel and add adhesive to your vinyl.


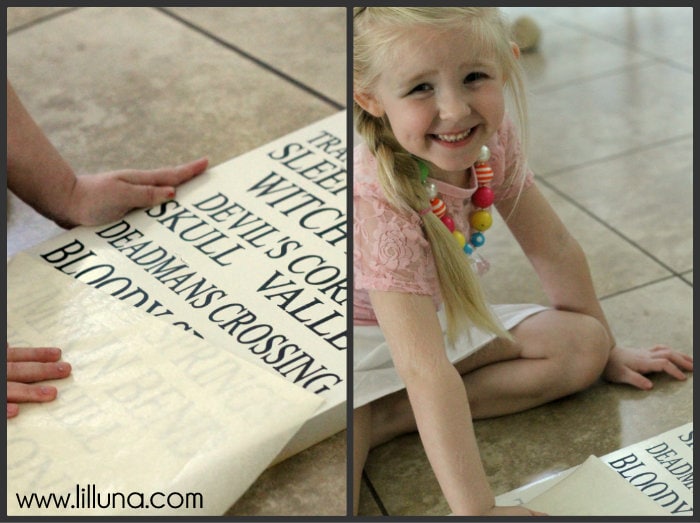
3. From there I added my vinyl (which can be any color since you’re only using it as a stencil) to my board, and peeled off the adhesive. My Lily is always happy to help with my crafting and helped me pull it off. 🙂 (NOTE: You do not have to use the vinyl as an adhesive. If you want to use it for the lettering just paint your piece and add your vinyl on top).


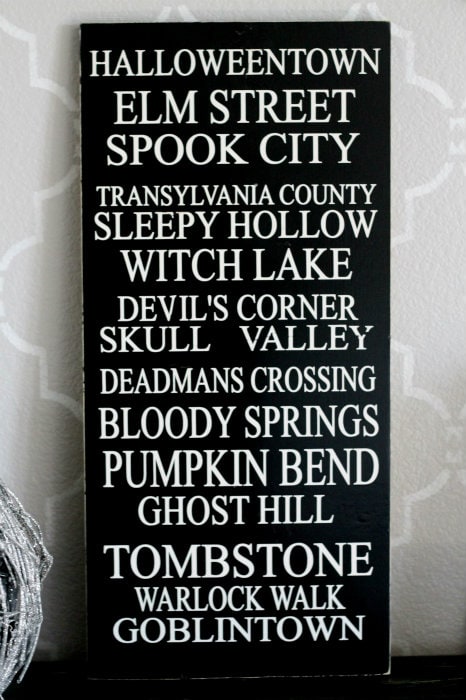
4. From there I spray painted the board the color I wanted it to be (in this case, black) and let it dry. I peeled off the vinyl and sprayed it with Polyurethane. Let dry.


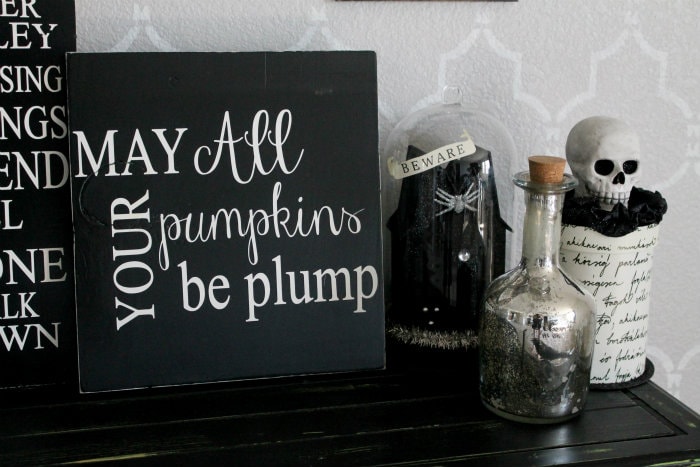
This is the finished product:


I also decided to make another one that was a little smaller. Directions are as the same as above but this piece is only 1 ft x 1 ft.

Saw the saying at the store “May All Your Pumpkins be Plump” and loved it!!
What’s great about these signs are they are quick and easy and only cost a few dollars to make!

From there I decided to make a 31 sign, another inspiration from Matthew Mead (if you don’t know who he is, go check out his website or his awesome magazines!!) He also has lots of vintage Halloween downloads on his site, two of which I used last year for my Spooktacular September post.

Making the 31 sign is super simple. Here is how to do it:

Halloween 31 Sign


SUPPLIES:
– Frame
– Spray Paint
– Vinyl
– Silhouette


DIRECTIONS:


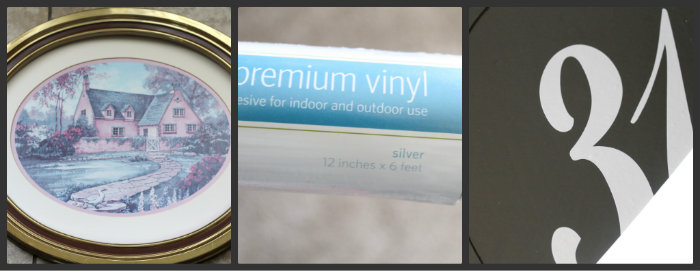
1. Find your frame (I got mine for a few dollars at Goodwill) and spray paint it your desired color. I painted mine black.


2. From there I designed my 31 on my Silhouette. The font used is: Elite Script Heavy.


3. Add 31 to frame.


Hang and enjoy!!


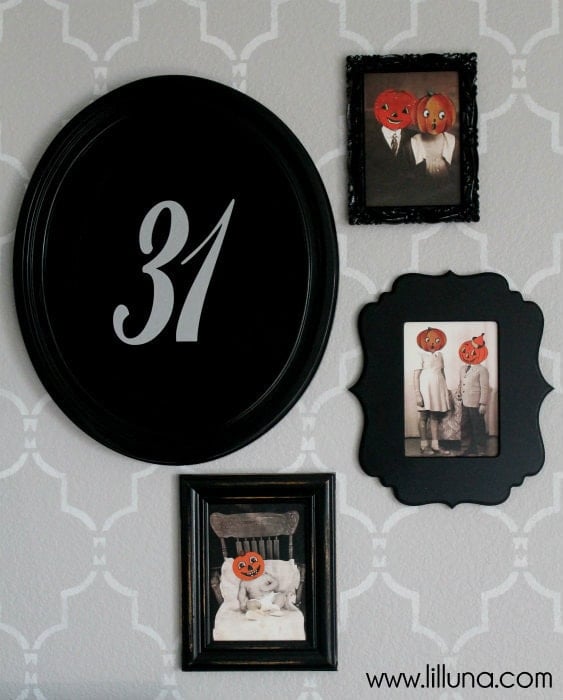
I love how simple and easy the 31 sign was. It was the perfect focal point for my gallery wall and was also made for only a few bucks.

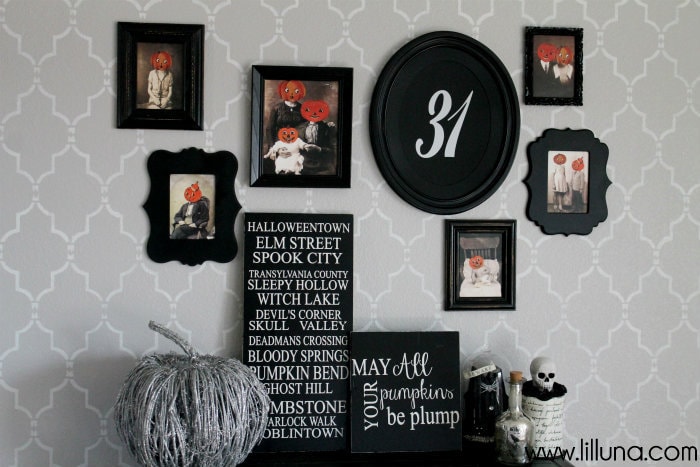
To finish off the gallery wall it was really simple. I bought some more frames at Goodwill, spray painted them and added some spooky pictures.

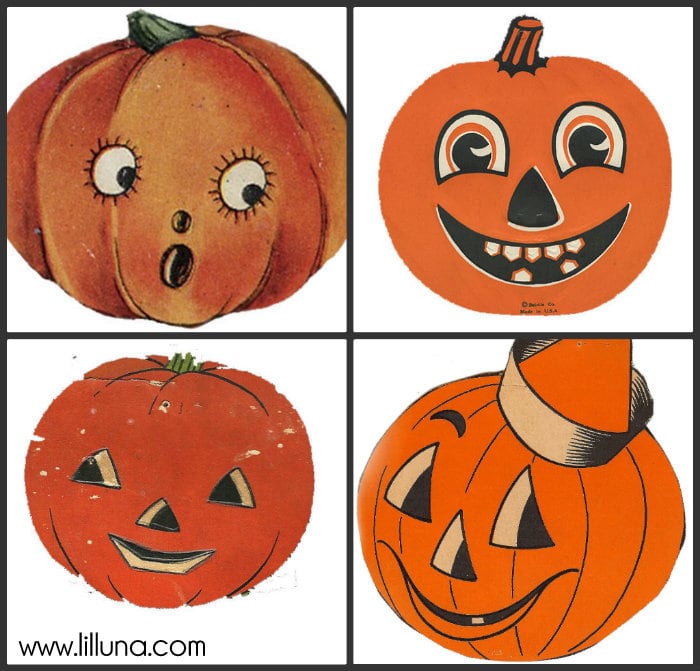
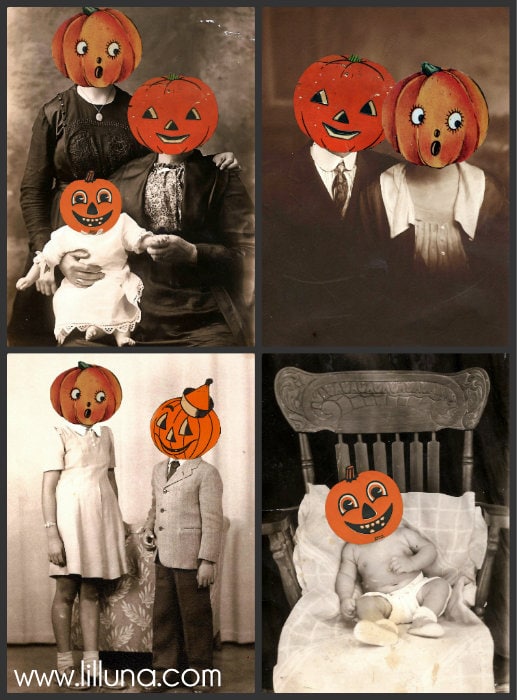
The photos are actually of mine and my husband’s ancestors. I found some vintage halloween and cat faces online and photoshopped the heads onto the vintage images to create some fun but spooky pictures.


I created EIGHT different Vintage Halloween Pictures for you that can be downloaded HERE:
For 5×7 images Part 1 go HERE and for Part 2 go HERE.
For 8×10 images Part 1 go HERE, for Part 2 go HERE, for Part 3 go HERE, for Part 4 go HERE, for Part 5 go HERE and for Part 6 go HERE.

I just got them laser color printed at the local copy store, cut them out and placed them in the frame. From there I added the pictures to the wall using command strips so I wasn’t putting a gazillion holes in the wall (hubby’s new rule, lol!!)

I LOVE how the gallery wall turned out!!

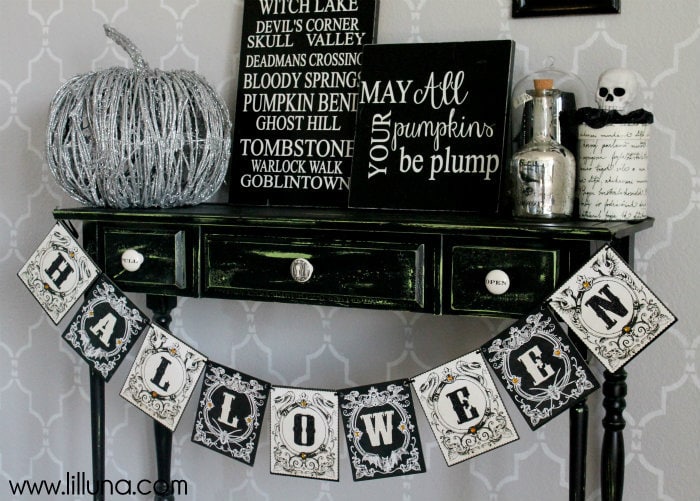
From there I topped things off with the few pieces I bought from Marshalls along with a banner.


I’m so happy with how it turned out and am so glad this officially got me in Halloween Decorating mode.

For more Halloween fun be sure to come to the blog and check out some other Creepy Creations, like this:

Trick or Treat Wreath


Thanks for having me today Jen, Jamie and Jodie!! And be sure to stop by Lil’ Luna to say hi as well as follow me on Pinterest!


ENJOY…. and Happy Halloween!


Visit Kristyn on her Blog : Facebook : and Pinterest
. . .
this post is sponsored by:
Park City Luxury Rentals are 20% OFF
  • Bio
  • Twitter
  • Facebook
  • Pinterest
  • Latest Posts
Jodie and Jen

Jodie and Jen

I'm Jen Sedillo, one of the bloggers behind Eighteen25. I love creating and crafting, reading good books, visiting new places and being with family!
Jodie and Jen

@eighteen25girls

Jodie and Jen
Jodie and Jen

Jodie and Jen

Jodie and Jen

Latest posts by Jodie and Jen (see all)

  • Our Friday Five 9.30 - September 30, 2022
  • Our Friday Five 12.3 - December 3, 2021
  • Composition Book Christmas Planner - November 28, 2021


16 Comments

« Please Welcome: Kami from NoBiggie
Please Welcome: Nat and Holly from My Sister’s Suitcase »

Comments

  1. Jacqueline says

    September 4, 2012 at 12:40 pm

    Very cute! Love each piece. Then again, I love almost all Halloween things!

    Reply
  2. Suzanne says

    September 4, 2012 at 12:56 pm

    The pumpkins on the photos are my favorite part!

    Reply
  3. kiki comin says

    September 4, 2012 at 1:06 pm

    loved it all, kristyn. those pumpkin photos are too fun!

    Reply
  4. Capturing Joy with Kristen Duke Photography says

    September 4, 2012 at 1:27 pm

    those pumpkins heads over the pictures made me laugh–so cute and fun! Very cute wall display!

    Reply
  5. CBH says

    September 4, 2012 at 2:08 pm

    Thank you so much for this post. I want to let you know that I posted a link to your blog in Creative Busy Bee Craft Inspirations, under the Page 2 post on Sep. 04, 2012. Thanks again.

    Reply
  6. Katie says

    September 4, 2012 at 2:16 pm

    Loving this adorable Halloween display!

    Reply
  7. Kristie K. says

    September 4, 2012 at 2:19 pm

    I am sure your ancestors are giggling! Too funny! And super darling….

    Reply
  8. Desiree @ The 36th AVENUE says

    September 4, 2012 at 5:36 pm

    Oh my! This is AMAZING! Pinning and sharing on my FB page! LOVE IT!

    Reply
  9. Megan B says

    September 4, 2012 at 7:08 pm

    So cute! I really need to get a silhouette, don't I?

    Reply
  10. Jeannie Clemens says

    September 4, 2012 at 11:41 pm

    So freaking (pun intended) cute!

    Reply
  11. Rach H @ FamilyEverAfter says

    September 5, 2012 at 4:20 am

    I love this girl!!! She is so creative! And I love your fun Halloween series! It's totally getting me into the spirit! 🙂

    Reply
  12. CBH says

    September 5, 2012 at 12:19 pm

    Thank you so much for this post. I want to let you know that I posted a link to your blog in CBH Digital Scrapbooking Freebies (please, notice the new url for my blog), under the Page 3 post on Sep. 05, 2012. Thanks again.

    Reply
  13. Angie says

    September 5, 2012 at 5:10 pm

    SO cute! I love this! And I pinned it. =)

    Reply
  14. Anonymous says

    September 10, 2012 at 10:10 pm

    Where is the banner from?
    I love it all!

    Reply
  15. Kayla and Andrew says

    September 14, 2012 at 2:28 pm

    Absolutely LOVE this! I love the pumpkin faces on the old pictures! :]

    Reply
  16. Ashlee says

    October 7, 2012 at 12:57 am

    Seriously love this! I featured it here: http://crafting-cousins.blogspot.com/2012/10/halloween-fab-5-friday.html?m=1

    Reply

Leave a Reply Cancel reply

Your email address will not be published. Required fields are marked *

This site uses Akismet to reduce spam. Learn how your comment data is processed.

welcome!

We are Jodie & Jen, born & raised in Vegas, in a little brick house. The number hammered onto our mailbox was 1825. Visit us often & be inspired to create a life you love. Read More…

  • Bloglovin
  • Facebook
  • Instagram
  • Pinterest
  • Twitter

Subscribe by Email

Get our latest & greatest posts straight to your inbox.

featured posts

Bird Feeders
Instant Pot BBQ Chicken Sliders
Free Printable Watercolor Notebook Covers
DIY Disney Ideas
Disney Trip Fun Bags
Printable Recipe Binder

eighteen25 loves

Disney banner 350

Privacy Policy

stay updated on latest
posts on Facebook

The Girls at Eighteen25
  • Bloglovin
  • Facebook
  • Instagram
  • Pinterest
  • Twitter

Copyright © 2025 · All rights reserved · Site by Melissa Rose Design