We recently shared this fun project over at Infarrantly Creative. The goal was to come up with a gift idea for under $10. We managed to stay under budget and are very pleased with the outcome.
The Love Notes Box

What You’ll Need:
- an unfinished wood box (got ours at Hobby Lobby $4.99 but on sale for 50% off. about $2.50)
- metal handle (from Hobby Lobby too $5.99 used a 40% off coupon. about $3.60)
- spray paint (we used Krylon Blue Ocean Breeze about $3.00)
- the following free downloads…
Download Lovenotes
Download Lovenotescards
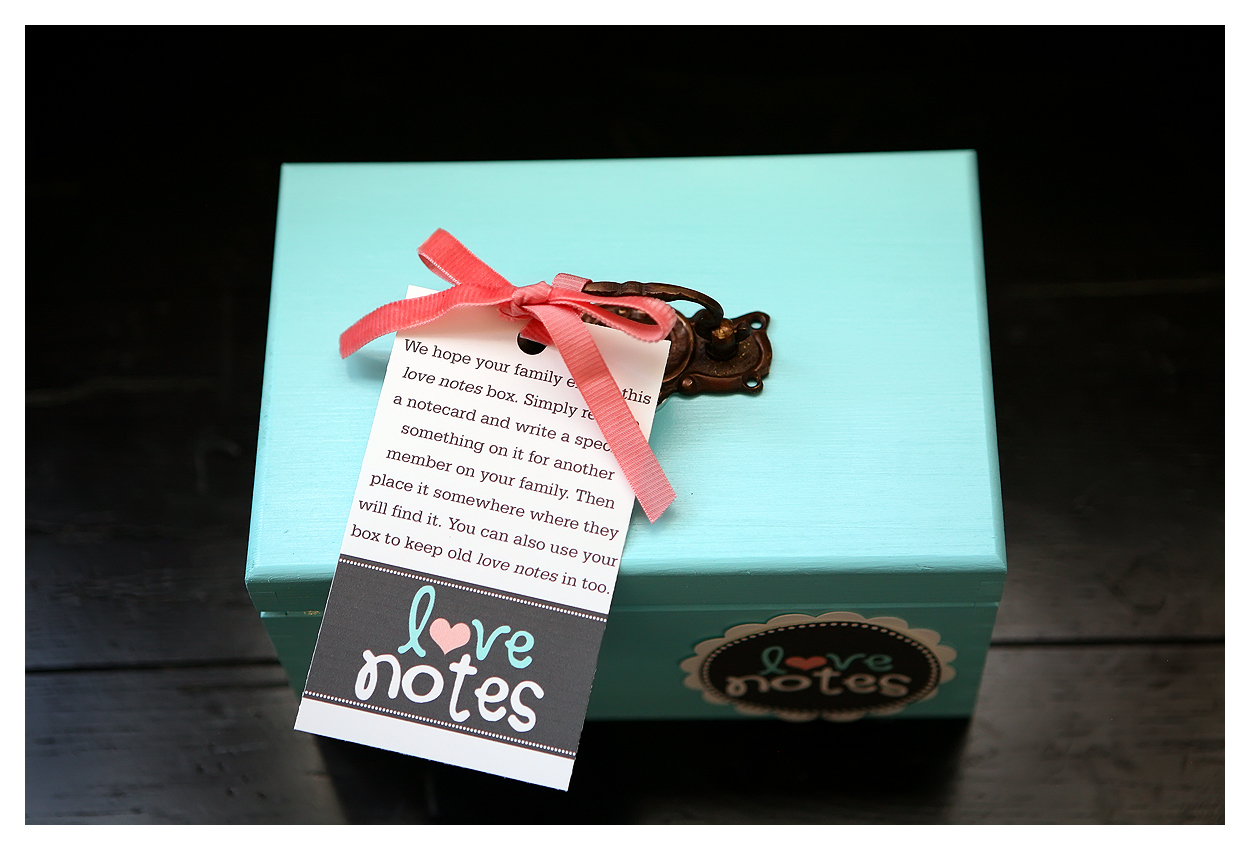
Download Lovenotestags - ribbon (from our stash)
- 3″ circle punch (or you could trace the top of a cup)
- 3 3/4 ” white scalloped circle (cut with the Cricut)

STEP ONE: Gather all of your supplies and print off all the downloads. Cut or punch out the 3″ tag and back with the scalloped circle.
STEP TWO: Spray a few coats of paint on the box.
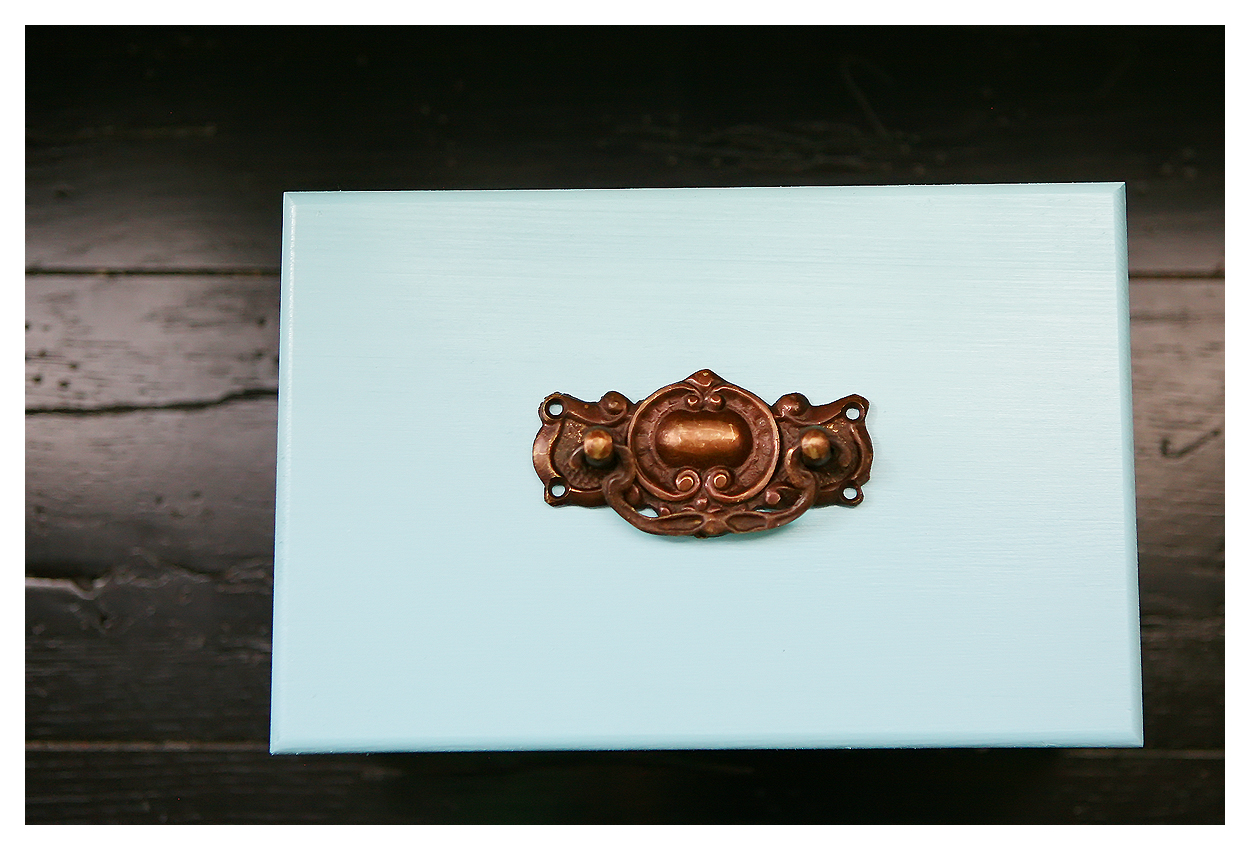
STEP THREE: Once dry, attach the handle to the top of the box. (We used E6000 glue)
STEP FOUR: Attach the 3″ round tag to the front of the box. (We used glue dots)

STEP FIVE: Tie the instructions tag onto the handle with ribbon.
STEP SIX: Fill the box with blank love notes cards.

STEP SEVEN: Make one for yourself. Your family will have so much fun leaving each other random love notes throughout the holidays and every day after.
Jamie
Latest posts by Jamie (see all)
- Bird Feeders - May 24, 2019
- [2014 WISHlists] Jamie’s List - December 12, 2014
- Avery Custom Photo Gift Tags - December 2, 2014
How could I describe it? Lovely? I like it! 😉
Just so creative and do-able! Thanks.
This is how I found you! I love Infarrantly Creative! I am going to make this for a wedding gift and put a gift card with it. So cute!
what a sweet idea
I love this idea and the colors you used are perfect. The last post for grandma's is also a sweet idea. Would love to make this for my grandma. Thanks for all your ideas and inspirations.
Are you still doing snapshot of your life this week, would be fun to see everyone's holiday.
Happy Thanksgiving to you and your family's.
LOVELY!!! I can't wait to make this! Thanks!
This is sooo adorable! I love this idea. Thanks so much for sharing. 🙂
I just LOVE this.
Everymorning, my husband leaves me a note before he ventures off to work for the day … but with this, I can leave notes, too! LOVE IT. Thanks for sharing!
Your how-to's are just terrific, step by step for the ones who need you to talk slowly and show me how!
ADORABLE! love this idea! thanks for sharing. happy thanksgiving!
Love this post and love this blog. I'm a terrible blog lurker and I *LOVE* your blog, so in the spirit of Love Notes, I wanted to know how much I appreciate each and every post!
My husband and I are making a concerted effort NOT to spend any money on each other. I think this is a wonderful project; I could make it almost entirely from my stash and fill the cards with notes for him. He's a sentimental man, and I think he will really appreciate it.
Hello Jennifer, Jamie and Jodie!
What a lovely gift. Lovely!! I think this is the best heartfelt gift for brides and new parents too. My 'notes of advice' are shaped in such a way that don't fit into a standard photo album and this is such a perfect solution.
It's absolutely gorgeous. Anything personalized means the world to me and what you've done is taken something that has helped others to help themselves.
What a great way to strengthen family love.
I couldn't be happier to have made my way to Vegas, stumbled across your steps, and have found your adorable picture hanging up on 1825.
Happy Holidays,
Susan
OHH…very beautiful project!! I love it!! Thnk you for tutorial!!
What a wonderful idea! Thanks for sharing. I was wondering…Which Cricut cartridge did you use to cut the scallop circle? I've been looking for the shape. Thanks!
Hello! I love this idea. I featured it on my blog today! Love if you stopped by! And if you don't mind – while your there clicking on my widget. Each click we get P&G is donating 1 days worth of water! Thanks!
Amanda
todaystoptwenty.blogspot.com
I absolutely can't wait to replicate this! This is just fantastic! Endless thanks for the printables!
xoxo,
Jen
I made these, with a little twist, for my self and two friends of mine for our graduation party. We filled them with memory cards though and had each guest leave a note or a memory. Now we can take the boxes to college and when we get homesick we can read the notes and remember all the fun times.
This is such a lovely idea! I can't wait to make my own box and start spreading the love.
Thanks for sharing.
Love Katie x
Thank you! I made this box to hold the note cards I write on everyday about something the girls have done. Feb 26 2011 – Olivia took her 1st steps
Feb 26 2012 – Lily laughed so hard she spit milk out her nose
Feb 26 2013 – Olivia asked to watch Woompa Woompa (Oompa Loompa)
I have 1 card for everyday of the year and each day I add something new to it from something they've done, or something funny they've said, places we've gone, etc. This looks so much nicer on my nighstand (i used a black plastic card box).
I LOVE your idea Tracey!! Thanks for sharing.