This adorable Yarn Ghost Garland won’t scare the kids, they can even help make it!
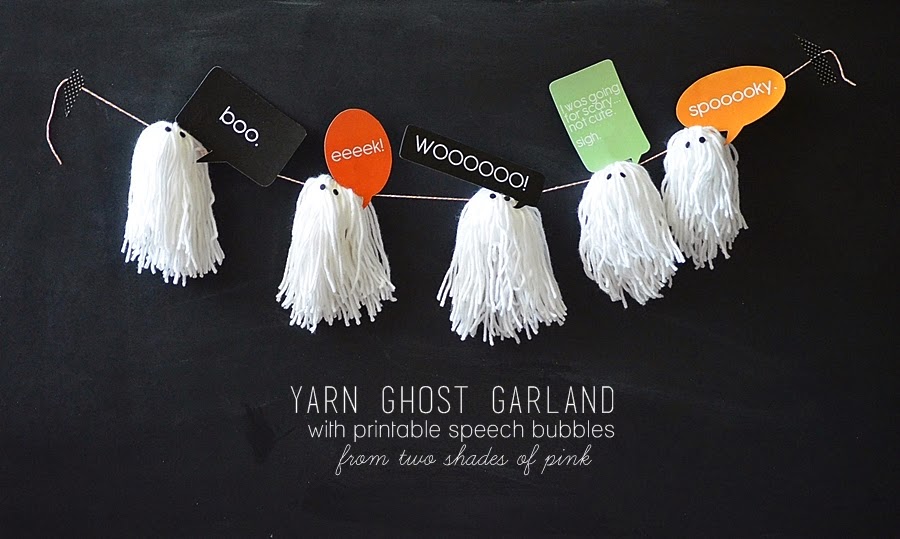
Hi there!!! I’m Jessica from Two Shades of Pink. I am so excited to share this adorably cute ghost garland with speech bubbles! I had lots of ideas for this year’s post but I wanted to gravitate towards something simple and family friendly. I always love me a good garland and literally have a storage bin FULL OF THEM. So why not make another? I actually took this idea off of another Spooktacular project I did (these adorable Monster Cupcake Picks) but expanded on it to make this ghost garland.
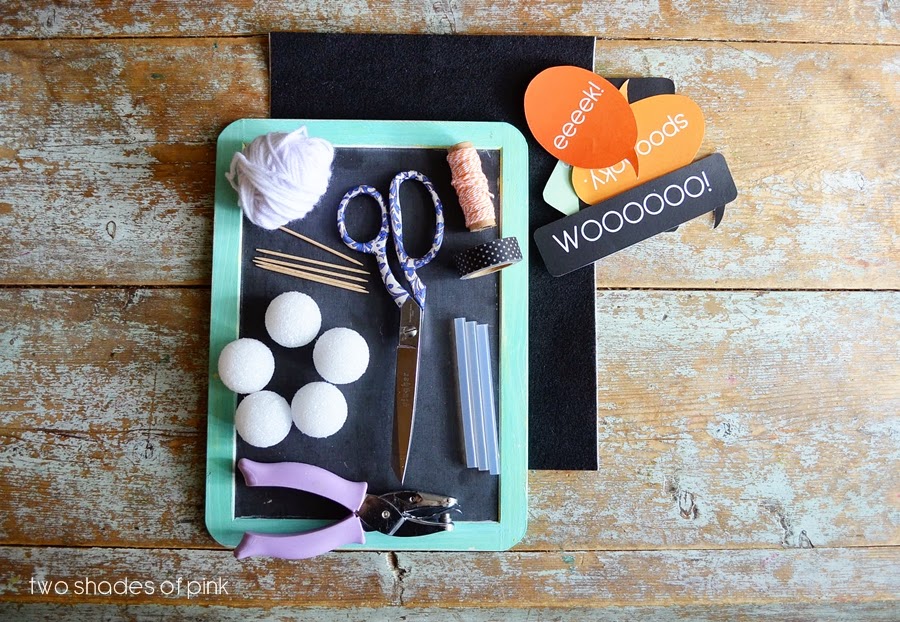
Here’s what you need: (5) 1.5 inch Styrofoam balls, white yarn, black adhesive felt, twine or yarn, 5 toothpicks, tape, hole punch, glue gun, a book or chalkboard for wrapping yarn around and scissors. Oh and your cute little speech bubbles. (printable below)
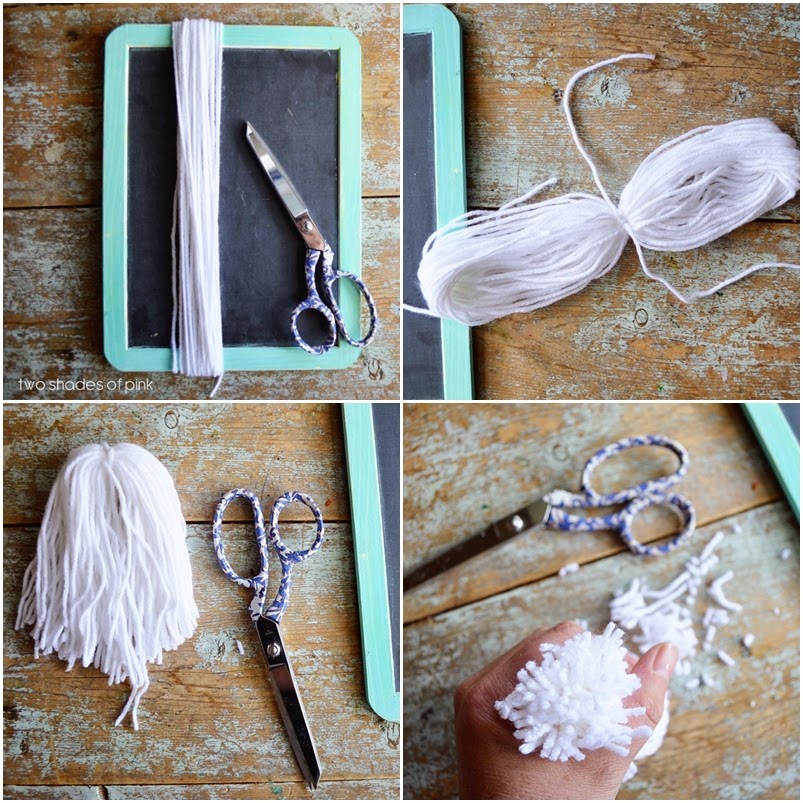
Step 1: Wrap yarn around a chalkboard or book 35-50 times.
Step 2: Slide the yarn off and tie off the middle.
Step 3: Snip the loops and fold in half until you have your ghost shape.
Step 4: Give your ghost a little haircut to even it up a bit.
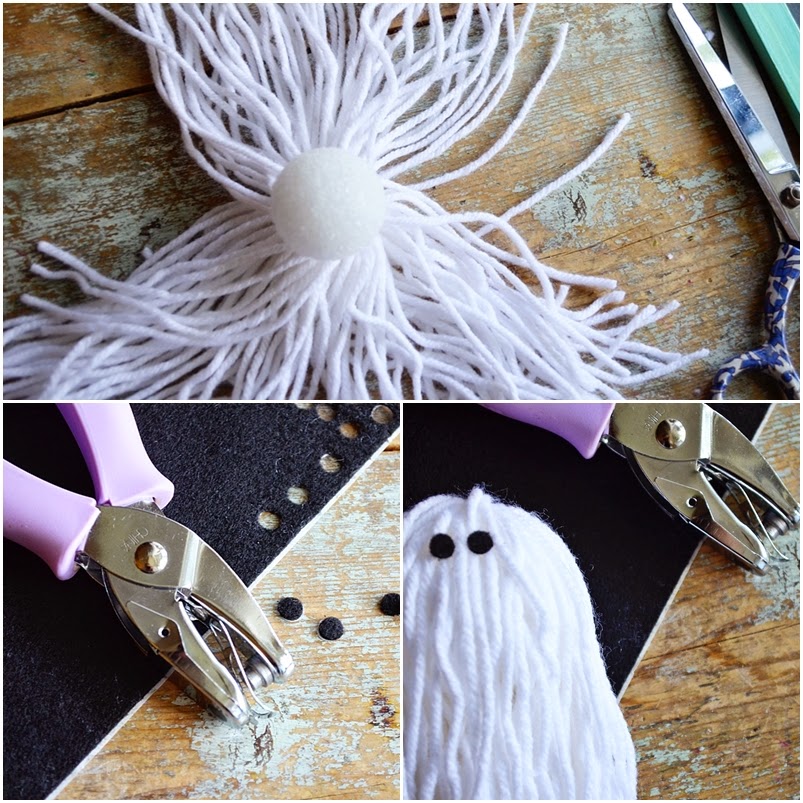
Step 5: Spread the yarn out and hot glue your Styrofoam ball right in the middle.
Step 6: Punch out eyes for your cute little ghosts to see.  I reinforced mine with a dab of hot glue.
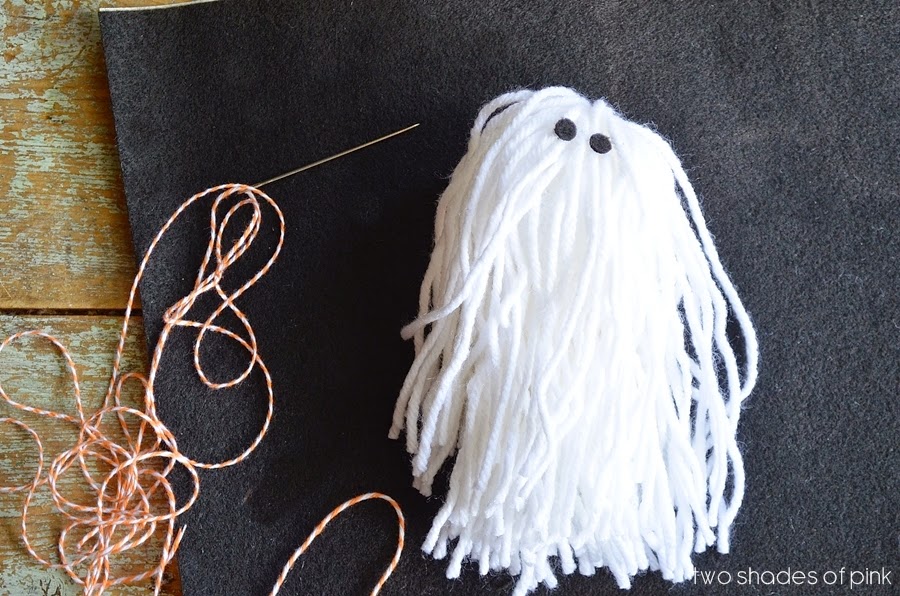
Step 8: Thread twine on a thick (yarn) needle. Push your needle at the top of the styrofoam ball (right where the needle is pointing in the photo). This will help it hang and not be too heavy. Thread each one onto your twine or yarn. note: yarn will probably make this much sturdier
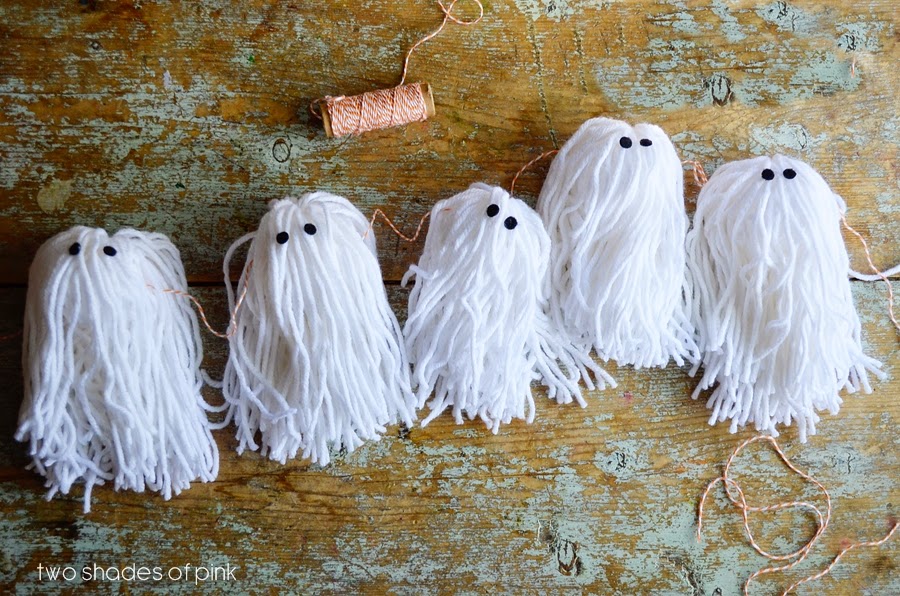
Now your ghosts are ready to start talking!

You can print your speech bubbles here.
(go to the downward arrow with a line underneath it in the bottom right, download, and print)
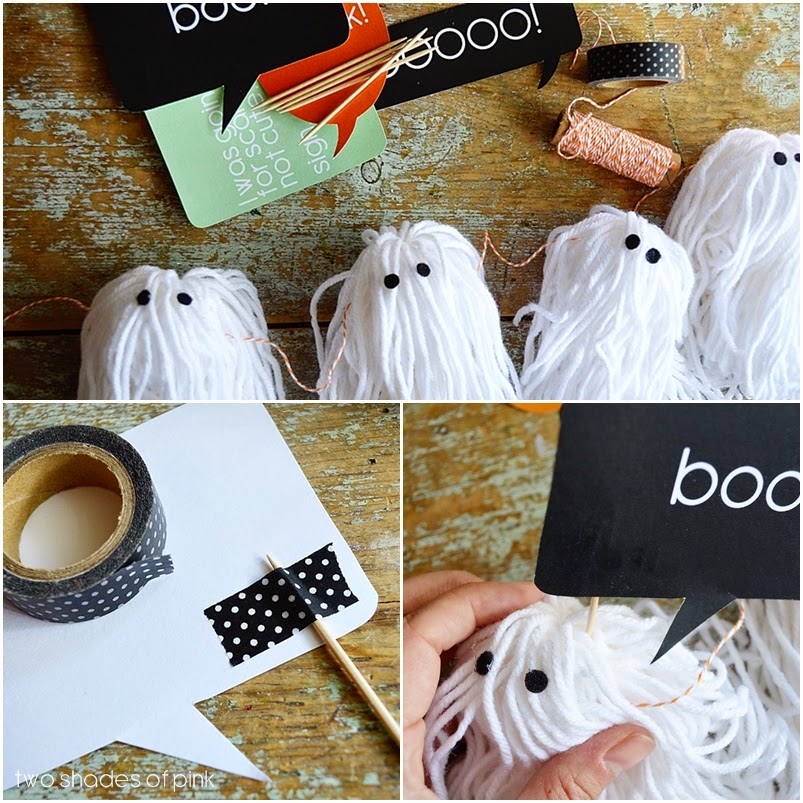
I used washi tape for the tooth picks but I think the best thing is probably scotch tape for the lighter colored bubbles because the darker tape can be seen through the back. Trim your toothpick to size with scissors and slide it in the ghost head on an angle.
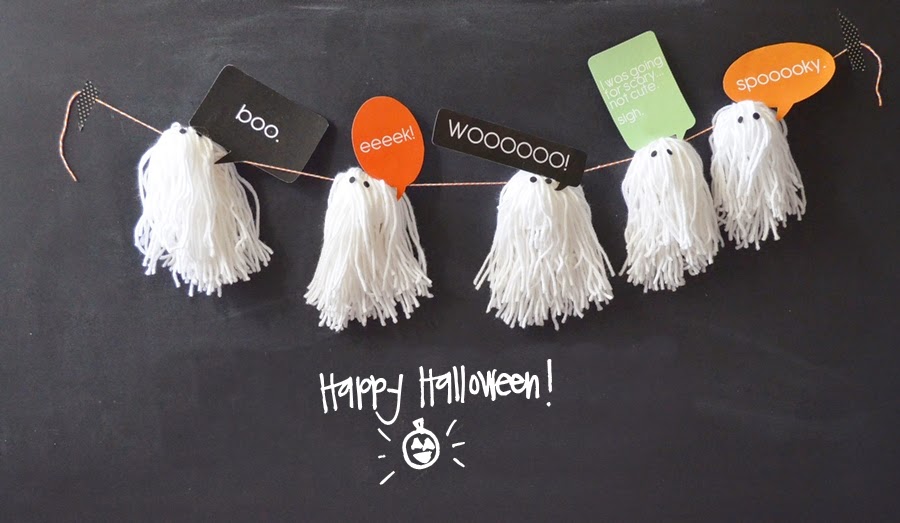
Now hang it somewhere so it makes you smile! I have this garland on my living room chalkboard but you could hang it on a blank wall or just about anywhere. It’s a pretty quick craft which makes it great to do with the kiddos too.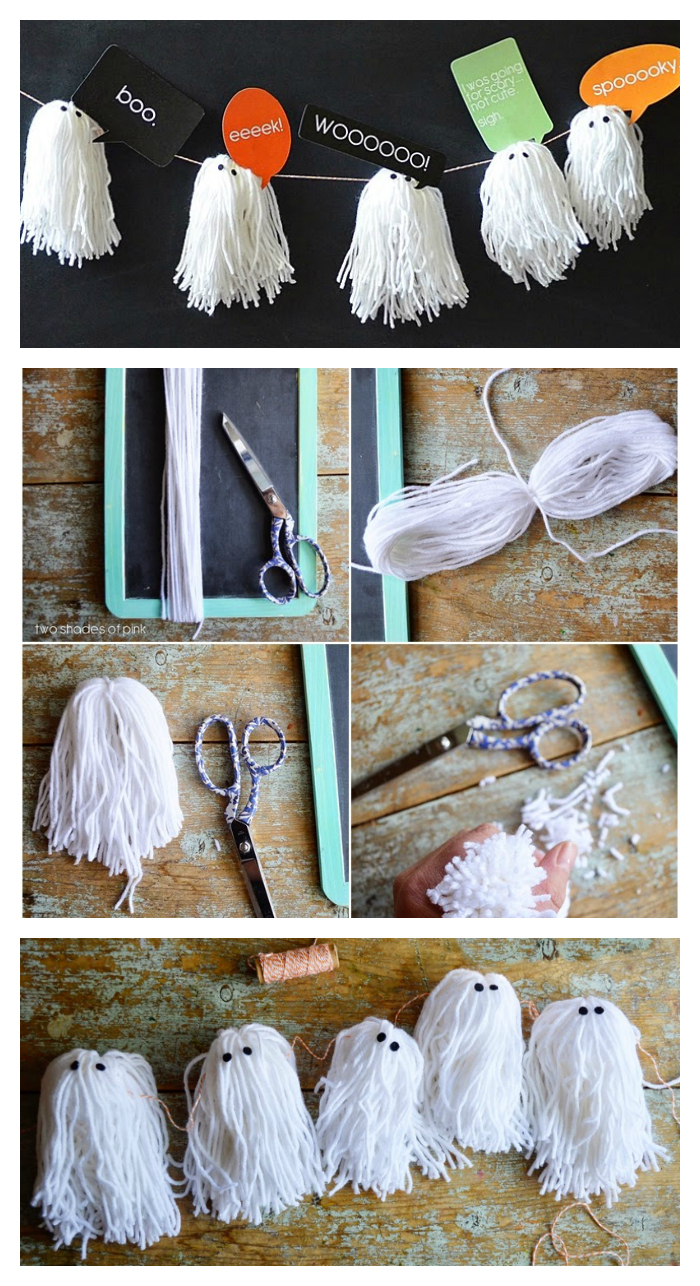
Thank you so much for having me Jen, Jamie, and Jodie! I love being here for Spooktacular 2014 and I’m always honored to be here.
Here are a few more fun Halloween posts you can find on Eighteen25:
- Framed Fabric Pumpkin
- Eat, Drink and Be Scary Tags
- Spooky Ghost Candy Jars
- Halloween Candy Corn Drink
Jamie
Latest posts by Jamie (see all)
- Bird Feeders - May 24, 2019
- [2014 WISHlists] Jamie’s List - December 12, 2014
- Avery Custom Photo Gift Tags - December 2, 2014
Such a fun and cute idea–thanks for sharing
Oh my word, I love these!!! So adorable!
These are so so so cute! What a great idea!
Adorable! I love these sweet little ghosts!
These are too stinking cute! I can see this fun little craft in my future. A little ghost garland would be perfect for my office window.
Thanks so much for sharing!
Absolutely wonderful, simple and fun but great impact.
These are so adorable!! Pinning it to make with the kids