
Hello everyone – I’m Toni from Design Dazzle! I’ve LOVED Halloween ever since I could remember. It’s such a wonderful holiday season with the fall weather, yummy foods, costumes and fabulous decor!! I thought it would be fun to make an unusual Halloween prop for my decor…so I added witch’s feet to a plastic cauldron for a Boot-a-licious Halloween prop. I’m trying to decide if I want this to hold candy for our trick or treaters or display it on the front porch with dry ice and hot water for a spooky effect. Hmm….
Pointy boots
Plastic cauldron
Spray paint
2 heavy duty plastic cups (not disposable)
Black electrical tape
Plaster of Paris
Ribbon
4 – pieces of 8″ floral wire
2 – pieces of wood dowel approx 6″ – 7″
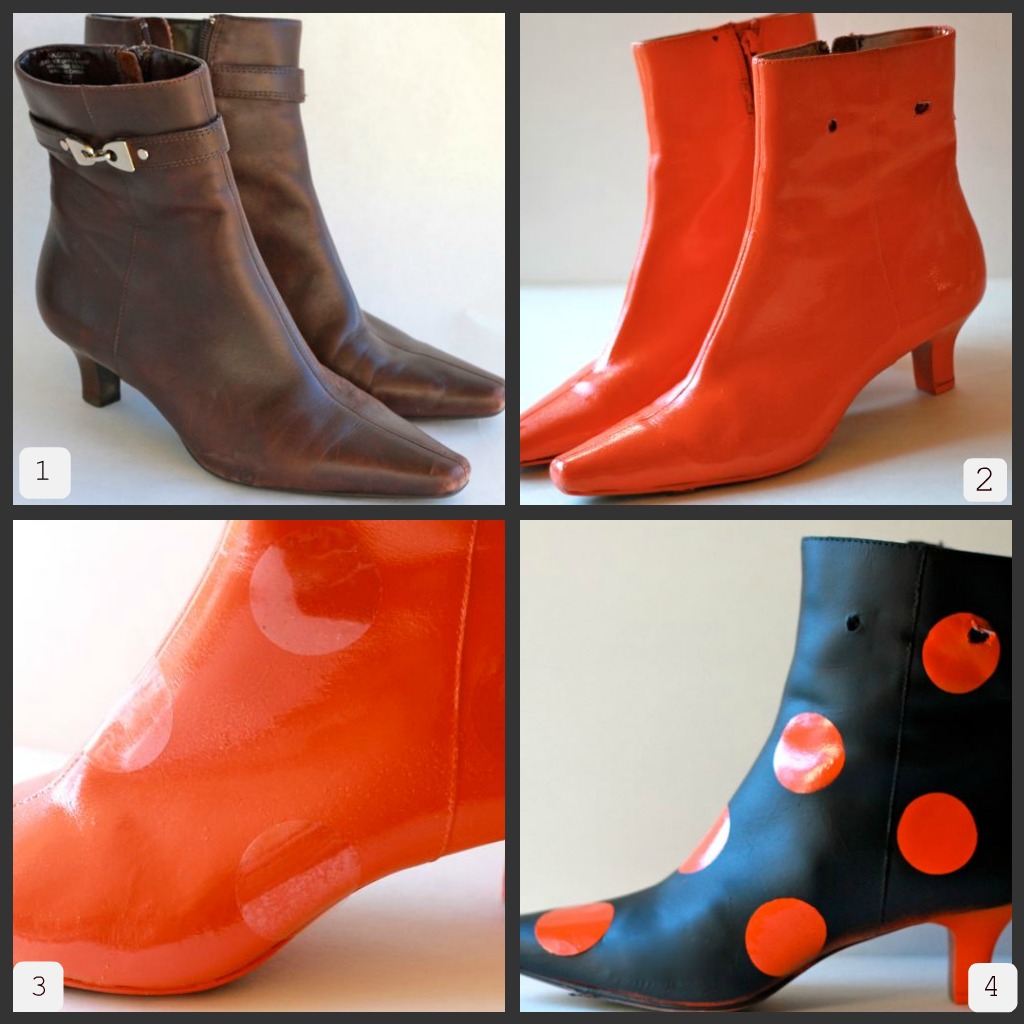
1. The boots were purchased at a thrift store ($2.50) and had hardly been worn. Before you start any painting make sure to disinfect (all over the boots) with bleach or Lysol. Let dry completely.
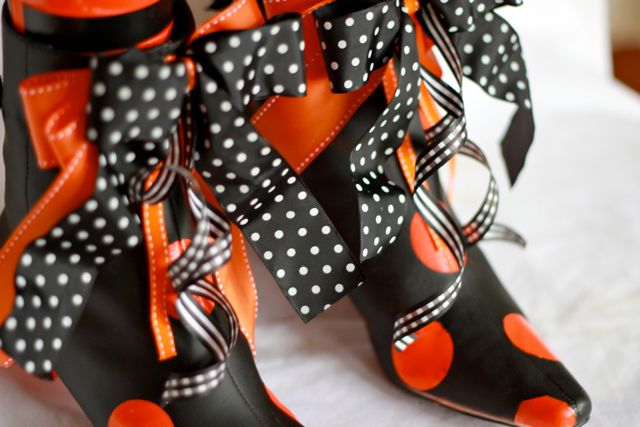
I decided I wanted black boots with orange polka dots. I thought about decoupaging the boots but decided to paint them since I had the spray paint on hand.
2. Spray boots with Kilz primer let it dry. Follow up with orange spray paint – let dry overnight. I used Rust-Oleum Orange Gloss.
3. Using packing tape (because it’s cheap and what I had on hand) – cut out 1 1/2 inch circles with the Cricut/Silhouette. Place circles randomly over the boot and press down firmly. The circles barely show up in the photo.
4. Spray paint the boots black. Gently peel the adhesive circles off before the black paint dries. Voila orange polka dots! If you’re fortunate enough to find black boots, orange vinyl circles would be a great and simple way to add the orange polka dots. Of course, you can always skip the step and just paint orange circles on the black paint.
Stuff the boots with newspaper – leaving about 2 inches of space at the top. FYI – I covered the holes on the side of the boot with ribbon.
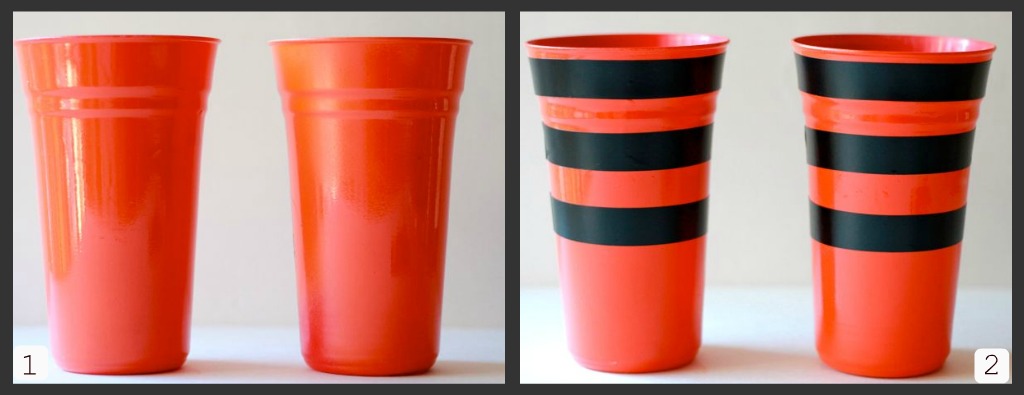
1. These heavy duty plastic cups were red until I spray painted them orange.
2. To make the stripes – adhere black electrical tape around the cup – easy, peasy!!

3. Tightly wrap the thin ribbon around the center point of the ribbon (the ribbon bunches up).
4. Pull at the loops. Fluff and fiddle with the ribbons until the bow looks how you want it!
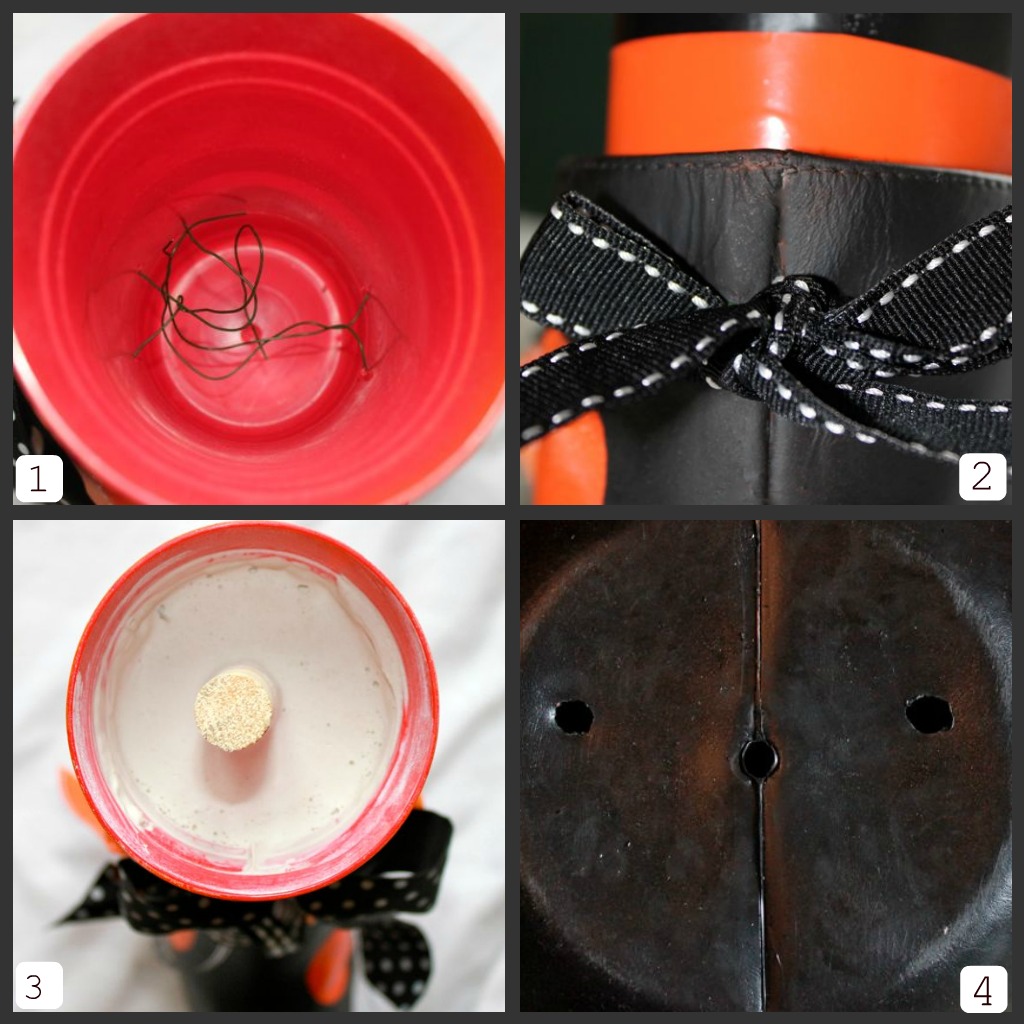
1. Place the cup inside the boot and drill two small holes through the back of the boot right through the cup. Do the same for the front of the boot and into the cup. Thread floral wire through the back of the boot into the cup and twist the wire to secure. Do the same to the front of the boot. This helps secure the cup to the boot.
2. Tie a small bow to hide the wire in the back of the boot. Tie the large layered bow to the wire in the front of the boot.
3. Mix Plaster of Paris with water inside the cup ( fill within 2 inches from the top). Immediately place the wood dowel in the center of the cup. Let dry for an hour or so. Do all of the above steps to the other boot : )
4. Place a small piece of duct tape adhesive side UP to the top of both wood dowels. Arrange the boots on top of the table. How would you like them to look under the cauldron? Line up the cauldron on top of the boots and place lightly on top of the wood dowels. The tape will stick to the bottom of the cauldron to mark the spot to drill two holes (shown below). The hole shown in the center was already there.

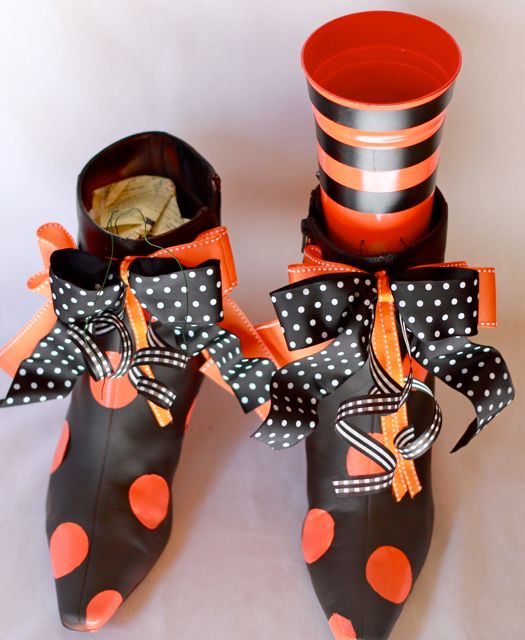

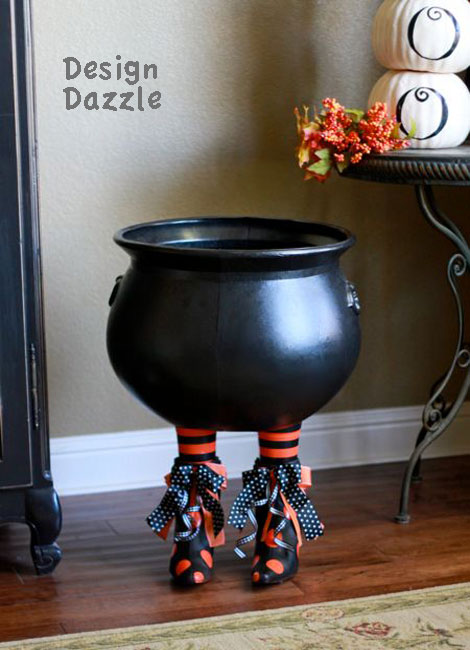
Turn the cauldron over and slide the tops of the wood dowels through the two holes drilled in the bottom of the cauldron! There you have it a Boot-i-licious Halloween decor! Since I don’t have enough orange vinyl on hand to make the “Trick-or-Treat Smell My Feet” saying. I’ll wait til next Halloween.
To store: remove the boots from the bottom (pull hard) and place inside the cauldron until next year.
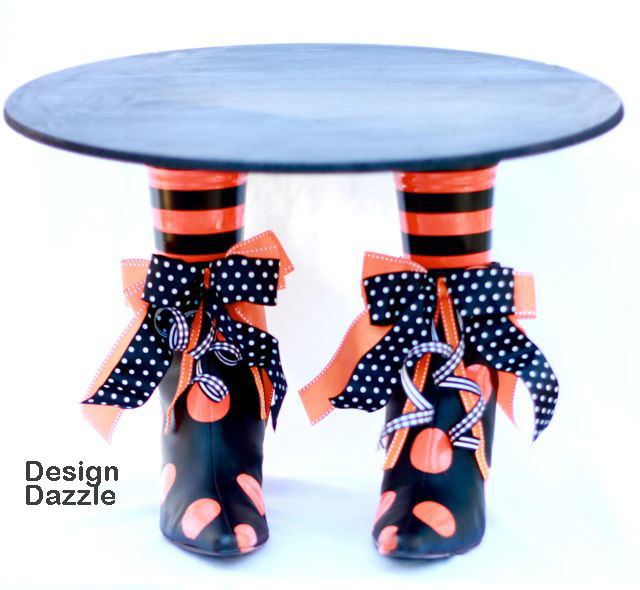
Which one do you prefer – the cupcake stand or the “Trick-or-Treat Smell My Feet” Cauldron? To make the cupcake stand it’s the same steps until you get to the cauldron part. Just substitute the round wood topper in place of the cauldron and screw the topper to the dowels with screws.
Thanks for sharing such a fun project Toni!!
Jamie
Latest posts by Jamie (see all)
- Bird Feeders - May 24, 2019
- [2014 WISHlists] Jamie’s List - December 12, 2014
- Avery Custom Photo Gift Tags - December 2, 2014
I love this idea. It's one of the favorites I have seen for Halloween. Thanks for sharing!
So cute! I love this, it's so unique! Great job!!!! Thanx for sharing!
Natalie
http://www.projectdowhatyoulove.wordpress.com
What a darling idea!!
This is such an awesome project! One of the cutest ones I've seen this year. Can't decide if I want to do the cauldron or the cupcake stand. Both great ideas.
OH! MY! GOODNESS! This is amazingly cute, and simple enough for just about anyone to give a go! Wow! Great job!!!
~Morgan
Hahaha…I love this!
that's too cute!
Thank you girls for having me today on your AWESOME blog. I love projects, ideas and creating new things! Thank you everyone for the sweet comments : )
I can't wait to try and make this! I went to the thrift store for some boots but couldn't find any, I will keep my eyes peeled! http://www.kalynernest.com
I love your blog! 🙂 I became a new follower! Erin
I just tried to do this project. How do you prevent the plaster of paris from leaking out of the holes in the cup?
Jennifer – my holes were extremely tiny. I noticed the water came out at first – but after 20 seconds or so the water had evaporated into the plaster of paris.
I would love to see your finished project!
This is such a cute idea. Thanks for sharing it with us.
Awww…this looks so cute! Now I know what should I do with ma old boots. Lovely idea. Thanks for sharing. 🙂
Oh My Goodness!!!! Just found your cauldron w/boots on Pinterest and LOVE it. Can't wait to go out and find all items needed. Thanks for sharing your talent and taking the time to do a step by step tutorial. I think I might be able to do this IF I find all the parts. Thanks again. 🙂
Wow! I love this idea for halloween. I just don't have shoes that I would sacrifice for this project.
This is a fabulous decoration!!! I, too, LOVE the ribbon combination. A MUST-DO for Halloween this year! Thank you so much for sharing!
I have always wanted one of these, didnt want to spend $50 at one of the big box stores for it
What size cauldron did you use?
I have the same question about the cauldron. What size cauldron? I am seeing 7 1/4 in and 8 in. when I google.
I love this and have had it on my to-do list for a couple of years! This year is the year I am tackling it. Quick questions – what size dowel rod did you use?
If you don't want to use your own boots try hitting up a good will or thrift shop great place for all the things you need
Love this idea. I'm in the process of trying to order cauldrons to be sent to me overseas. Can you tell me what size you used for this project? Thank you.
I am going to gather my supplies and tackle this for the upcoming Halloween trick or treat. I was wondering what size couldron you used?
I absolutely love these! I am making this year for my daughters birthday party. As with all of you, I was wondering the size ratios. If you go to design dazzle’s site/blog page it said in the comments the boots are size 8 and the cauldron is 15in high and 18in in diameter. Hope this helps!
Great idea! Gave me n idea for my Halloween costume. Going to do this to the black boots I will be wearing with my costume. It will make a creative statement, inspired by you.