Hello Eighteen25 readers! I’m Toni and you’ll find me over at Design Dazzle, where I love to share inspiration all about kids. Whether its kids parties, stylish kids rooms, DIY and holiday awesomeness – we share a lot of great ideas. I am thrilled to be featured here at Eighteen25 with all the Halloween fun! I love Halloween, and I also love easy peasy projects.
So I’m excited to share with you one of my latest creations, Franky Baby!
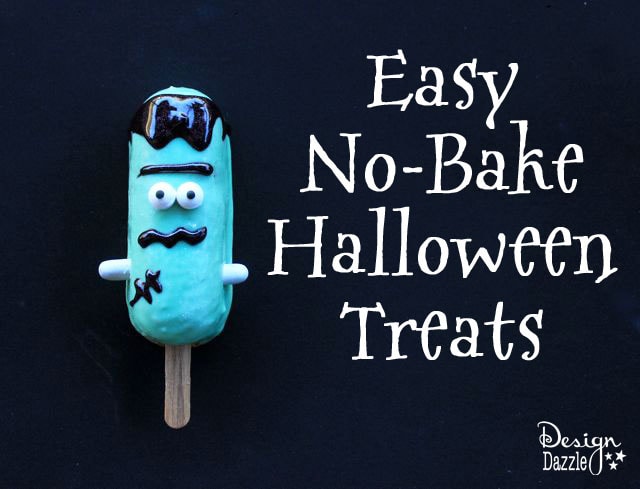
Franky Baby is an easy Halloween treat to make using snack cakes (e.g. Twinkies). It’s also great food craft for kids with no baking required. Green candy melts (available at WalMart, Michaels Crafts, etc) were used as the coating for Franky Baby. Check below for the tutorial…
Materials:
– Snack Cakes (Twinkies)
– Green Candy Melts
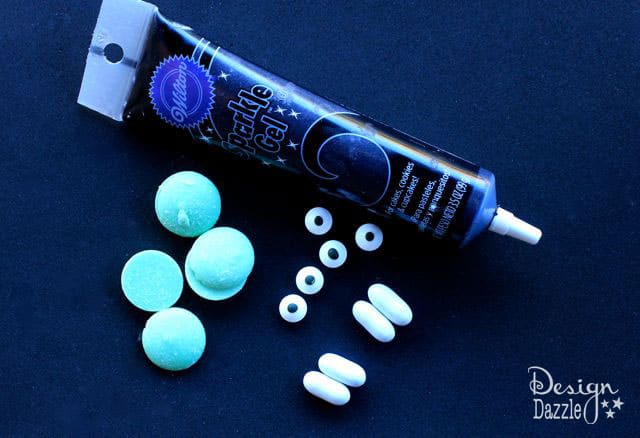
– Candy Eyes (purchased at Michaels Stores)
– Black Gel Icing
– Wooden Popsicle Sticks
– Styrofoam
1. Stick the snack cakes in the freezer for 20 minutes to make them firm.
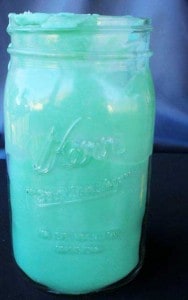
2. Melt the green candy melts in the microwave. Instructions are on the package. Melt them slowly and at 50% power. Preferably melt them in a tall container (like the glass canning jar shown). Having a tall container for the melted candy makes it easier to cover the entire snack cake when you dip them. If the candy melts are too thick you will have trouble dipping the snack cakes. I use Paramount Crystals to help thin out the candy melts. I melt the PC separately from the candy (when melted it looks like melted shortening). Shortening can also be used. For about 1 cup of candy melts you could use about 1 -2 tablespoons of melted PC or shortening. You can always add more.
3. Take the snack cakes out of the freezer and stick the wooden popsicle sticks in the bottom so that the cakes are vertical.
4. Dip the snack cakes in the green candy melts and make sure the candy spreads evenly. Let it sit over the container until any of the extra drips are gone.
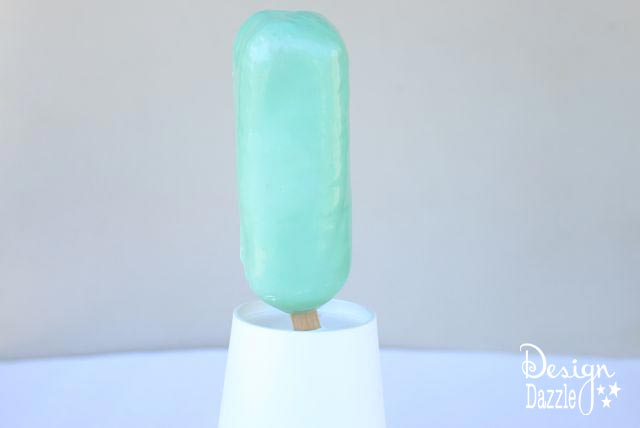
5. Stick the dipped snack cakes in the styrofoam to dry. (If you don’t have styrofoam we turned a paper cup upside down and cut a slit in the the bottom of the cup to stick the popsicle stick through. Then we just stuffed a paper towel inside the cup to keep the stick in place.) Let dry to the touch.
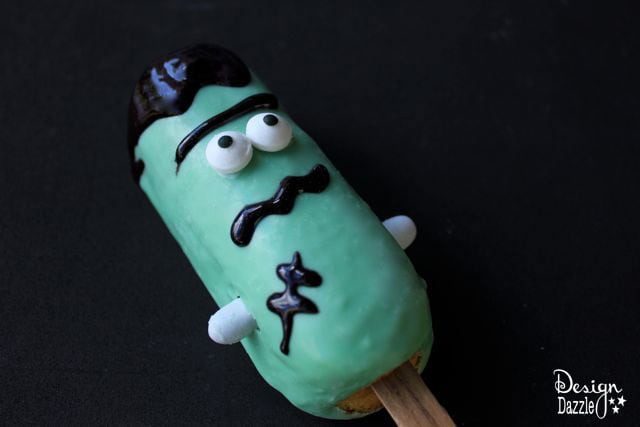
6. For Franky Baby we used black gel icing for the hair, mouth and scars. Stick a white good-n-plenty on each side of the head for the screws/bolts. Simply add candy eyes for the finishing touch. Use the leftover melted candy as the “glue” to glue the eyes on. There you have it, the easiest but coolest Halloween treat to make with your kids!

We are now hosting our Halloween Link Party. It’s all about Halloween decor, costumes, treats and more.

Sharing DIY Halloween costumes ideas like this cute cat lady.
We would love for you to join us at Design Dazzle!!
Don’t forget to check out some of the projects over at Design Dazzle like…
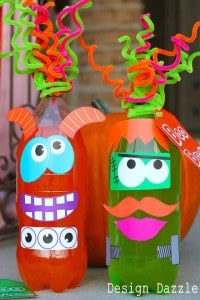
Make your own Halloween Sodahead with free printables.
Terrific you’ve been ‘Boo’d” treat.


________________________________
this post is sponsored by:

Jamie
Latest posts by Jamie (see all)
- Bird Feeders - May 24, 2019
- [2014 WISHlists] Jamie’s List - December 12, 2014
- Avery Custom Photo Gift Tags - December 2, 2014
SO cute!
love it!
love this! and thank you that I don't have to type in a capcha anymore…hallaljuah!