• About
  • Advertising
  • Contact
  • Meet the Team
  • Blog
    • Bloglovin
    • Facebook
    • Instagram
    • Pinterest
    • Twitter

Eighteen25

Create A Life You Love.

  • Home
  • Printables
  • DIY + Crafts
  • Holidays
  • Recipes
    • All Recipes
    • appetizers
    • salads/side dishes
    • main dishes
    • Desserts
  • Misc.

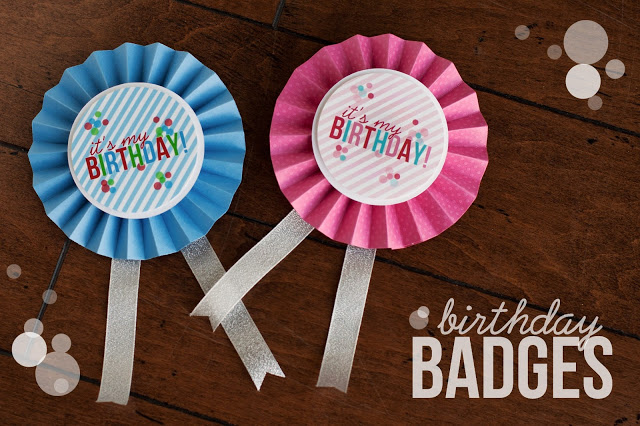
Birthday Badges

Apr52013 posted by Jamie 6 Comments

Everyone deserves some special attention on their Birthday
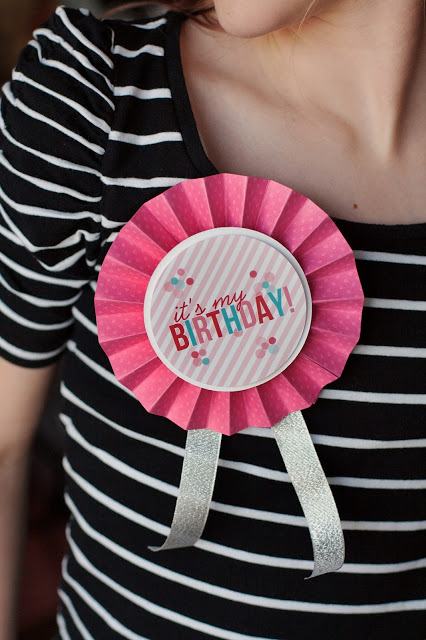
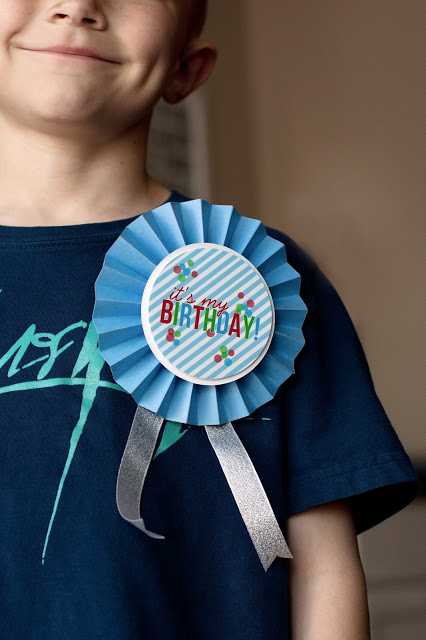
and what better way to grab someone’s attention, than with a big ol’ Birthday Badge!

SUPPLIES:
• Birthday Badge tag – download 5×7 pink tag HERE download 5×7 blue tag HERE
• coordinating cardstock
• white cardstock
• silver ribbon
• bar pin
• glue gun
• score blade and ruler
• pop dots (optional)
• punch the tag out with a 3″ circle punch.
• back it with white cardstock (i used my Silhouette to cut out a 3 1/4″ circle and used the pop dots to give it some dimension).
• cut the colored cardstock into 2 1/2″ x 11″ strips and score every half inch down the strip.
• fold strips like an accordion and glue both of the ends of the two strips together to make a circle.
• turn your circle and bring the middle together – hot glue and hold together until dry.
• hot glue the tag onto the front.
• when that’s dry, cut a 6 1/2″ piece of ribbon, fold in half and glue onto the back. glue a bar pin on top of the ribbon.

Now the Birthday Girl or Boy can wear their badge proudly.
And hopefully one or two people will sing to them on their special day!!
_________________________________
this post is sponsored by:
  • Bio
  • Latest Posts
Jamie

Jamie

Jamie

Latest posts by Jamie (see all)

  • Bird Feeders - May 24, 2019
  • [2014 WISHlists] Jamie’s List - December 12, 2014
  • Avery Custom Photo Gift Tags - December 2, 2014


6 Comments

« [GIVEAWAY] Blurb
Meet Our Sponsors »

Comments

  1. Tina says

    April 5, 2013 at 1:46 pm

    Way too cute, I love these!

    Reply
  2. - - Sheryl - - says

    April 5, 2013 at 3:20 pm

    This is awesome! I am going to a birthday party tomorrow night and will make one

    Reply
  3. Anonymous says

    April 7, 2013 at 3:20 am

    awesome thank you so very much for sharing
    ,hugs Nana Kat

    Reply
  4. Anonymous says

    October 10, 2014 at 1:09 pm

    Great Idea! I made one for my grandson, but couldn't figure out the colored cardstock. For those who have a problem with that I used a cupcake cup. I flattened it out, glued it to the back and it fit perfect.
    HAPPY CRAFTING!

    Reply
    • Jamie says

      October 12, 2014 at 6:05 pm

      That is a GREAT idea. And would be so much easier. Thanks for sharing.

      Reply
  5. anonymussssss says

    June 9, 2015 at 6:26 pm

    Awesome Idea

    Reply

Leave a Reply Cancel reply

Your email address will not be published. Required fields are marked *

This site uses Akismet to reduce spam. Learn how your comment data is processed.

welcome!

We are Jodie & Jen, born & raised in Vegas, in a little brick house. The number hammered onto our mailbox was 1825. Visit us often & be inspired to create a life you love. Read More…

  • Bloglovin
  • Facebook
  • Instagram
  • Pinterest
  • Twitter

Subscribe by Email

Get our latest & greatest posts straight to your inbox.

featured posts

Bird Feeders
Instant Pot BBQ Chicken Sliders
Free Printable Watercolor Notebook Covers
DIY Disney Ideas
Disney Trip Fun Bags
Printable Recipe Binder

eighteen25 loves

Disney banner 350

Privacy Policy

stay updated on latest
posts on Facebook

The Girls at Eighteen25
  • Bloglovin
  • Facebook
  • Instagram
  • Pinterest
  • Twitter

Copyright © 2025 · All rights reserved · Site by Melissa Rose Design