
Hi fellow Spooktaculars! I’m Sarah from Sarah Dawn Designs and am just thrilled to be here at eighteen 25! In fact I have Jamie, Jodie, and Jennifer to thank for getting the ball rolling when it comes to Halloween. I saw their add in July and haven’t stopped since. I must start with a confession though. Before this year I have never really decorated for Halloween. I’ve been figuring out my style and how to incorporate that into my holiday decor.
I started by going to JoAnns to look for some Halloween inspiration when I stumbled upon the black and white stripe fabric AND the orange polka dot fabric that happened to be on sale. You could say these fabrics sang to me and the end result was these Trick-Tastic pillows. Today I’m going to share my tutorial for the monogrammed envelope pillow.

Envelope pillows are super easy once you figure out how to assemble them. One of the tricks this pillow has is that it is two sided so when Halloween is over I can either take off the tulle and leave it as is or flip it to the other side.
Supplies:
– 2 different Fabric Quarters (you know those pre-cut pieces of fabric they have by the cottons)
– 18″ x 8″ of coordinating fabric
– coordinating thread
– 1/2 yard of tulle
– glitter heat transfer (I used a Silhoutte machine to cut my letter)
– iron
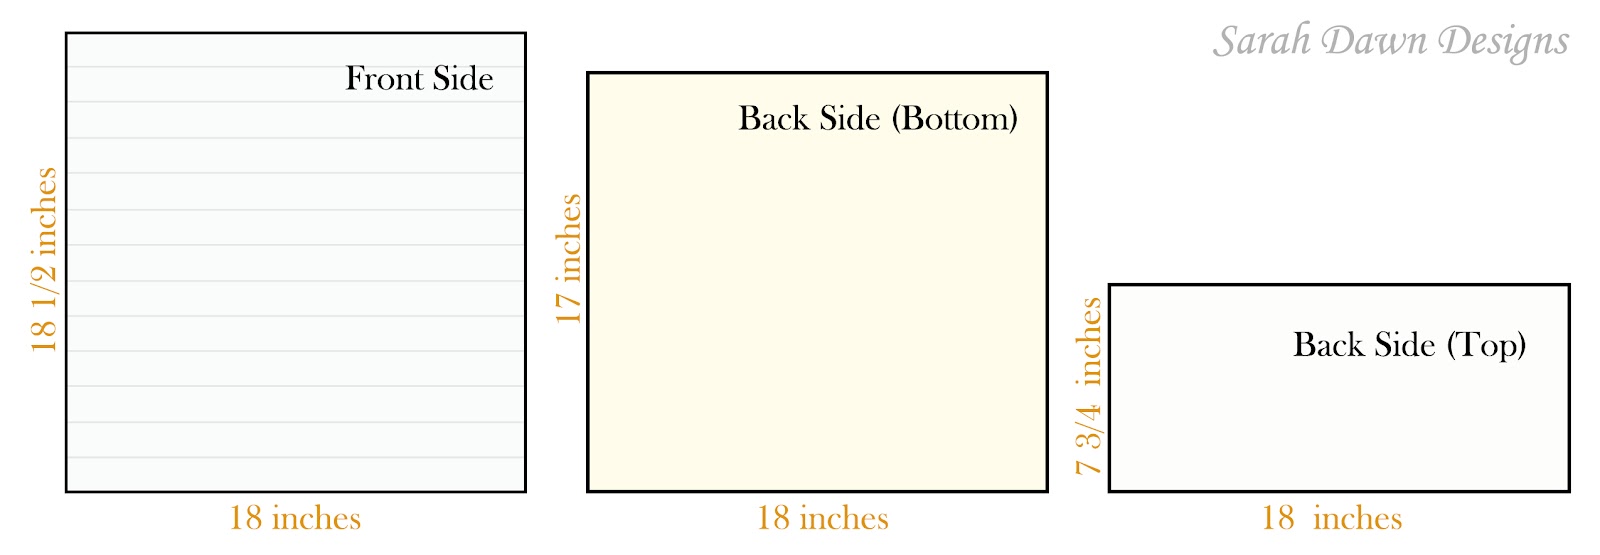
Step 1: Cut out all of your pieces. I made my pillow envelope for a 17″ square pillow. Since the fabric quarters come in 18″ x 21″ one side is slightly smaller than the other. My cuts were as follows:
#1.) Black and White Stripe Fabric – 18″ x 18 1/2″
#2.) Light Yellow Fabric – 18″ x 17″
#3.) White Fabric – 18″ x 7 3/4″ (If you notice I used two pieces of fabric for this, the white and striped fabric, they were left over scraps so I sewed them together to be the measurement above.)
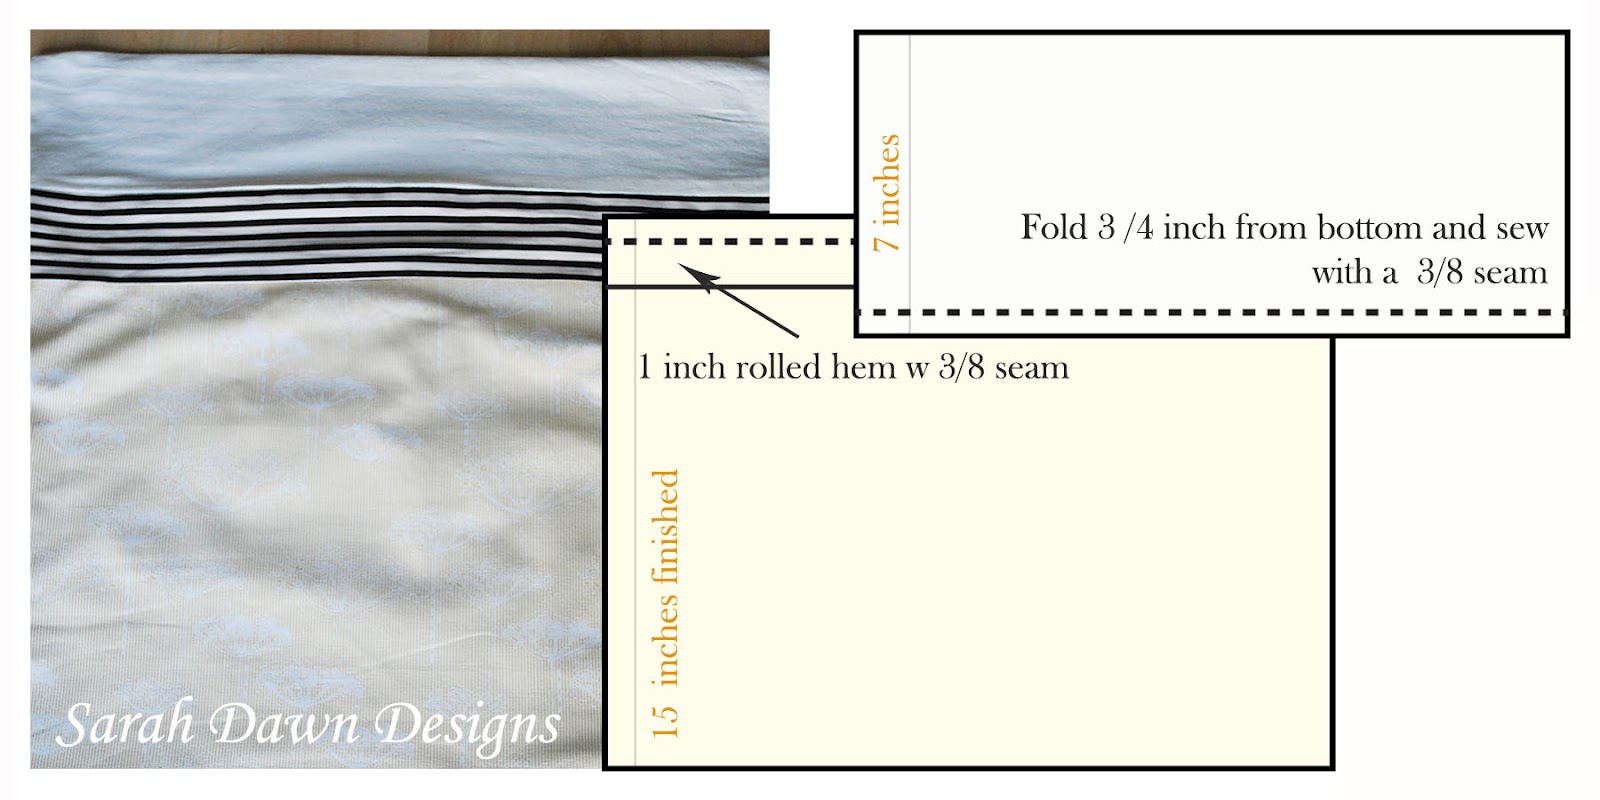
Step 2: Take fabric #2 (light yellow) and give it a one inch rolled hem with a 3/8″ seam. My hem is on the front of the fabric like shown. When I say 1″ rolled hem I mean that you actually use two inches. You do this by folding one inch over the top, and then folding it over the top again. Ironing it may help to keep it in place before you sew. After you have completed this your finished measurements should be 18″ wide and 15″ tall. The photo above shows the seam with the dotted line and the what the hem will look like with the solid line.
Step 3: Using fabric #3, fold 3/4 of an inch towards the back of the fabric, iron, and then sew using a 3/8″ seam. You should not see any of the fabric that was folded on the front of the fabric, just the seam.

Step 4: Here comes the tricky party, which really isn’t that bad. You are going to place all three fabrics right sides together to sew. That means all the fronts of the fabrics will be on the inside. Start by placing fabric #1 down first. Then you will place fabric # 3 on top of #1 lining up the top and sides, (your hem on # 3 is the bottom). Finally fabric #2 will go on top of #1 and #2. It should look like the photos above with fabric #3 sandwiched in-between 1 and 2. All fronts should now be on the inside. Pin your fabrics together and sew all four sides using a 3/8″ seam.
Step 5: Turn your pillow case out so the fronts are now on the outside. You may need to use a pencil to get the corners looking sharp. It should look like a finished pillow case.
Step 6: Iron on your heat transfer monogram.
Step 7: Finally place your pillow form in your fancy pillow case and wrap your tulle around it, tying it with a bow. I liked that the tulle was not centered.
Wa La… you have a tricked out pillow all ready for Halloween.
*The orange pillow was even easier. I cut out two pieces of fabric to the size of my choice, sewed right sides together leaving a small hole at the bottom. I ironed on the raven and swirls. To finish I stuffed the pillow with batting and hand stitched the hole up.*
I think they compliment each other nicely and more importantly look fantastic sitting in my awesome orange chair.
Like I said in the beginning these pillows were only the start to all of the Halloween projects I would do. Thanks to the girls at eighteen25 I’m hooked on Halloween.
Here are some of my other “tricked” out projects:
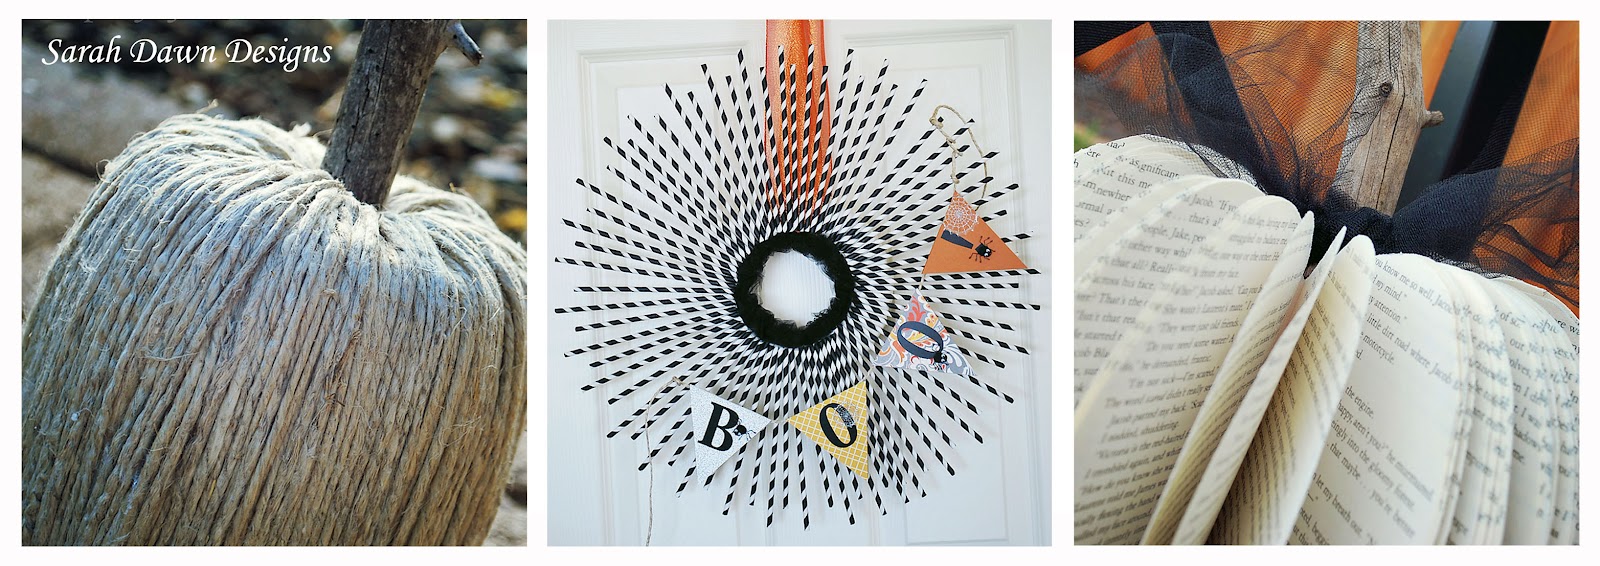
Twine Pumpkins – You’ll never guess what’s inside. A Halloween Straw Wreath – It has a reversible FALL banner. Book Pumpkins – I share my tricks for cutting up an old book ready for recycle. If you get a chance, stop on by my blog, I’m always up for meeting new friends!
Thanks so much to eighteen25 for having me and inspiring me!

. . . .
this post is sponsored by:
Jamie
Latest posts by Jamie (see all)
- Bird Feeders - May 24, 2019
- [2014 WISHlists] Jamie’s List - December 12, 2014
- Avery Custom Photo Gift Tags - December 2, 2014
The raven is so awesome!