[updated 2017 Christmas planner printables are HERE!]
For the past three years, us girls have gotten together to make Christmas Planners. It’s always fun (and a little frustrating) to design it inside and out. But, it’s even more fun to use it during the holiday season.
We’ve come up with a Christmas Planner download to help you get yours done in a snap.
In TEN easy steps, to be exact.
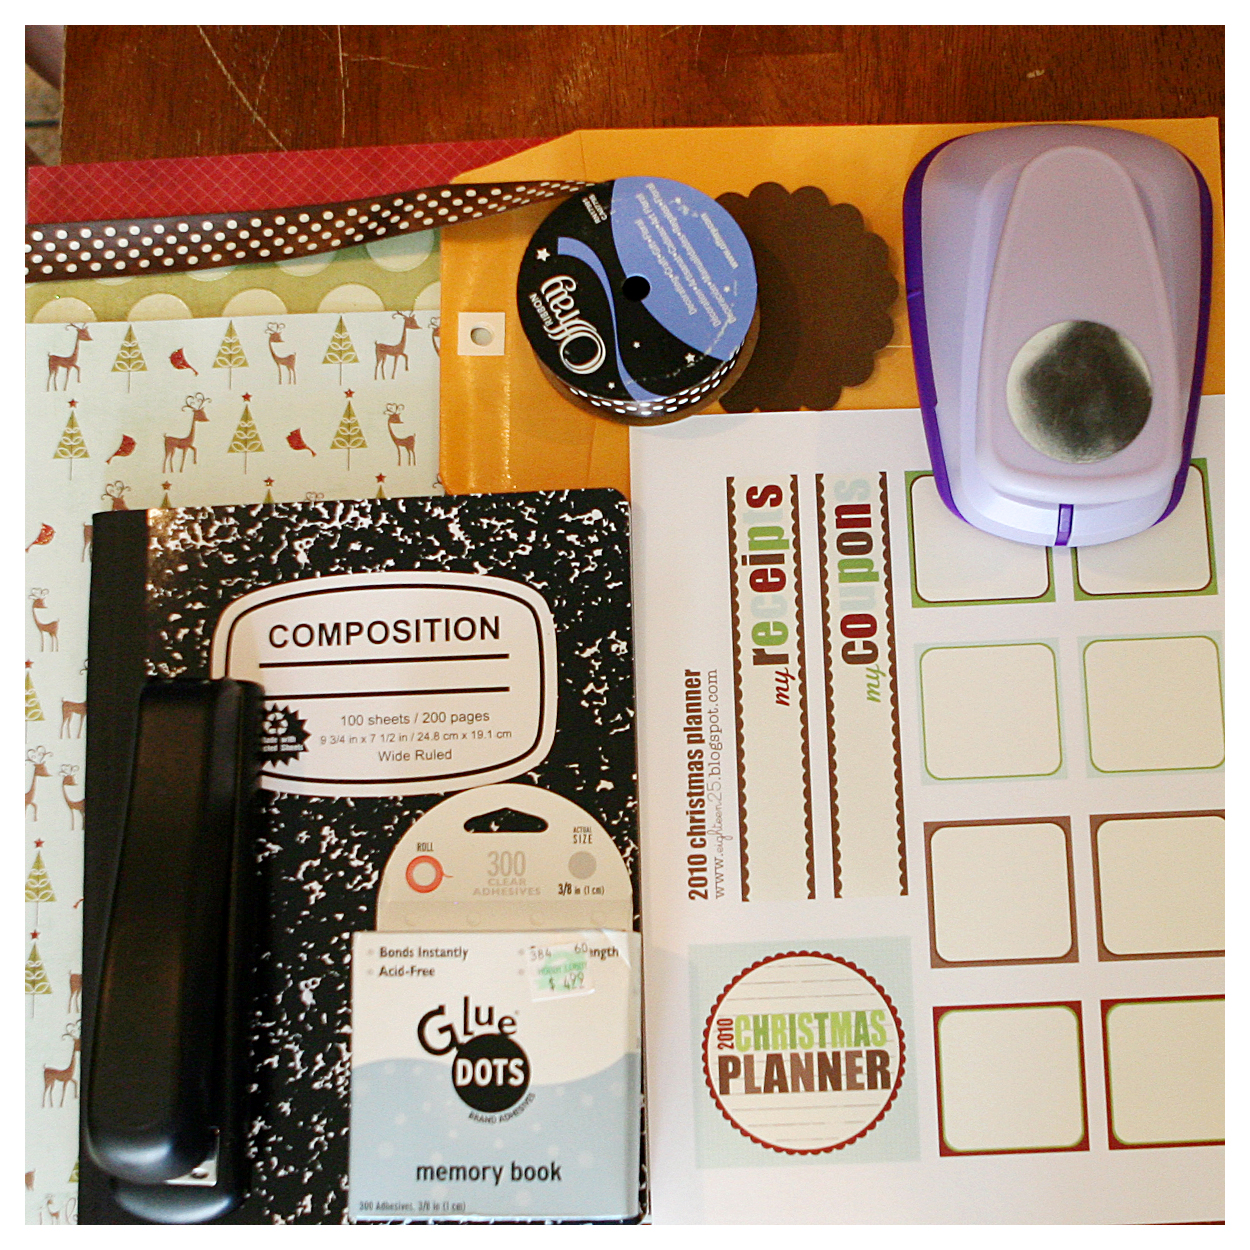
STEP TWO: Gather all of your supplies…
- composition notebook
- ribbon (we picked black grosgrain)
- 3 sheets of 12×12 pattern paper (we used My Mind’s Eye – I Believe papers)
- adhesive (glue dots work best)
- 3″ circle punch (to punch out Christmas Planner tag)
- a 4″ scallop circle cut from a Cricut (optional)
- 2 6″x9″ envelopes with clasps
- stapler
- black ink pad (optional)
STEP THREE: Cut a piece of ribbon about 36″ long and attach around your notebook with adhesive. Now you’ll be able to tie it shut so little curious eyes won’t be able to peek at your Christmas list.
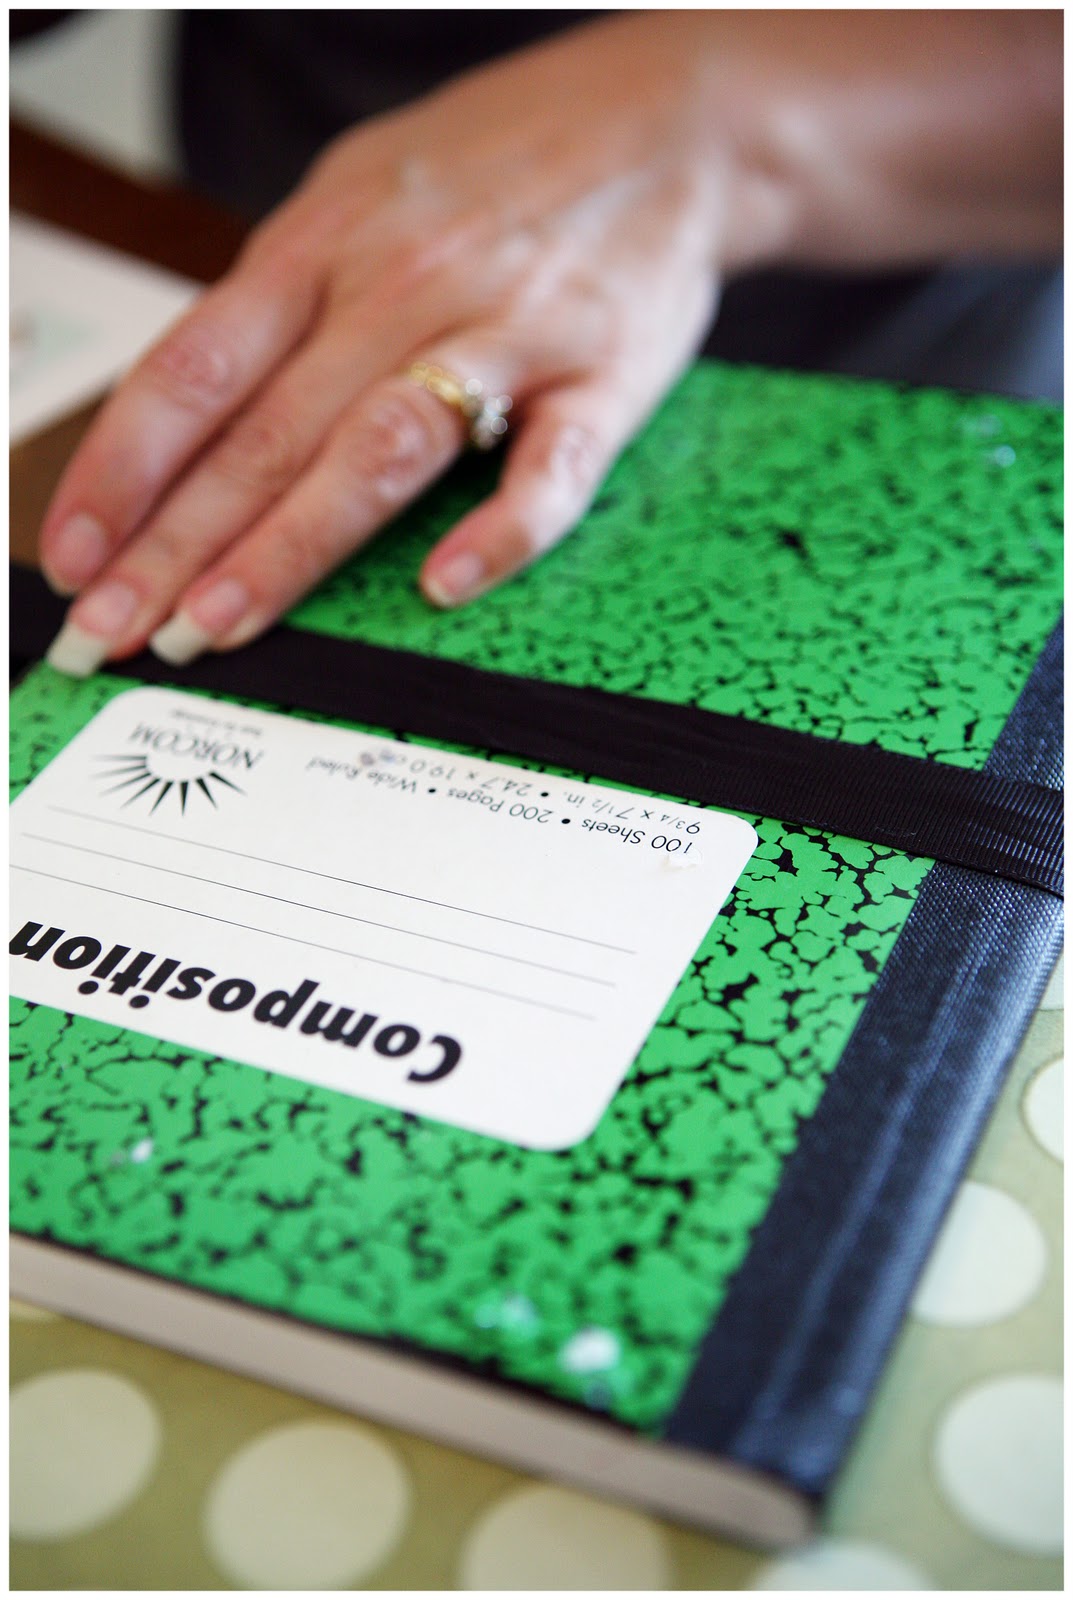
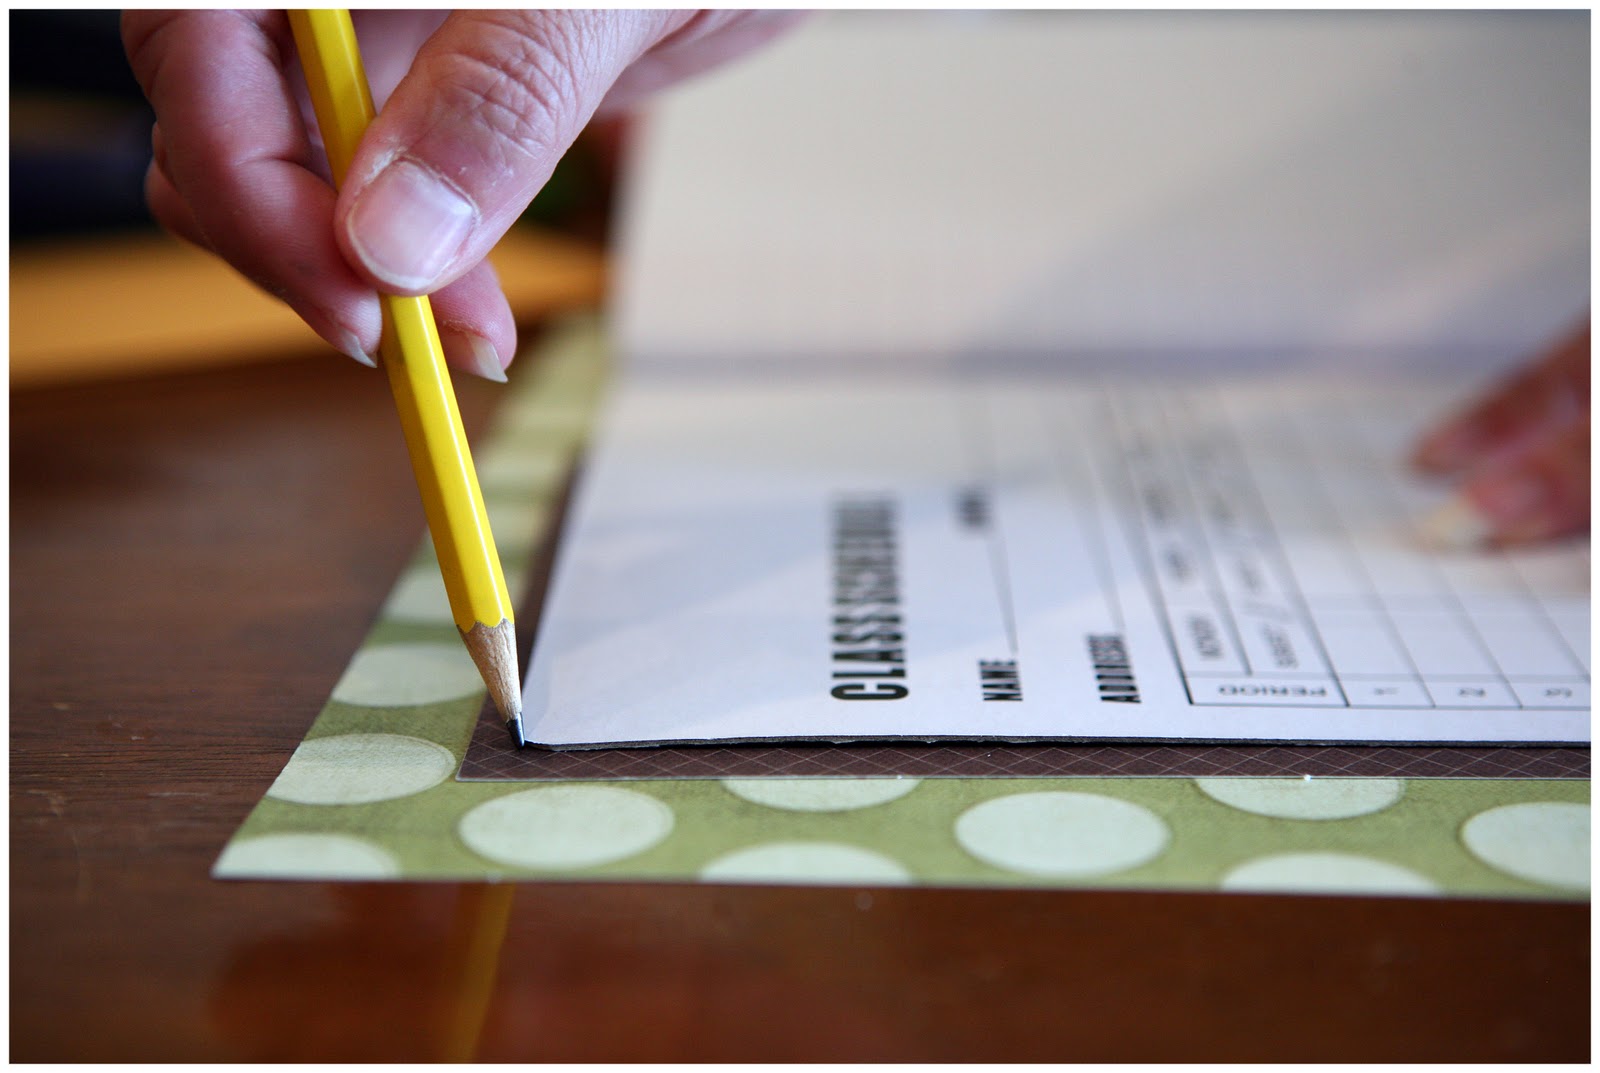
STEP FOUR: Cut one sheet of paper in half so that you have two 6″x12″ pieces. Lay each piece under the front and back cover and trace so you know how long to cut for the length and corners. All composition notebooks are a little different. If you’d like, ink the edges of your paper to give it a distressed look.
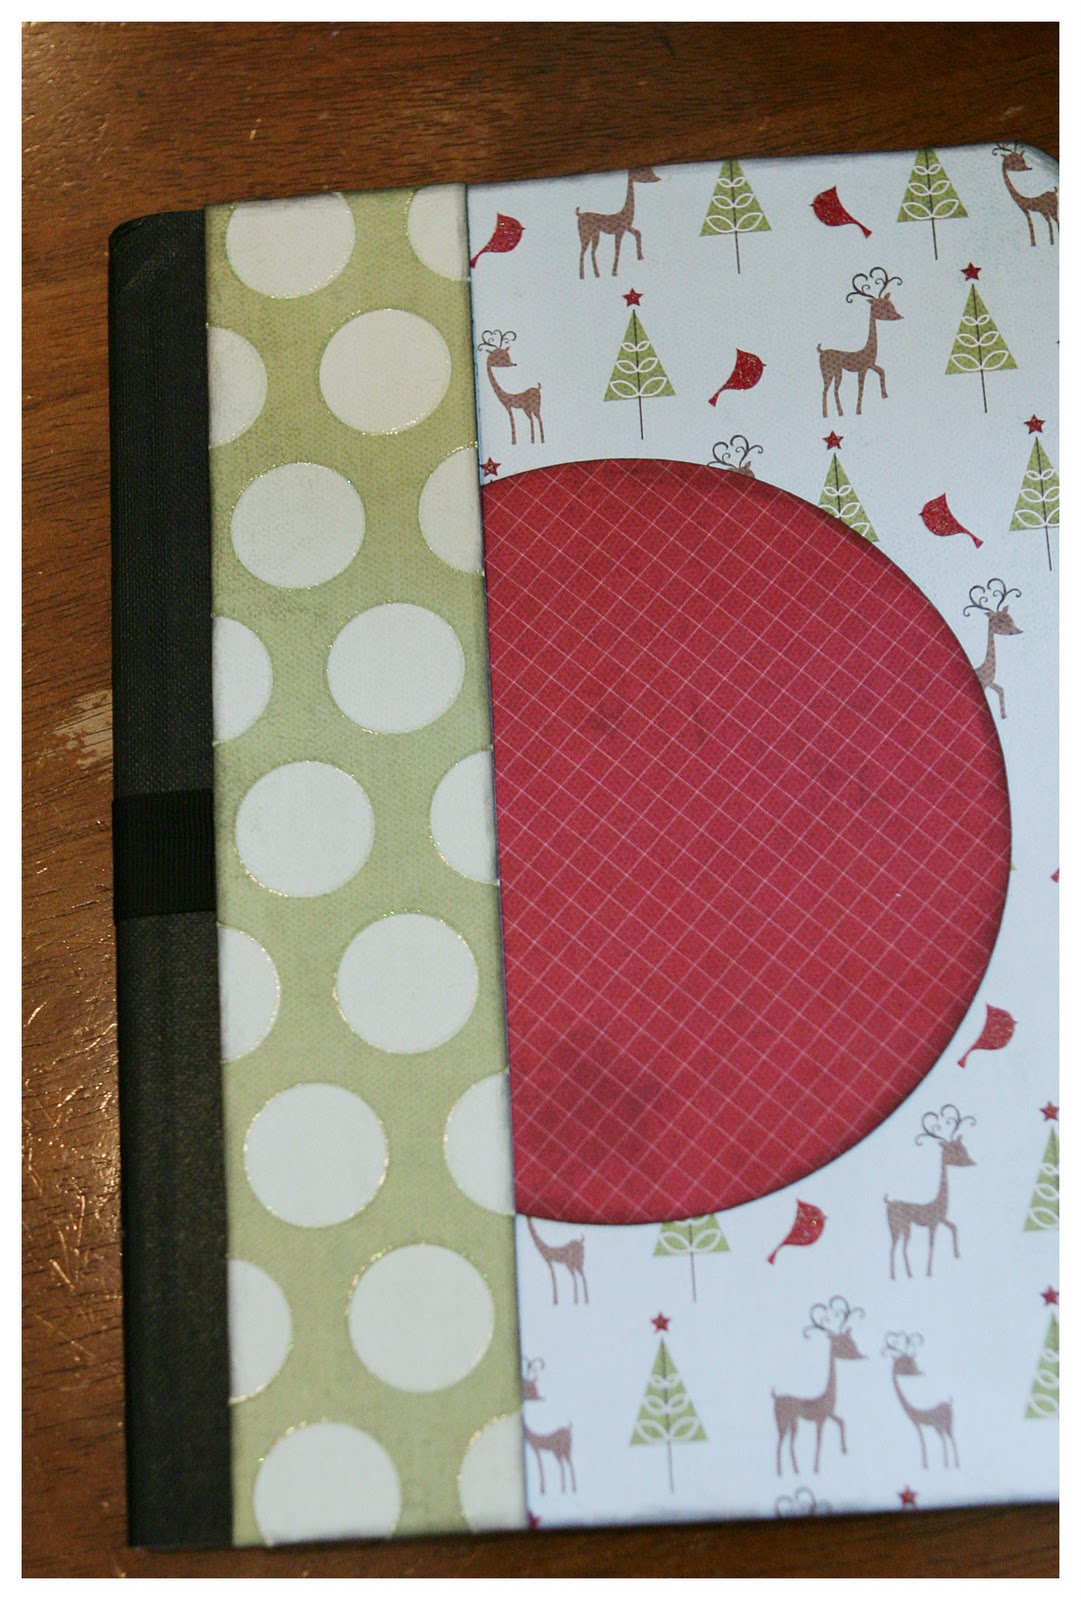
STEP FIVE: Using another sheet of paper, cut two 2″ strips and then trace on your notebook to get the length. Ink the edges.

STEP SIX: Cut a 5 1/2″ circle out of your last sheet of paper. You can ink the edges of that too.
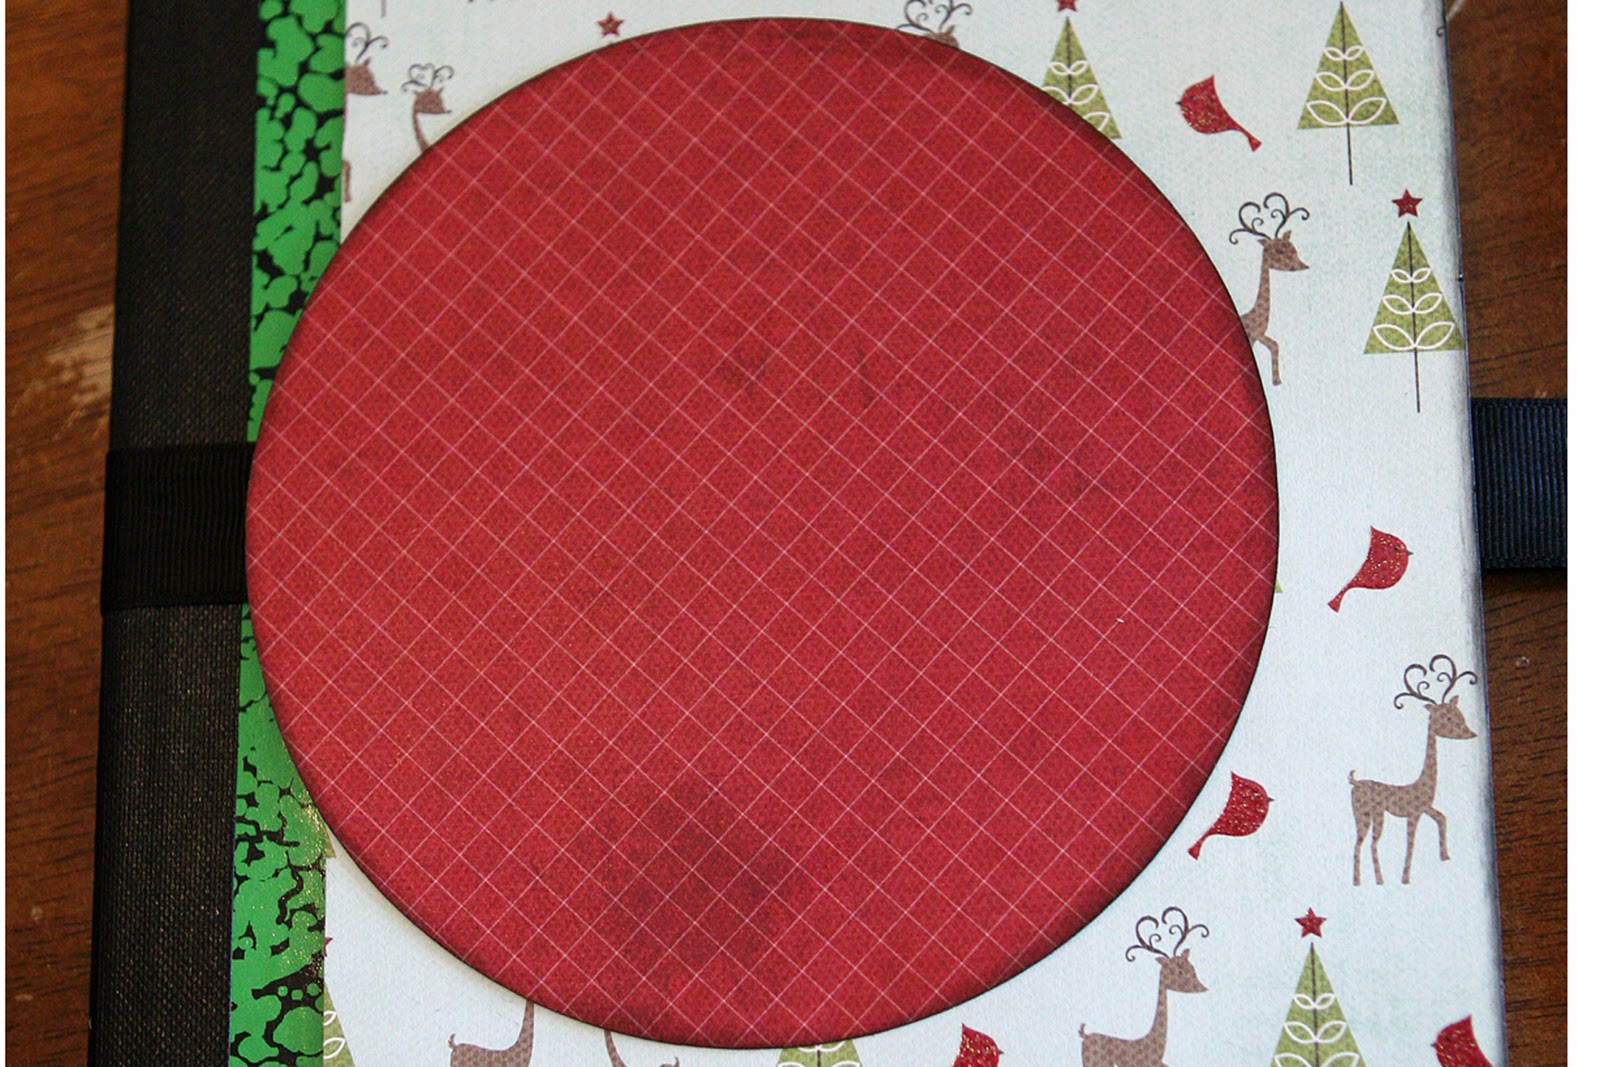
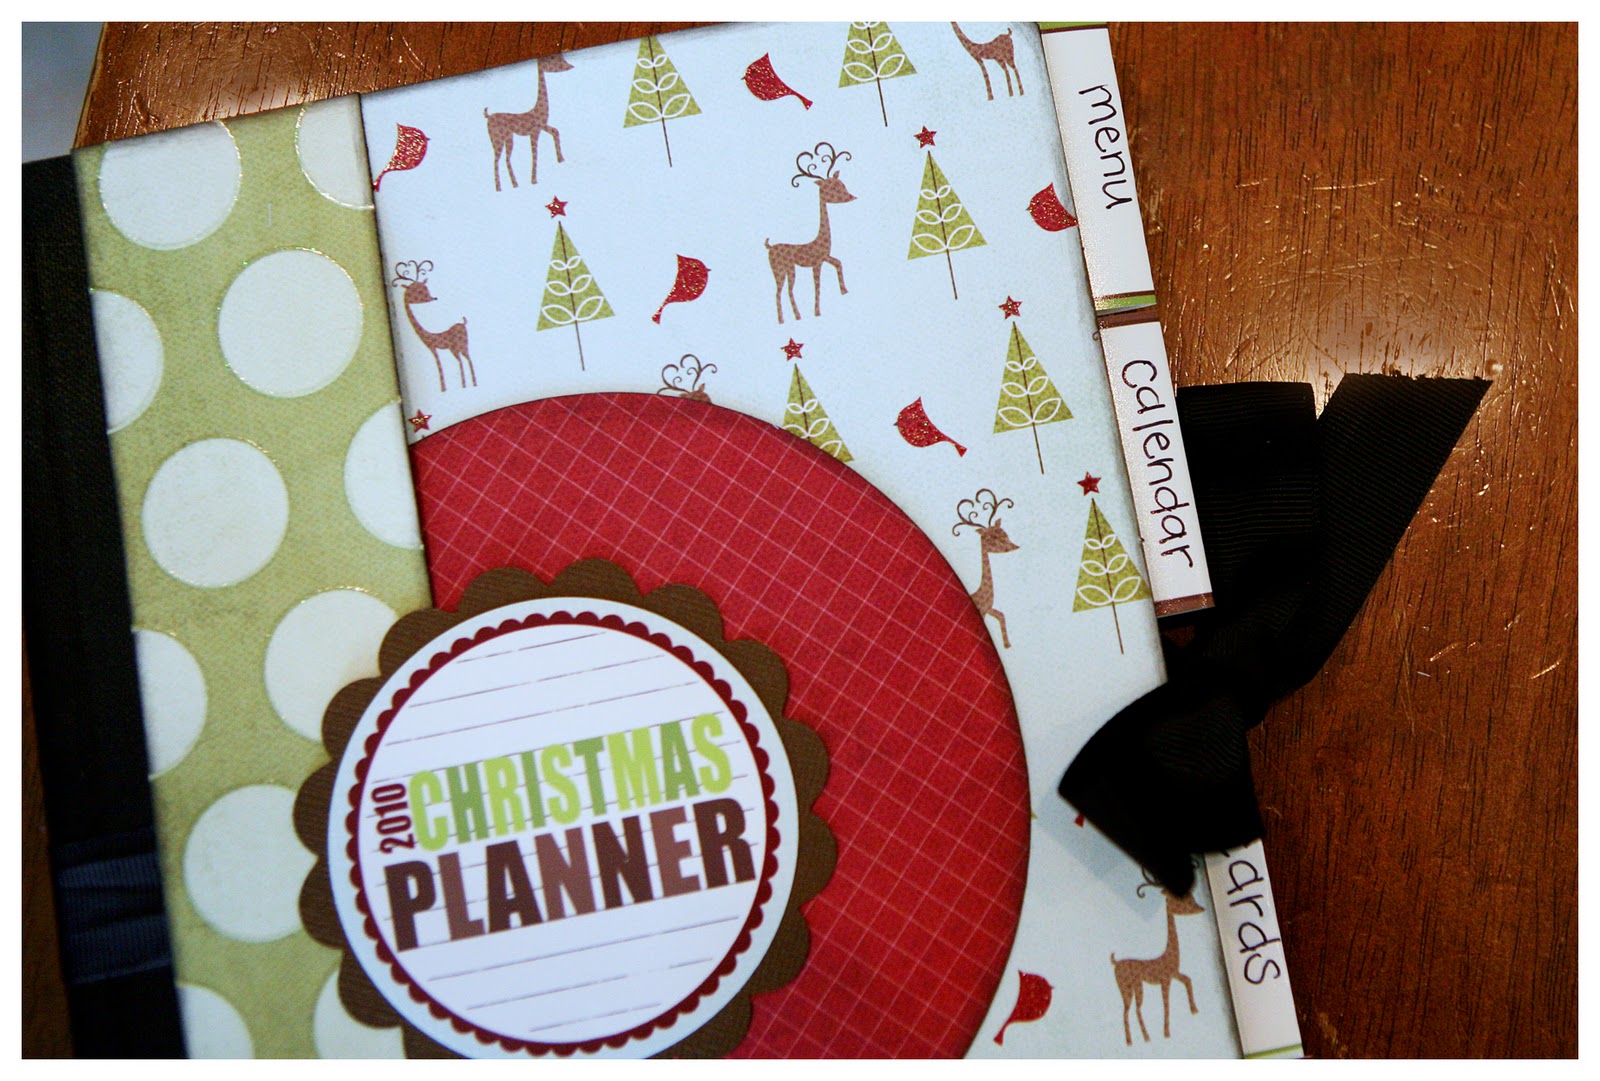
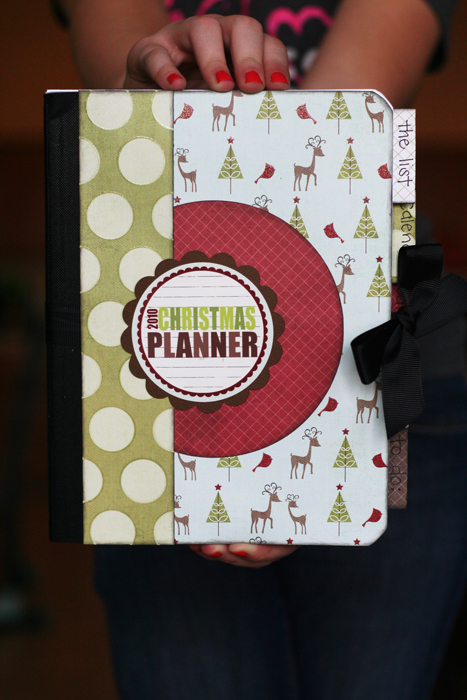
STEP SEVEN: Now we’re going to glue everything down. First, start with the two larger sheets. Then your large circle (you should be able to line it up with the black spine of the notebook. Next, adhere your two strips. Again, lining it up with the black spine. And last, but not least… attach your Christmas Planner tag.
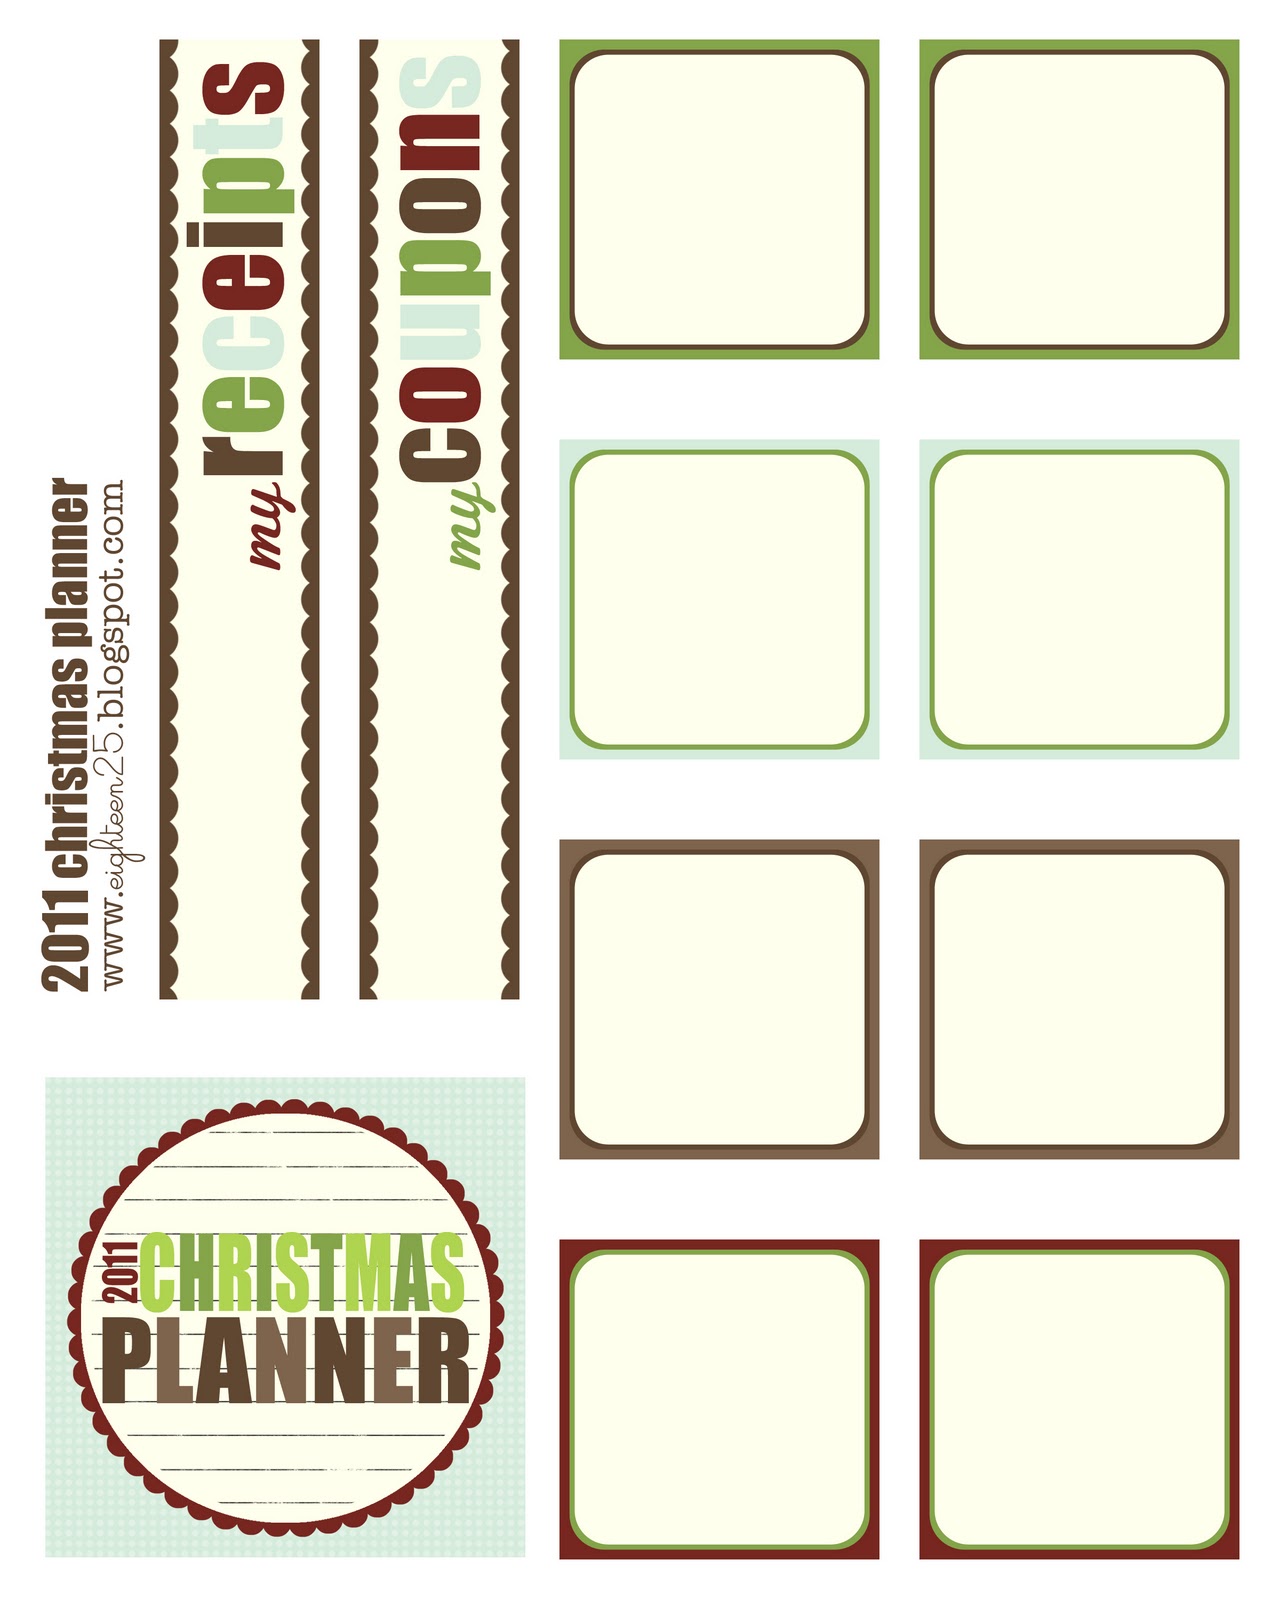
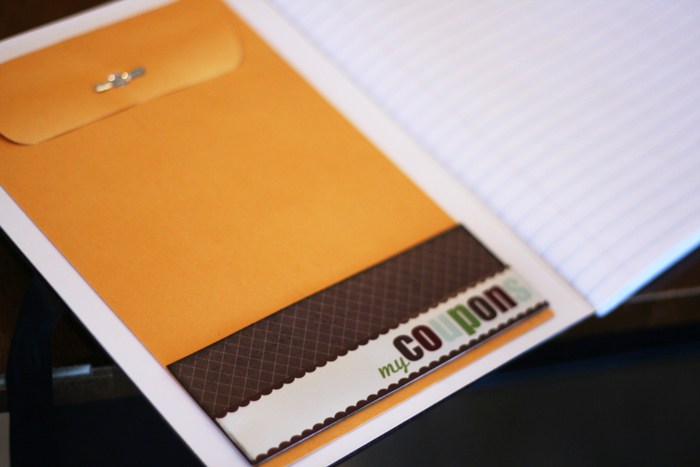
STEP EIGHT: Get your envelopes and your two strips that say “my receipts” and “my coupons” ready. Find two scraps of your pattern paper and cut two strips 2″x6″. And go ahead and ink the edges. Attach these to the bottom of your envelopes and then attach the strips with the sayings at the bottom of that. Glue these down to the inside of your front flap and the inside of your back flap. Now, you’ll never misplace those important little pieces of paper. (NOTE: we backed the inside flaps with white sheets of cardstock to cover up all of the printed words that we don’t need to see.)
STEP NINE: Find a calendar online and print it out. We used the weekly calendar from calendarlabs.com. You’ll adhere these sheets right on the notebook pages behind your calendar tab. What calendar tab? That’s the next step. 🙂
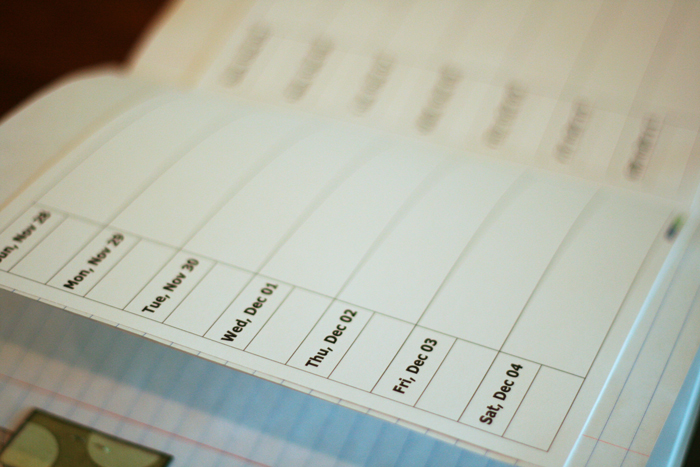
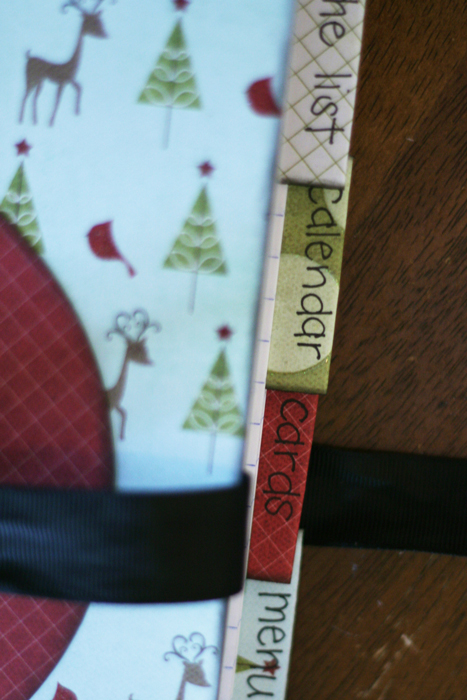
STEP TEN: You can use the tabs provided on the download, or make your own by cutting 2″x2″ squares out of your remaining paper. Ink the edges and then fold them in half. Now, you’ll want to give each tab a title. Our tabs include… THE LIST (where we write down all of those wonderful gift ideas), CALENDAR (where we attach the calendar print outs and jot down important dates), CARDS (where we keep address of everyone we need to mail Christmas cards too), MENU (where our Christmas dinner menu goes and our grocery list too), TO DO (where we write down all of the extra little things we need to remember, but are too frazzled to) Choose whatever works best for you. Gather a few notebook pages and staple your tabs on. Layering them down the side, so they’re easy to read.
And you’re done!!
Hopefully it wasn’t more complicated than we told you it would be.
Make sure this little puppy tags along with you on every shopping trip. It’s a must!
Jamie
Latest posts by Jamie (see all)
- Bird Feeders - May 24, 2019
- [2014 WISHlists] Jamie’s List - December 12, 2014
- Avery Custom Photo Gift Tags - December 2, 2014
this is adorable!!
i already use a holiday planner, but your's is waaay cuter…i might have to do a redo 🙂
This is so cute, and a great way to keep track and therefore save money! Please add my link to the post so I can keep you on the party list. Thanks!
Actually, I don't think this is the same post that you were trying to link to the party: "coupon organizers". Please come back and enter that one…
I love it! And this is exactly what I need to keep my Christmas party Organized! Thank you. 🙂
LOVE this idea! I saw this when you guest posted on Under the Sycamore and had to create one for my sister and my Mom! They loved them and were so excited!
Thanks for the great idea!
so cute, i love it! great idea
Seriously you girls think of everything!!!! I LOVE IT!! 😀
That is SOOO cute! If I was planning a big Christmas, I would definitely put one together!
How wonderful! I think I'll make a couple for me and friends. Thanks so much for the tutorial!
So great… Thanks a lot for this tuto !
thats so cute! ive never done a christmas planner before!
I read your post on Write. Click. Scrapbook. and decided to look you up on this blog. Wow! You ladies are very creative and I will be checking in as often as possible. Thanks for the great ideas.
Sue
OH MY GOSH! I am feeling so much better!
When I went to post my Christmas planner a bit ago….I KNEW I had seen this one and wanted to reference that mine was quite similar. I could've SWORN it was you cute gals that made it. And I went through EVERY post on your blog to try and find it. Then I searched a couple other blogs thinking maybe it wasn't you after all!
Now I know why I couldn't find it.
Just know that I remembered reading it, and thought of it as I made mine. And I had EVERY intention to say that yours was amazing and darling!
Whew! At least I'm not losing it!
Love this!
Wayy too cute!
Thank you for this tutorial and download!
Looks great!
This is very darling. I make one similar for birthdays. One section for each month with pages behind each "calendar" page for keeping notes of gifts. The last half of the book is for recording everyone's "wishes" they make each year so we can keep a running record! I LOVE the papers and fonts you chose. Thanks for the download.
Looks cute! Thanks for the great idea!
So lovely! Great idea!
-Marie
Hey, great minds think alike! 🙂 We're working on ours to post next week–
This one is darling, as always!
I've got a new blog and your planner is my first feature! I'd love for you to stop by and grab a button! todaystoptwenty.blogspot.com
I can't wait to make this! Normally I keep track of my Christmas plans in an Excel Workbook, but this looks a lot funner:) I went to http://www.twopeasinabucket.com and ordered the supplies needed right away. Thanks for the great idea!
Love this! Thanks for sharing and for the steps to create this great Christmas Planner!
I love this! Thanks for sharing. I could totally use one of these!
You ladies are super talented! We loved this idea so when I went home for Thanksgiving my mom, sister and I made these. They are so fun and will keep us so organized. Thank you!
Thank you so much for posting this tutorial. I completed one tonight! Yea!!! I have seen others do them and thought I don't have time to do that and am not organized to keep it all together. We will see how things go but I have my planner reader for Black Friday. 🙂
http://ragtagmama.blogspot.com/2010/11/told-ya.html
I loved this project so much I made my own. Check it out here: http://tw0.us/R35
Thanks for the inspiration! Everyone gives me compliments.
~Kelly
Saw this on PINTEREST.
I love this and can't wait to make several for 2011.
I love this idea. I want to make these planners for my co-workers and friends. Are you going to update it for 2011?
Just made mine, thanks SO much! http://skipperclan.com/2011/10/01/christmas-planner/
Thank you sooo much for updating for 2011!!!! You ladies are awesome. 🙂
WOW that is the coolest thing! LOVE IT! :o)
Do you have an updated version of the printouts yet? I'm looking for one that says 2012 or just Christmas planner. If you could email me and let me know, I'd really appreciate it! Kjsoard@gmail.com
I am also looking for an updated pdf for 2012. Are you going to do one? I would love it. My email is mhenry3@nycap.rr.com. Thank you so much.
I would LOVE the 2012 version as well! I can't wait to do this! What an amazing idea! :o) My email is kristen_barnhart@yahoo.com
God Bless!
Do you print on card stock or regular paper?
Are you planning on doing another update for 2013 any time soon?
Would love a 2013 version. I have always wanted to do something like this.. love it!! My email is txlady66@gmail.com
What a cute idea! Love it!
Could you update it without the year? It would be very easy to use stickers to put in the current year so it will always be updated.
I am a little embarrassed that we haven't thought of this before. 😉 we are getting this years' all ready, i'll make sure to include a blank one.
Anyway you might want to sell some? Would be a great idea to get a lil extra cash! 🙂
-Kinzie
kinziemartin@yahoo.com
Sorry to sound so lame but how do you "ink the edges"?
not lame at all. 🙂 we just use a raggedy old ink pad and lightly run it along the edges of the paper.
I know this is a really old post… and probably a stupid question… but can you clarify this one step? "Gather a few notebook pages and staple your tabs on." Is an individual page too flimsy to hold the tabs? Or is there another reason for stapling to multiple pages that I'm just not getting? It's been a long day… I'd assume there'd be blank pages in each section, but I could be missing something. Love the looks of these (and all the ones since…)
Hi Lindsey… yes, we just say to staple a few pages together to make it a little more sturdy. 🙂
I loved this and made one this year! I linked to your page in my blog post! Lou from Lou's Labors
Do you have a 2016 printable out yet? I really want to be organized this year 😉
No we don’t sorry. I wish we were that on the ball. Probably won’t have a 2016 one until November. Sorry.
Will the 2016 version be available soon?
It will be out within the next two weeks!! Yay!
You guys are such an inspiration! I just gathered my goodies to put together, and am now thinking what a great early teacher gift — they are always appreciative of cute organizers, and might not have the time to make one. THANK YOU!!!
LoVe it!!
So cute!! I am going to make one for this Christmas!
One question…how did you ink your pages?
Just used an old sponge type ink pad they sell in the scrapbook section and lightly inked the edges. We actually skipped that step this year and it looks great without it too if you don’t have an ink pad. 🙂