Hi there! I’m Rachel over at Fawn – Handcrafted Celebrations and I am beyond thrilled to be a part of the wonderfully talented Eighteen25 Creative Team this year! Today I have a darling wood project to share with you. It’s incredibly simple and fairly quick to whip up.
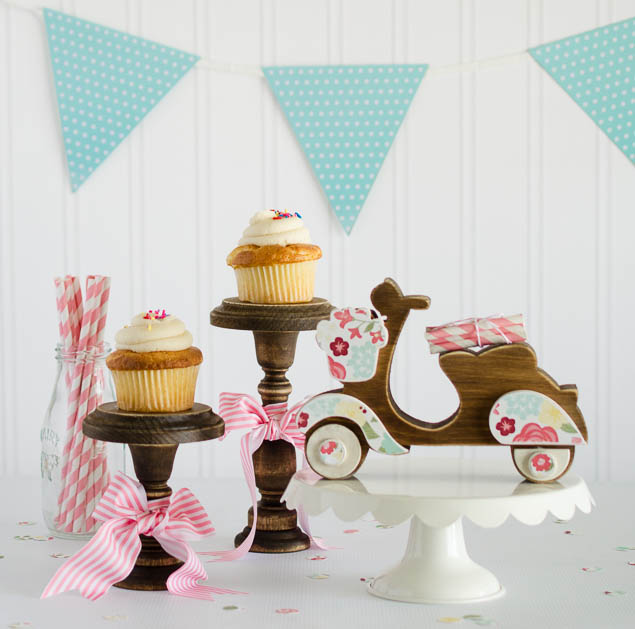
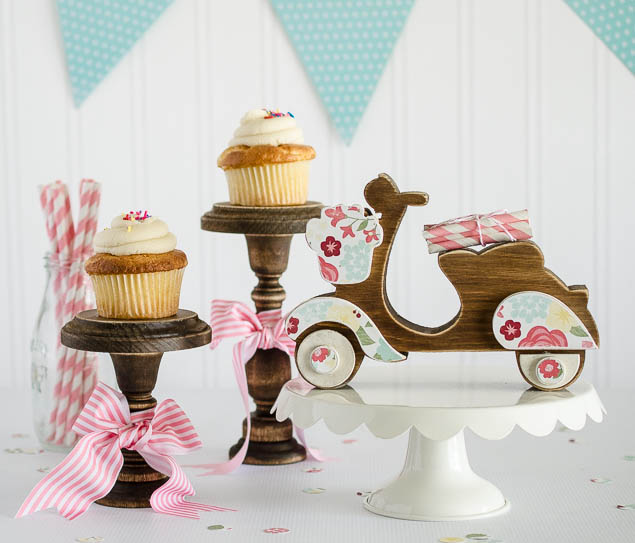
Wedding season is just around the corner and these rustic cupcake stands and vintage style scooter would make the perfect centerpiece for a bridal shower or wedding reception. Of course they’d be adorable for birthday party or really any kind of celebration that includes cupcakes. 😉
Let’s get this party started!
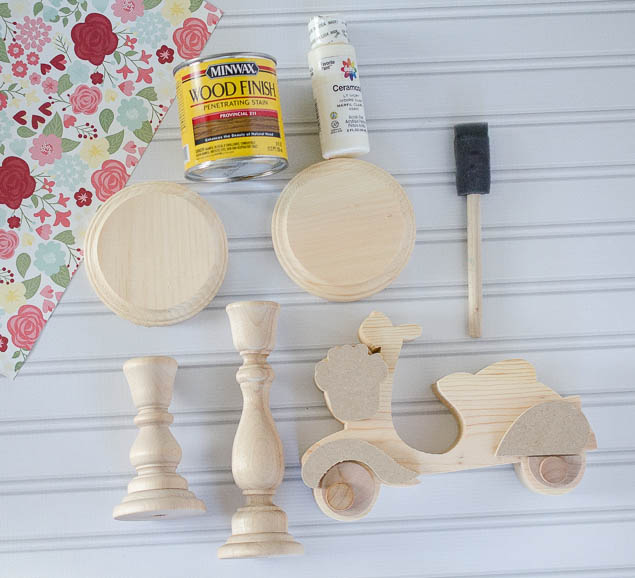
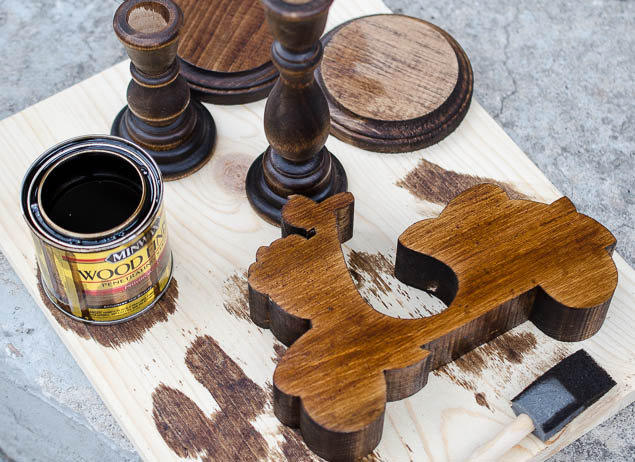
Supplies:
- Miniwax wood finish – provincial
- Acrylic paint – ivory
- Paper- Simple Stories -Power of Love
- Two 4″ circle plaques, two candlesticks in small and large and scooter – available at The Wood Connection
- foam brush
- wood glue
Directions:
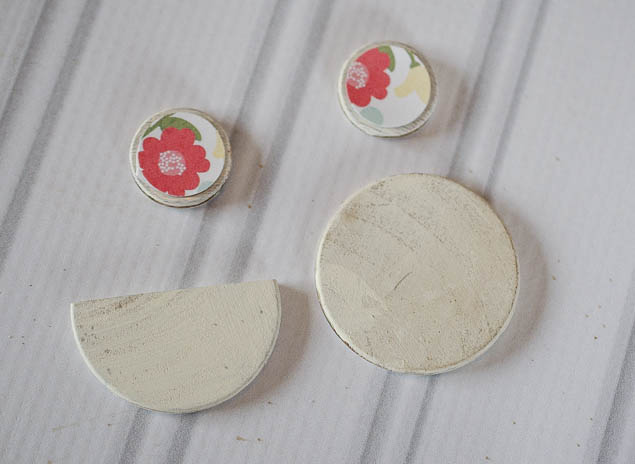
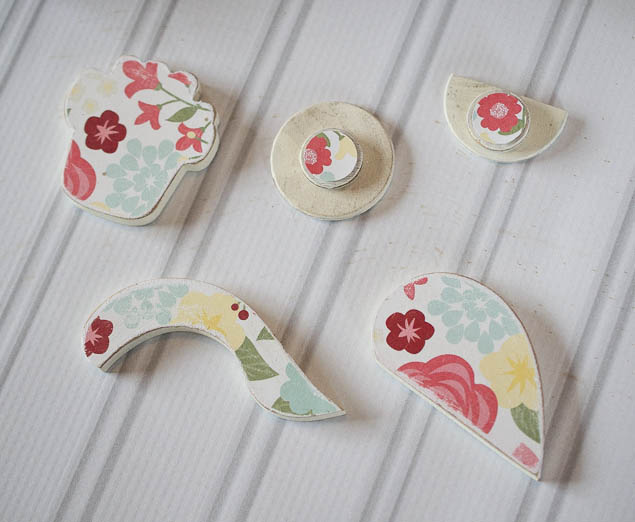
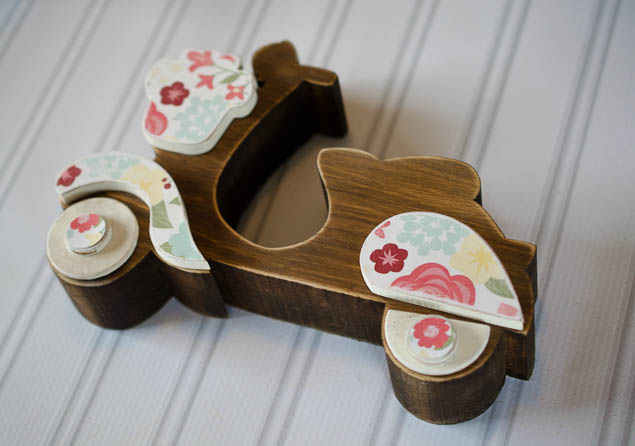
Trace the flower basket and the front and back end of the scooter using pattern paper and cut out. Set aside while you paint.

Paint all loose scooter pieces with ivory acrylic paint and allow to dry.

Apply wood glue to wood pieces and attach paper to the pieces.


Sand the wheels of the scooter a bit to give them a bit of that distressed look. Punch two circles out from the pattern paper to attach on top of the wheels.

Set aside all the loose scooter pieces while you stain the rest of the project.
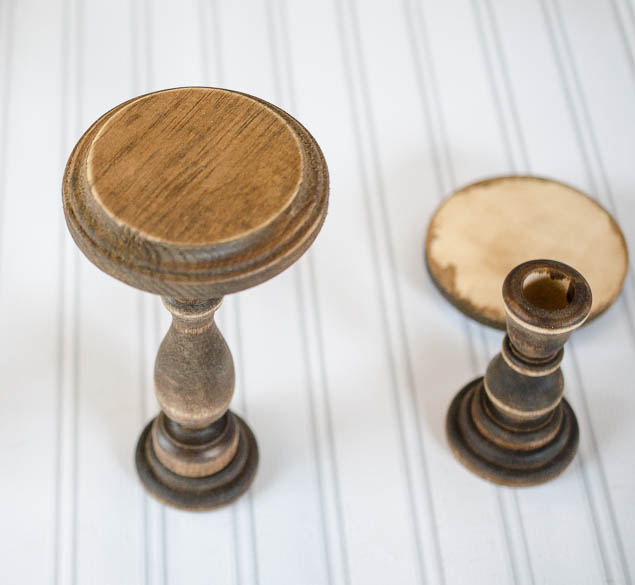
Take the 4″ circles, scooter and candlesticks outside to stain. Brush one coat on each wood piece and allow to dry. After all the pieces are dry, take a bit of sandpaper and sand your projects to give them that rustic look.
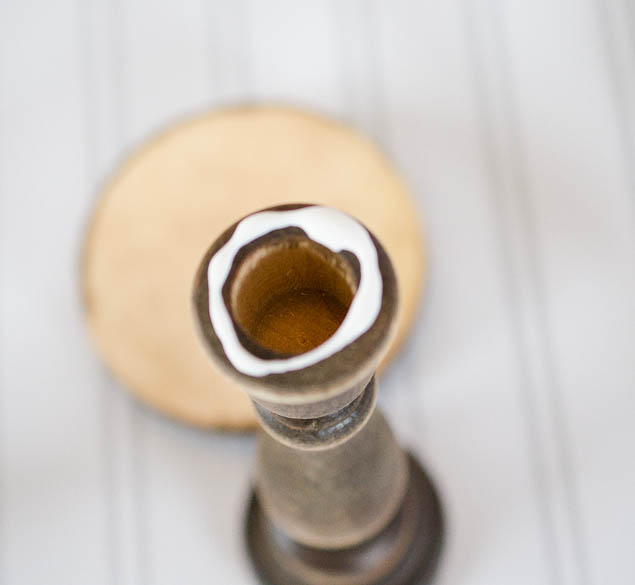
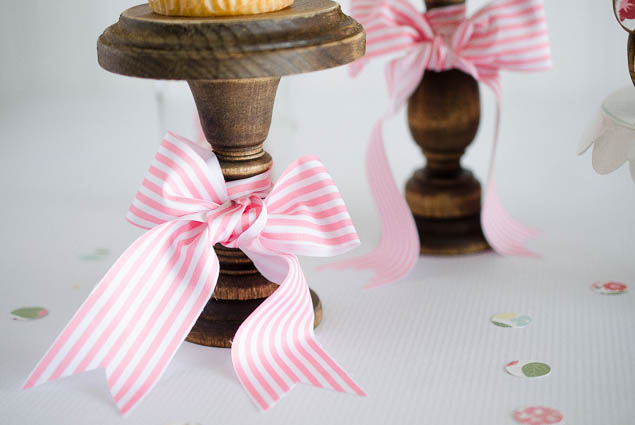
Using wood glue, attach the 4″ circle to the top of the candle stick.
Attach flower basket, front and back end and wheels to the scooter using wood glue as well.
Tie a pretty little bow around the middle of the candlesticks.
And the most important step… add cupcakes with colorful sprinkles. 😉
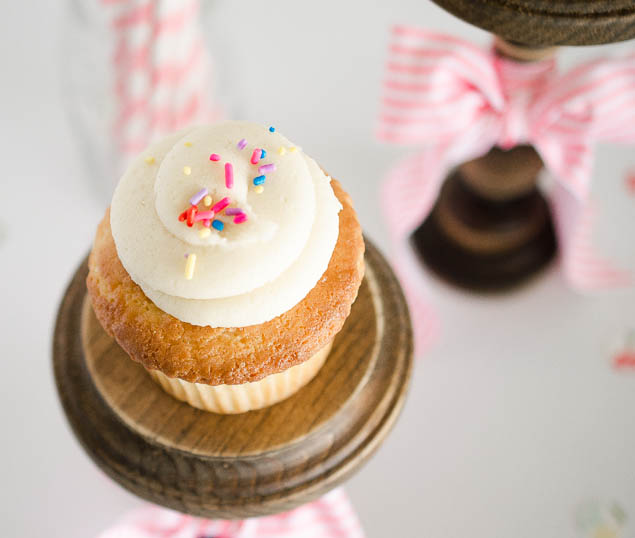 And there you have it! Rustic cupcake stands to display lovely little cupcakes and a super cute vintage style scooter.
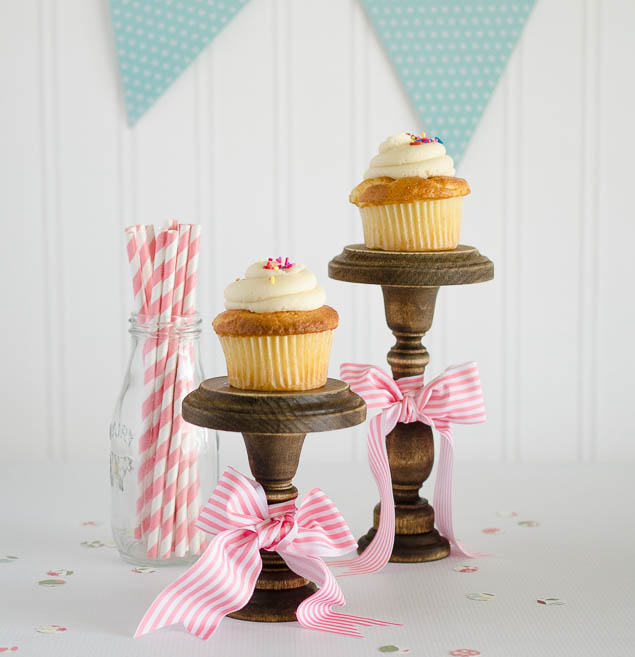

Thanks so much for stopping by and I hope you treat yourself to a cupcake….or two! 😉
and check out these other great Spring ideas of hers…


Rachel believes in creating occasions to celebrate rather than waiting for them. Unbirthdays and the changing of the season are just a few of her favorite holidays.
As a work from home mom her day job also includes multiple dress-up changes, elaborate role playing and excessive tea parties. In her free time she can be found scouring thrift shops for inspiration, hiking with her husband and 5 year old daughter and, of course, brainstorming her next party.
Latest posts by Rachel (see all)
- Santa Claus Delivery Sack - November 15, 2017
- Halloween Emoji Gifts - September 20, 2017
- Sweet Summer Gift Ideas - July 19, 2017
Seriously…this is the cutest!! ADORE!
These are beautiful! I think I’ll need this for my daughters’ birthdays. Great tutorial, thank you!